If you have a contract with Planet, you can download imagery directly from Explorer or via Planet's APIs. If you do not have a contract with Planet, you will not be able to download imagery. Please contact sales if you would like to download imagery but don't currently have access.
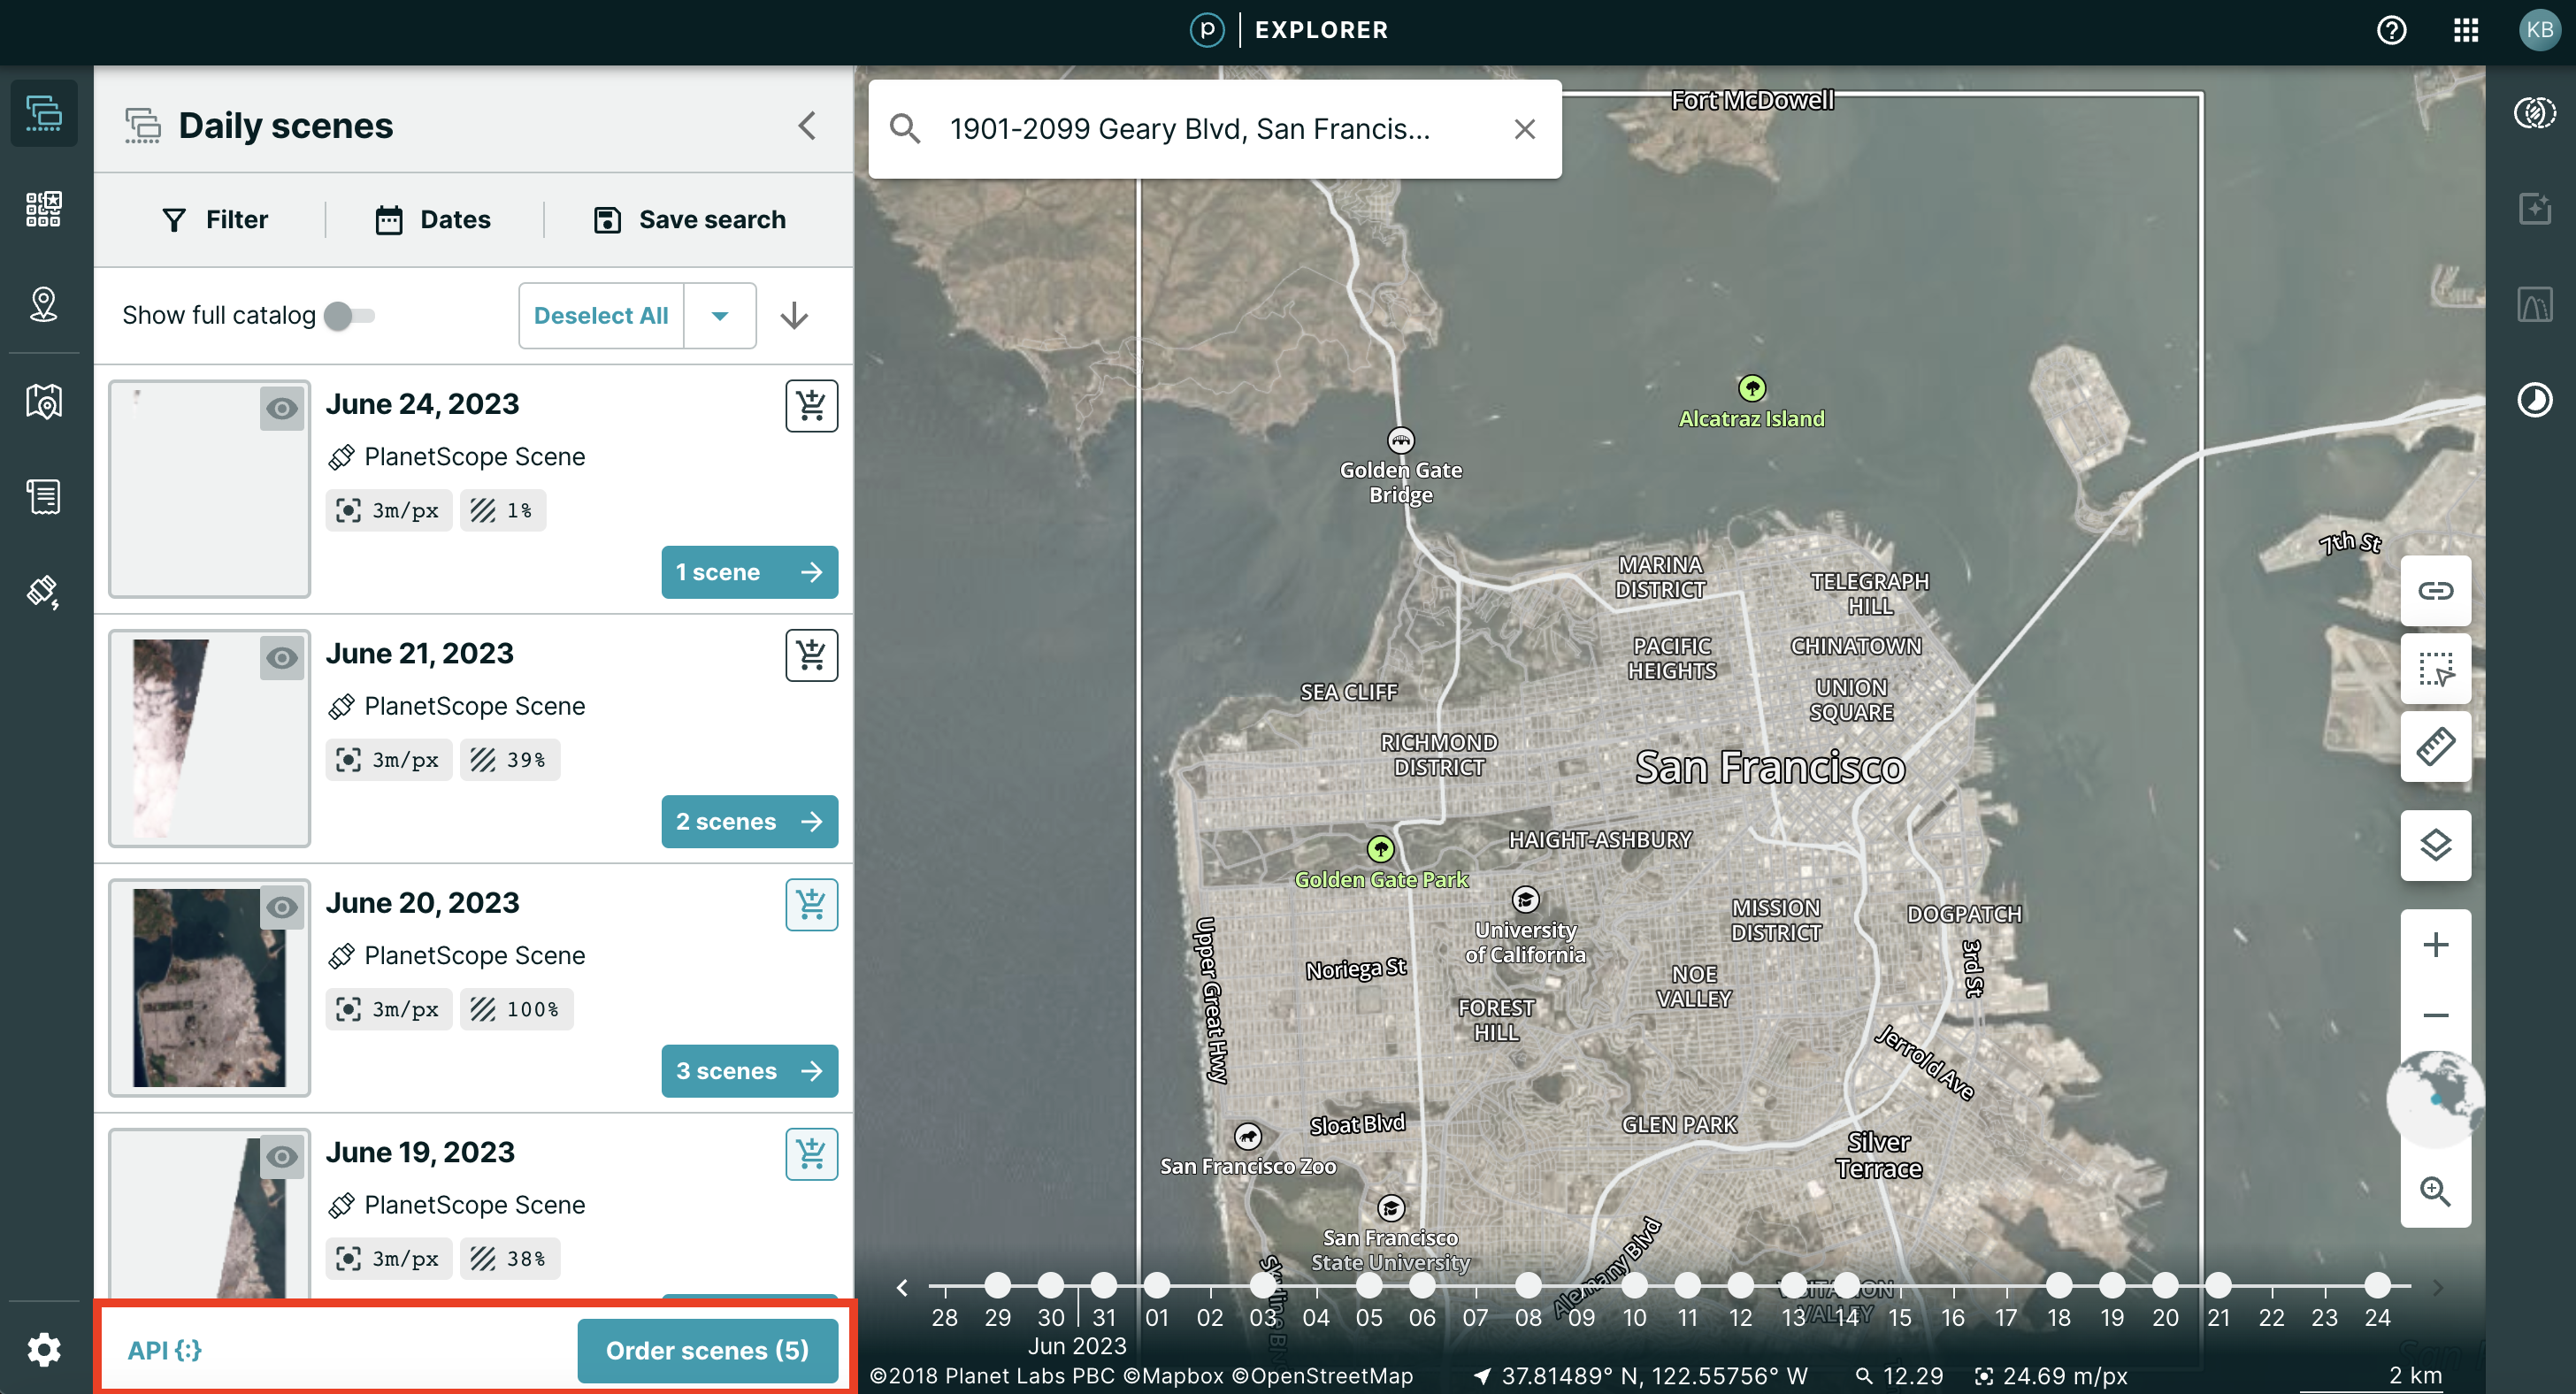
At the very bottom of the Search panel on the left of the screen, you will see two buttons - one for API {:} and one for Orders. Both of these buttons reference the images in the above panel that you have selected (in the case below, the 9 images from January 23, 2022 - PlanetScope Scene)
The API Button
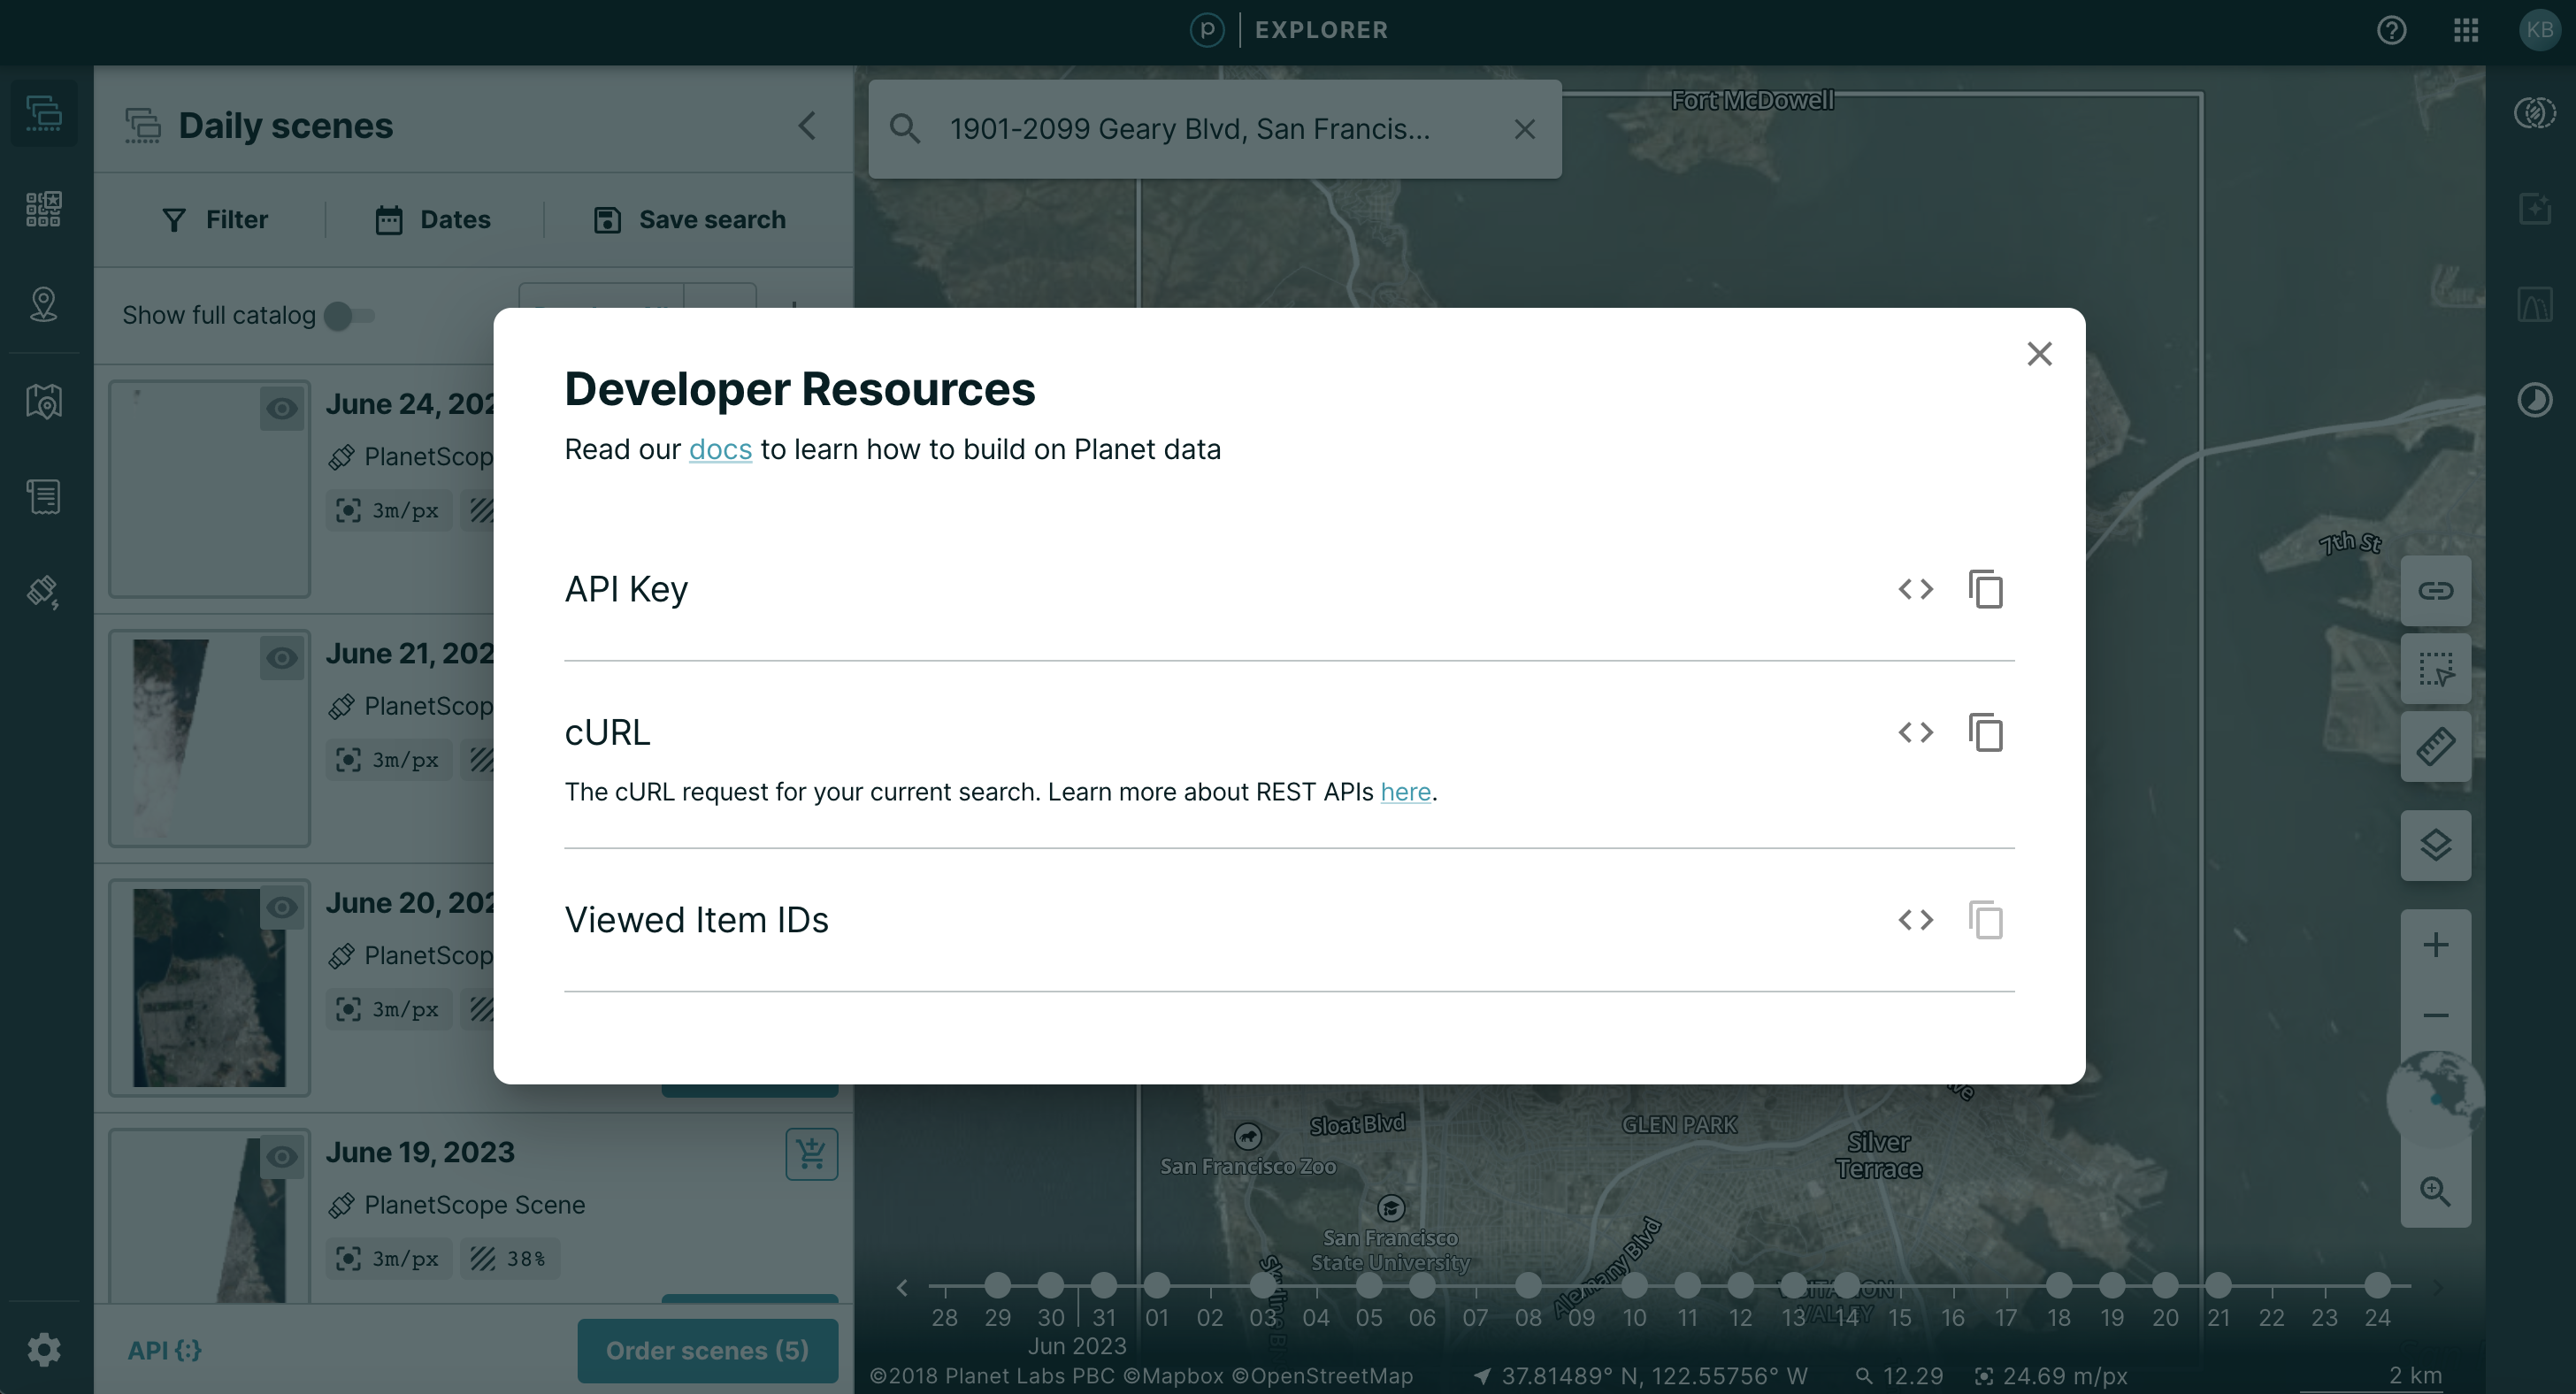
The API button will open a modal with three sections - API Key, cURL and Selected Item Ids.
Each section is collapsed by default, they can be expanded via the < > icon to show the content. The content text can be easily copied by pressing the copy icon on the far right, whether you expand it or not.
The cURL Request section has the text of the cURL request syntax prepared. It also has a Include Authentication toggle so that you don't expose your api key.
The Selected Item Ids section simply gives you the identification numbers of the images you have selected.
The Order Items Button
The Order Items(n) - where n equals the number of image sets you have selected in the panel above - button will open a new window. If you would like to download imagery, select Direct Download.
Placing your Order
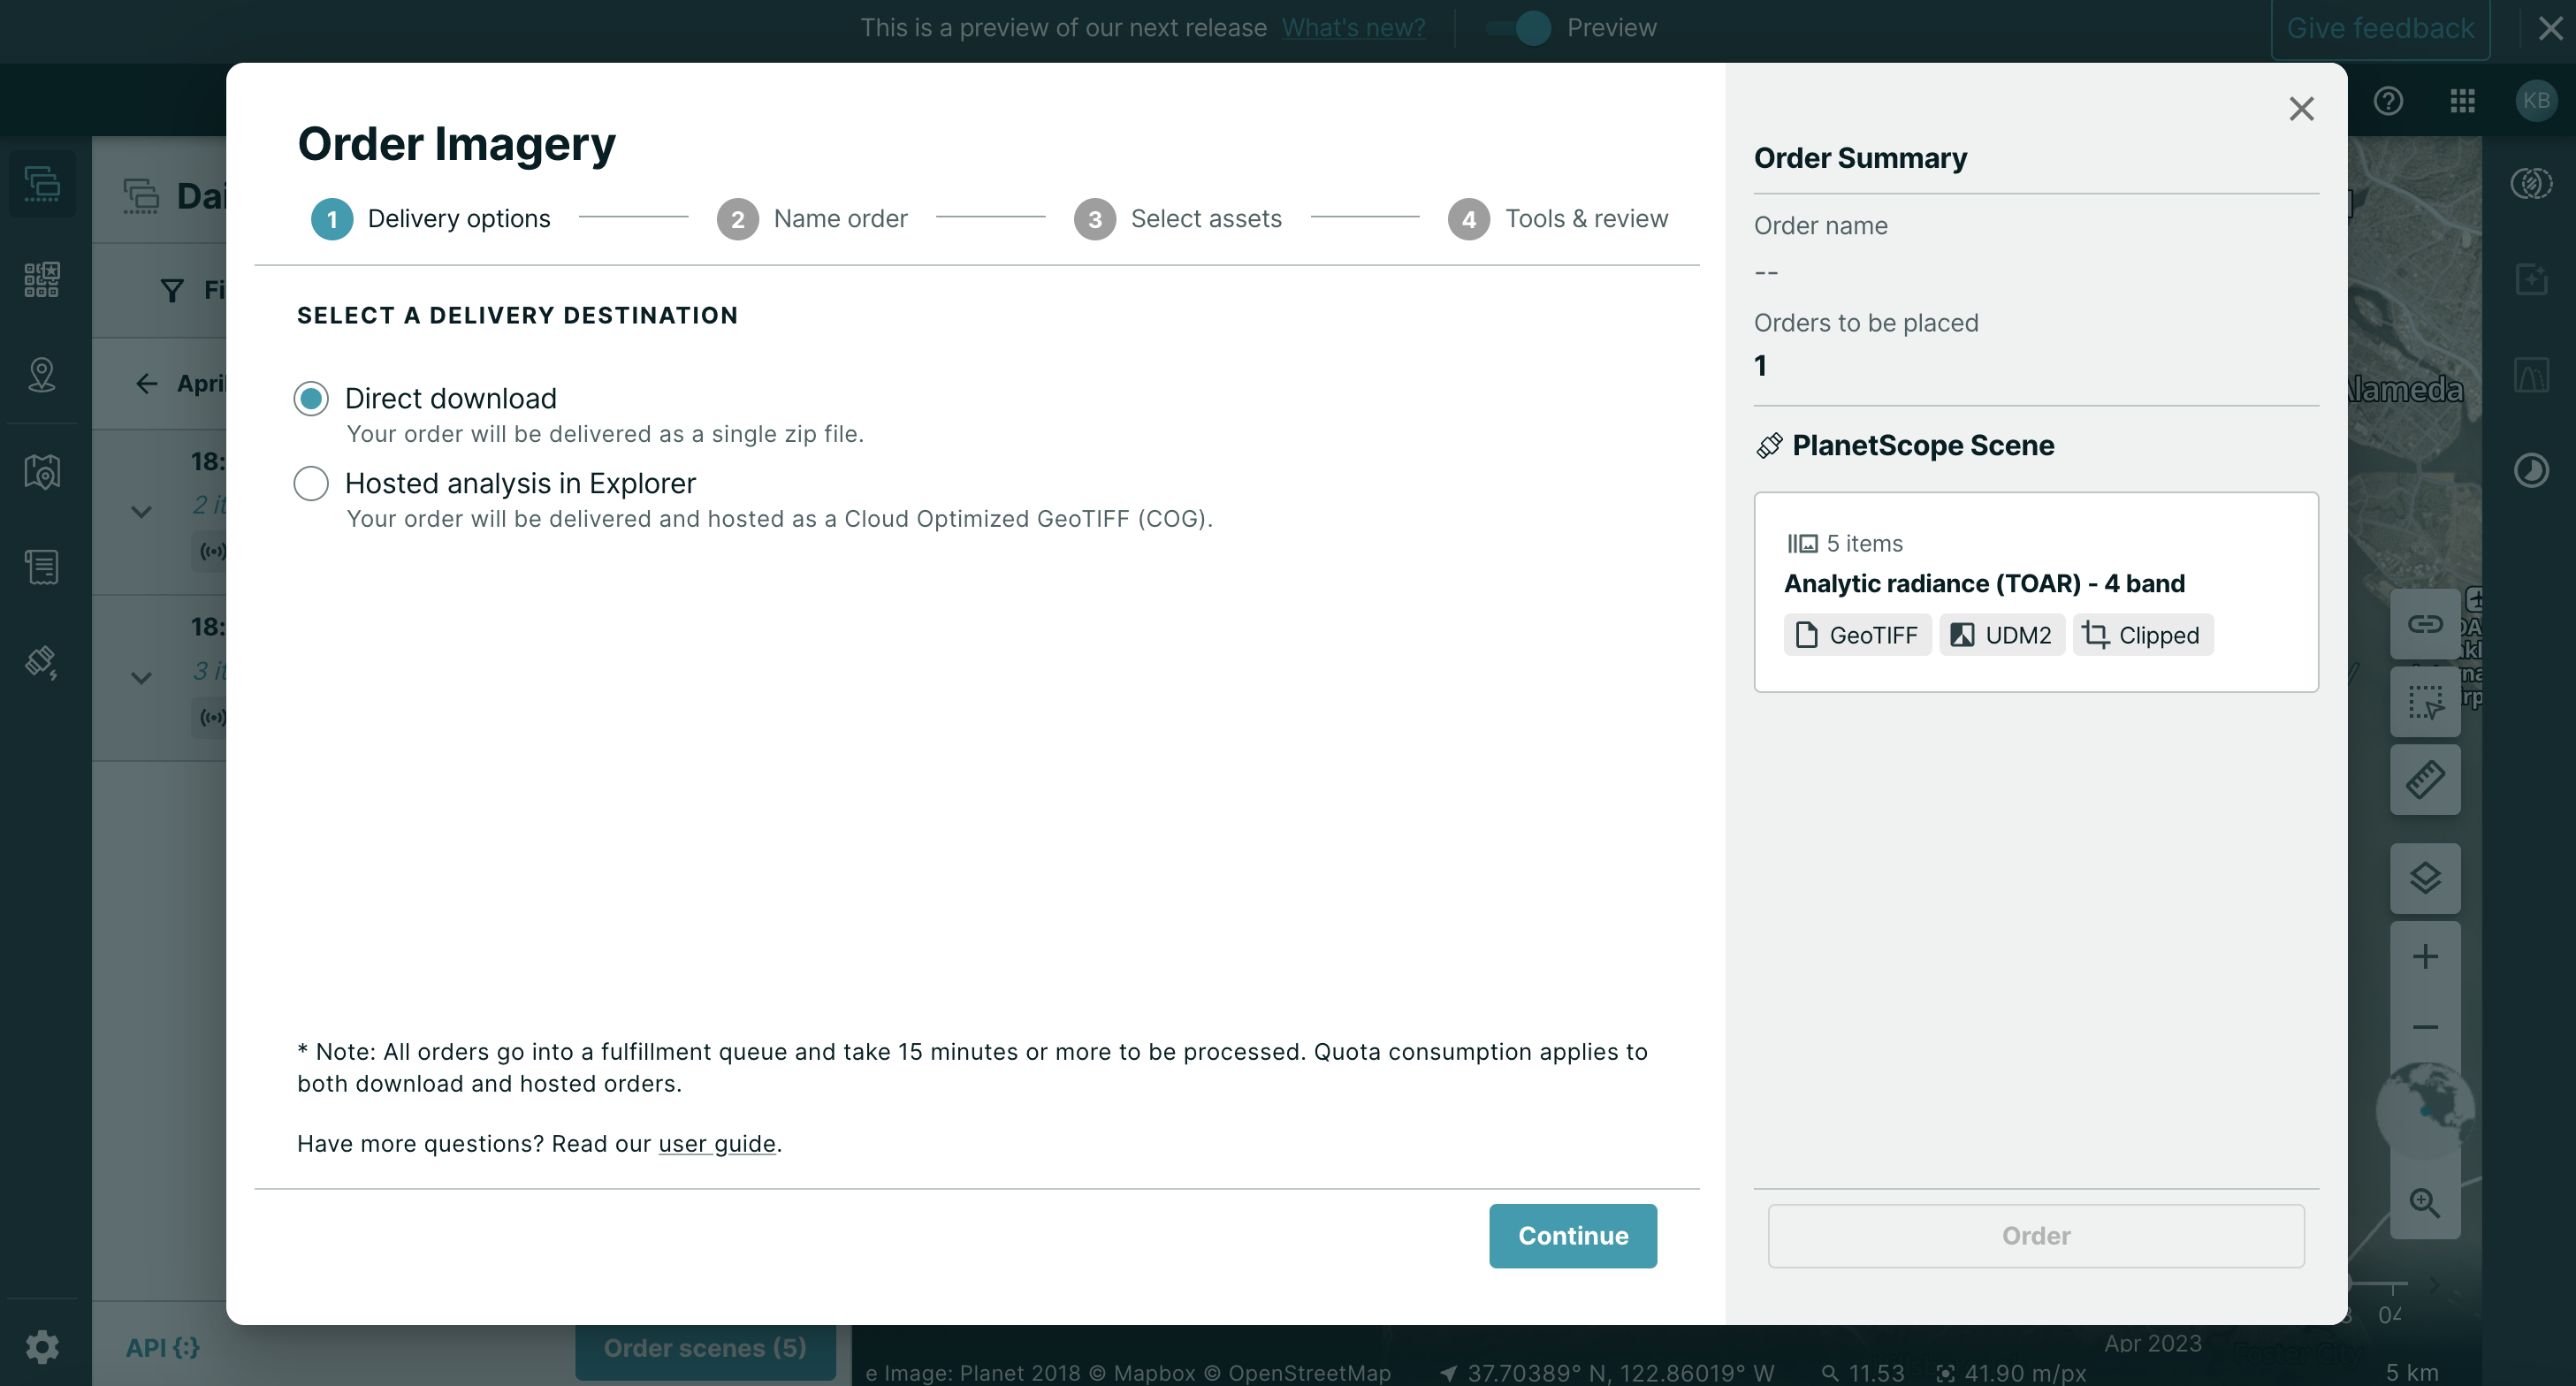
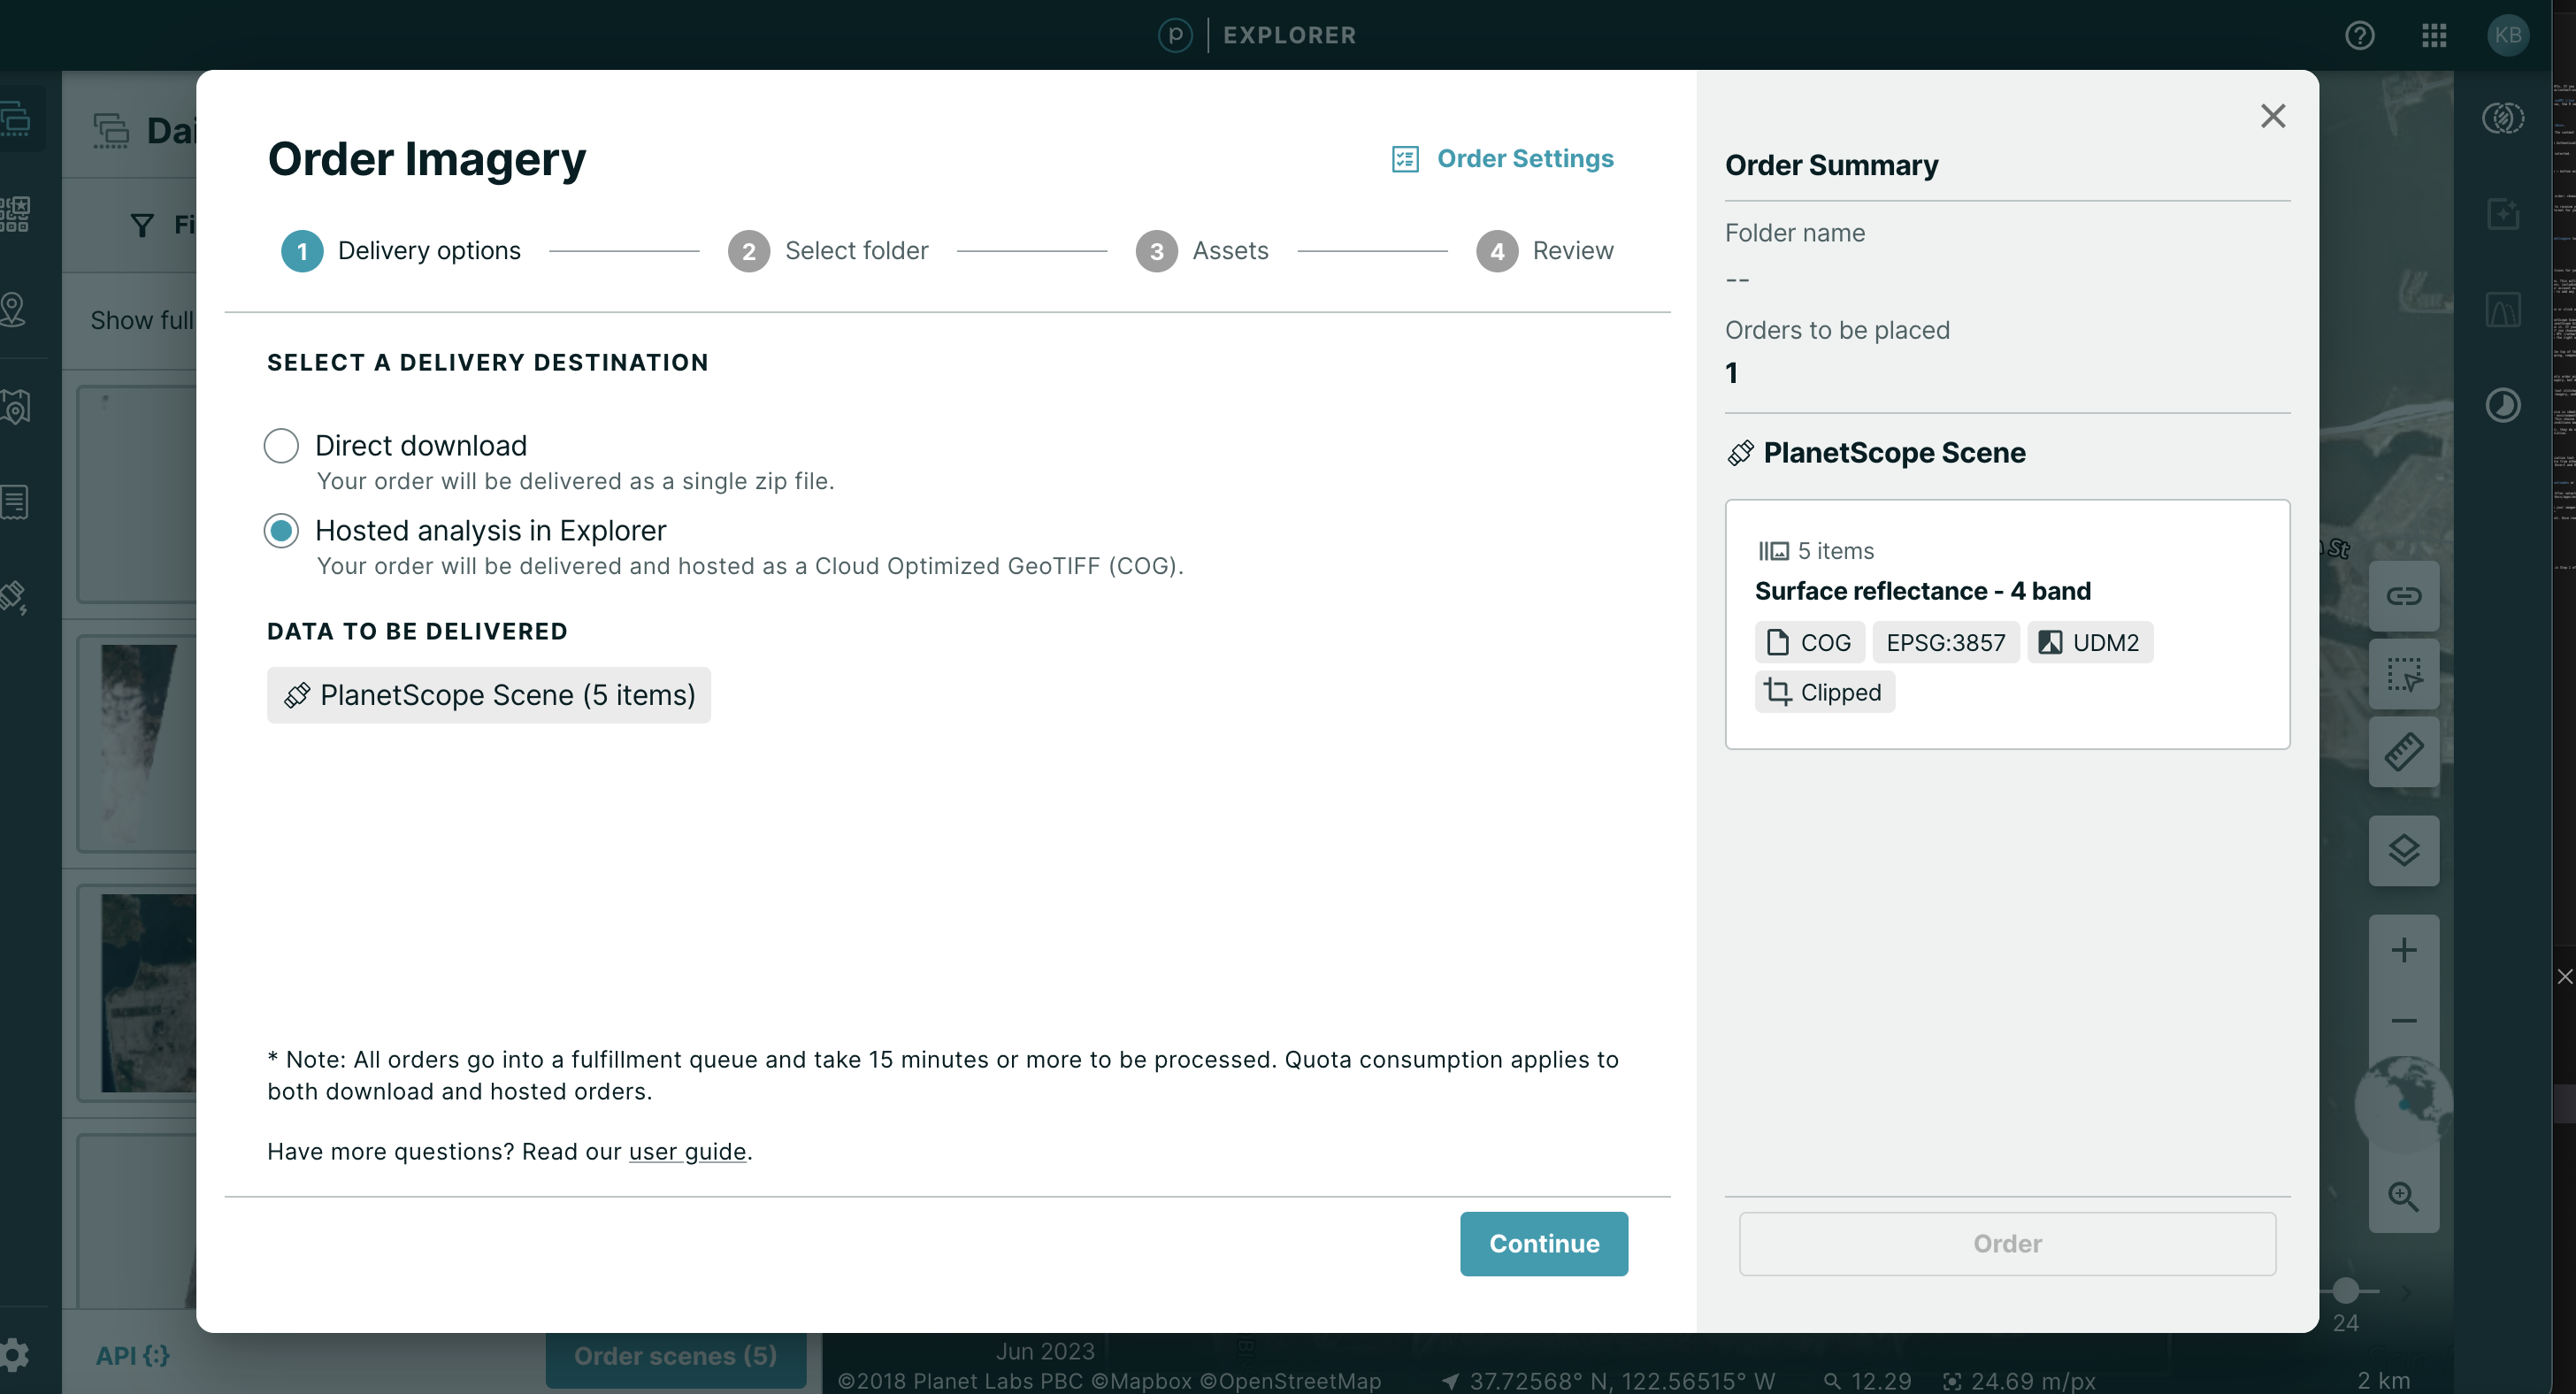
From here, you will see a new window for completing your order. There are 4 steps to completing your order: choosing your delivery option, naming your order, selecting assets, and tools (where available) and final review.
The first step requires you to choose between Direct download or Hosted analysis in Explorer to receive your order as a Cloud Optimized GeoTIFF (COG). If you choose Direct Download, you will also be asked to select a file format for your download.
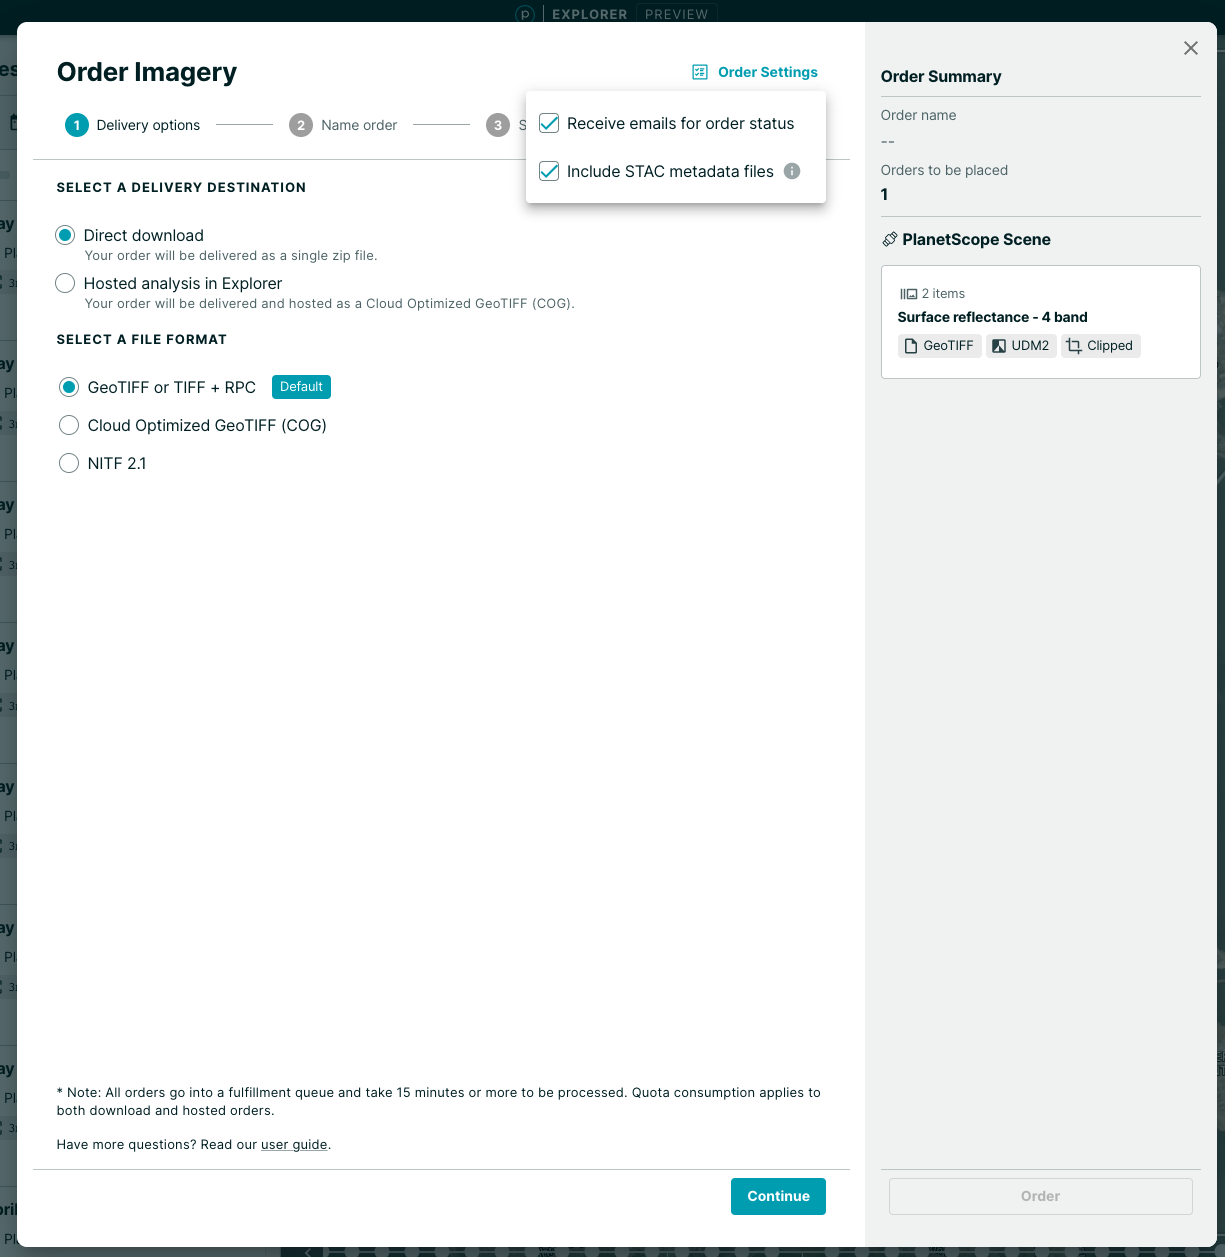
The file format options are:
- GeoTIFF or TIFF + RPC (Default)
- Cloud Optimized GeoTIFF (COG)
- NITF 2.1 (not available to all users).
There is an icon in the upper right of the order field labeled Order Settings. Click on Order Settings to choose options to Receive emails for order status and/or Include STAC metadata files.
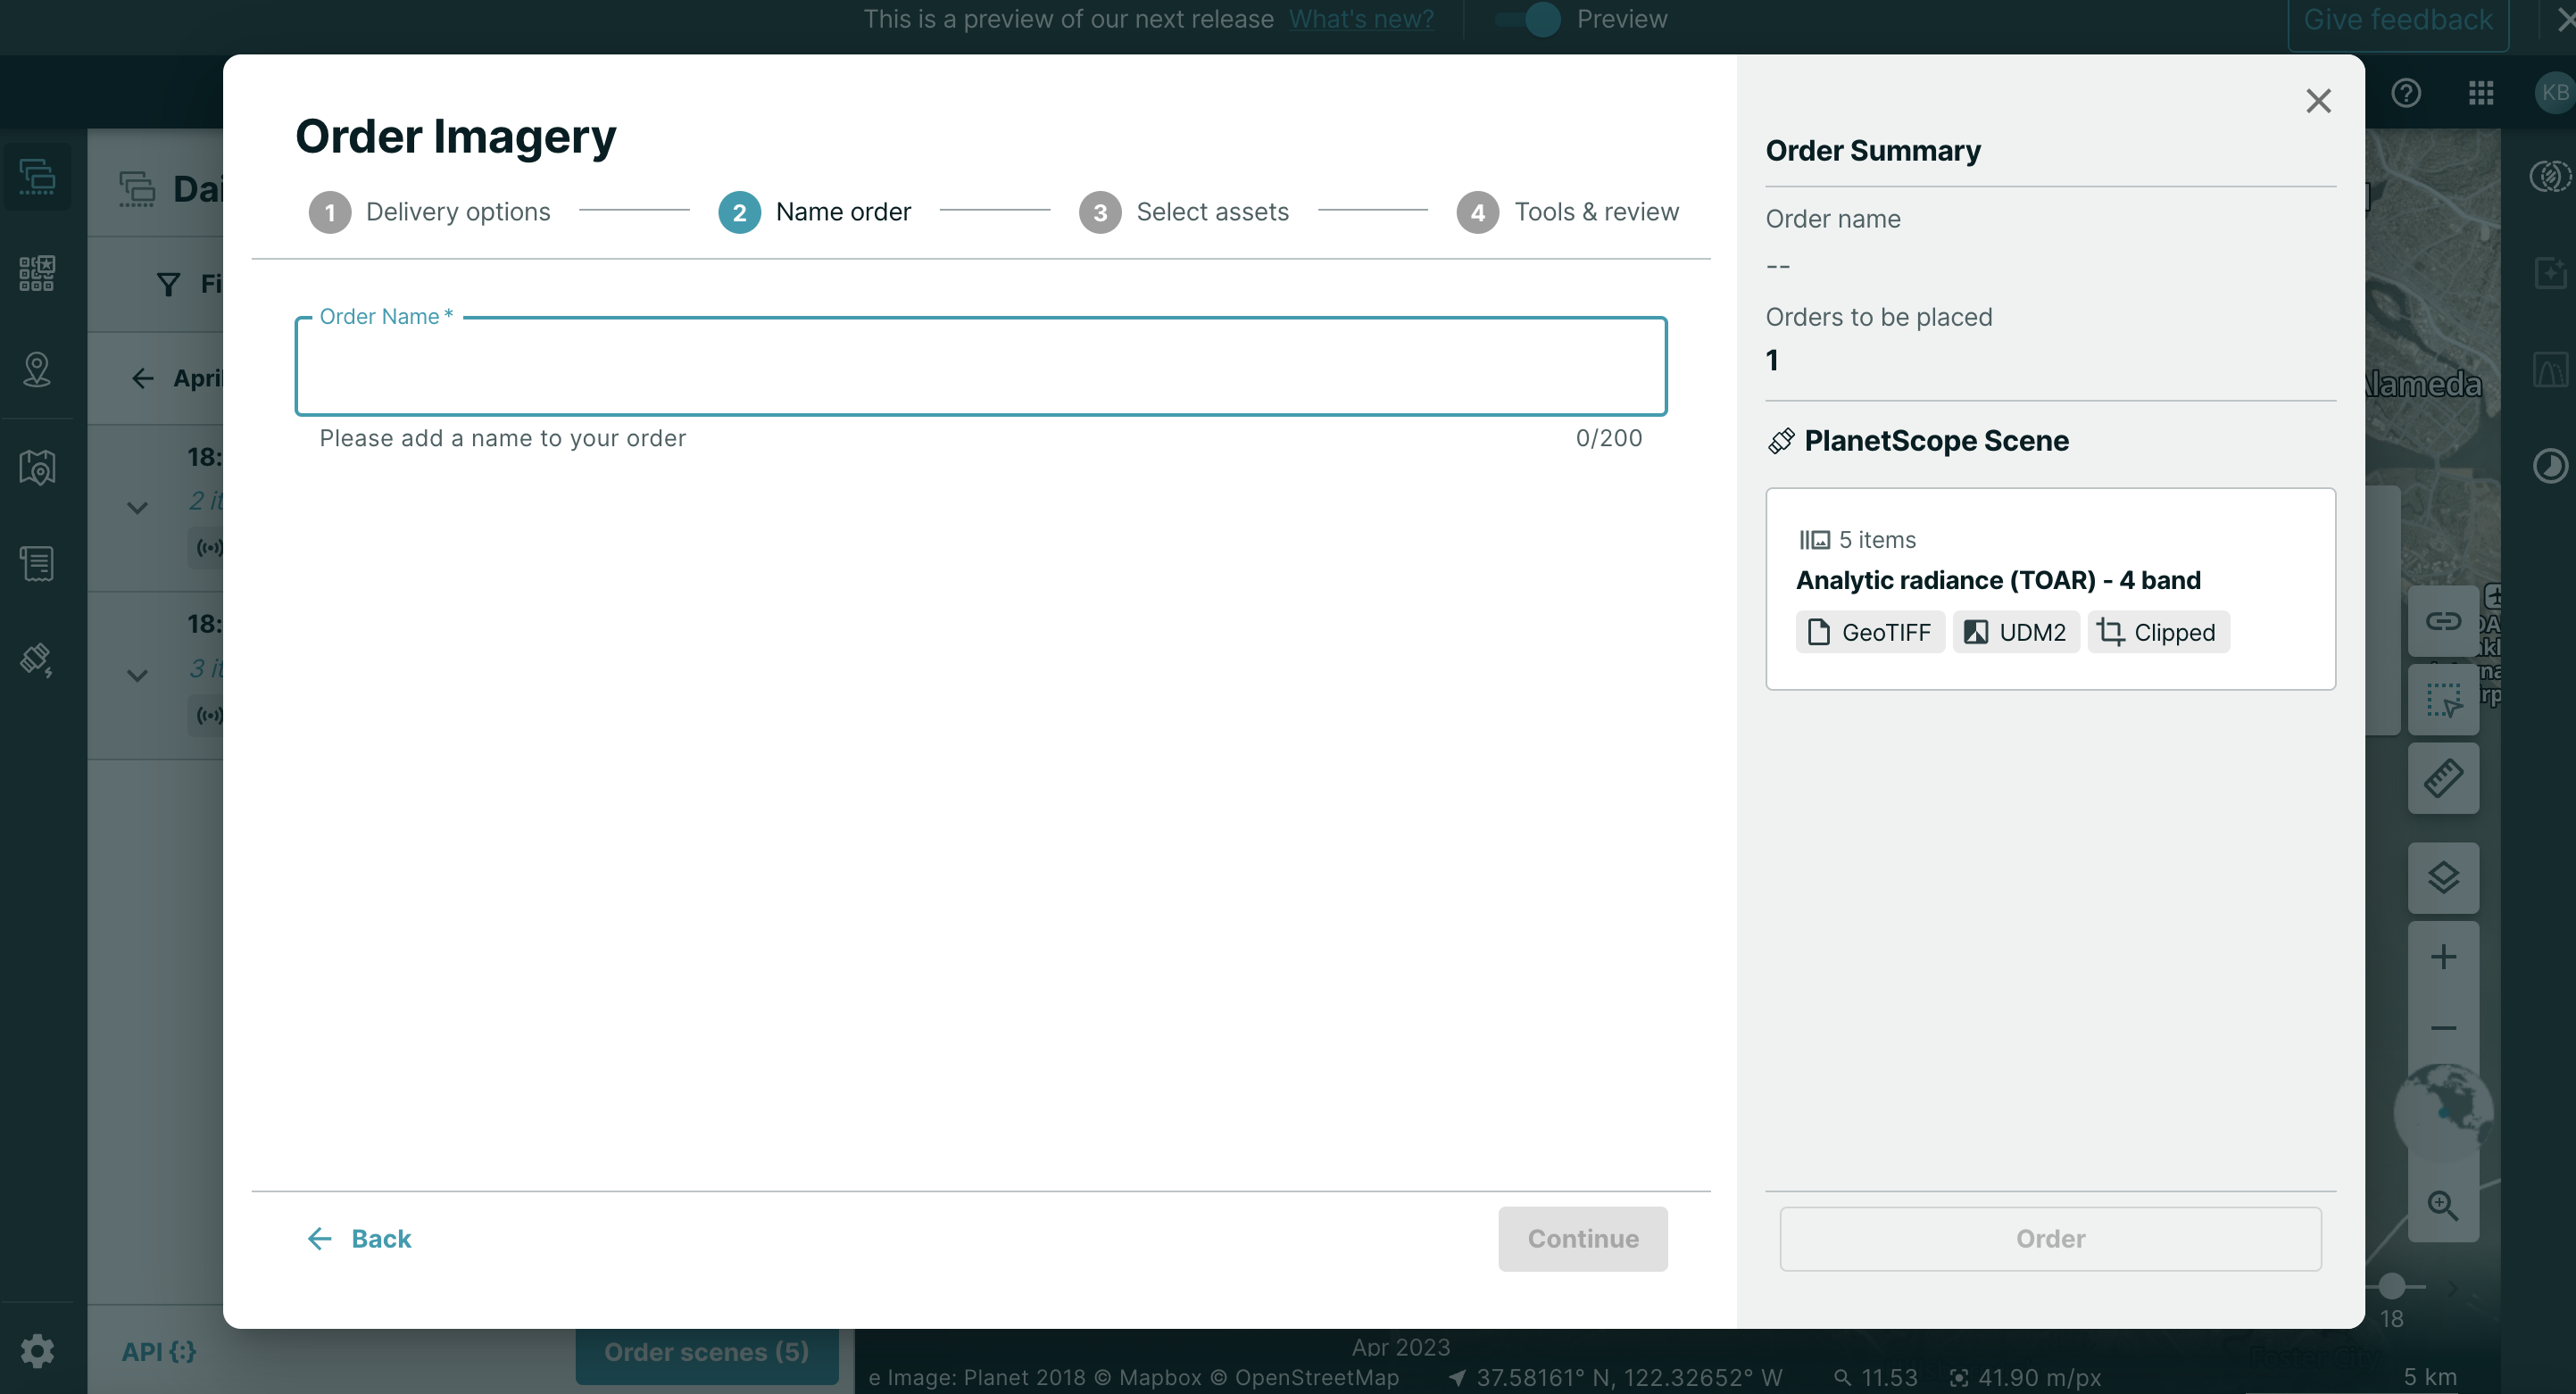
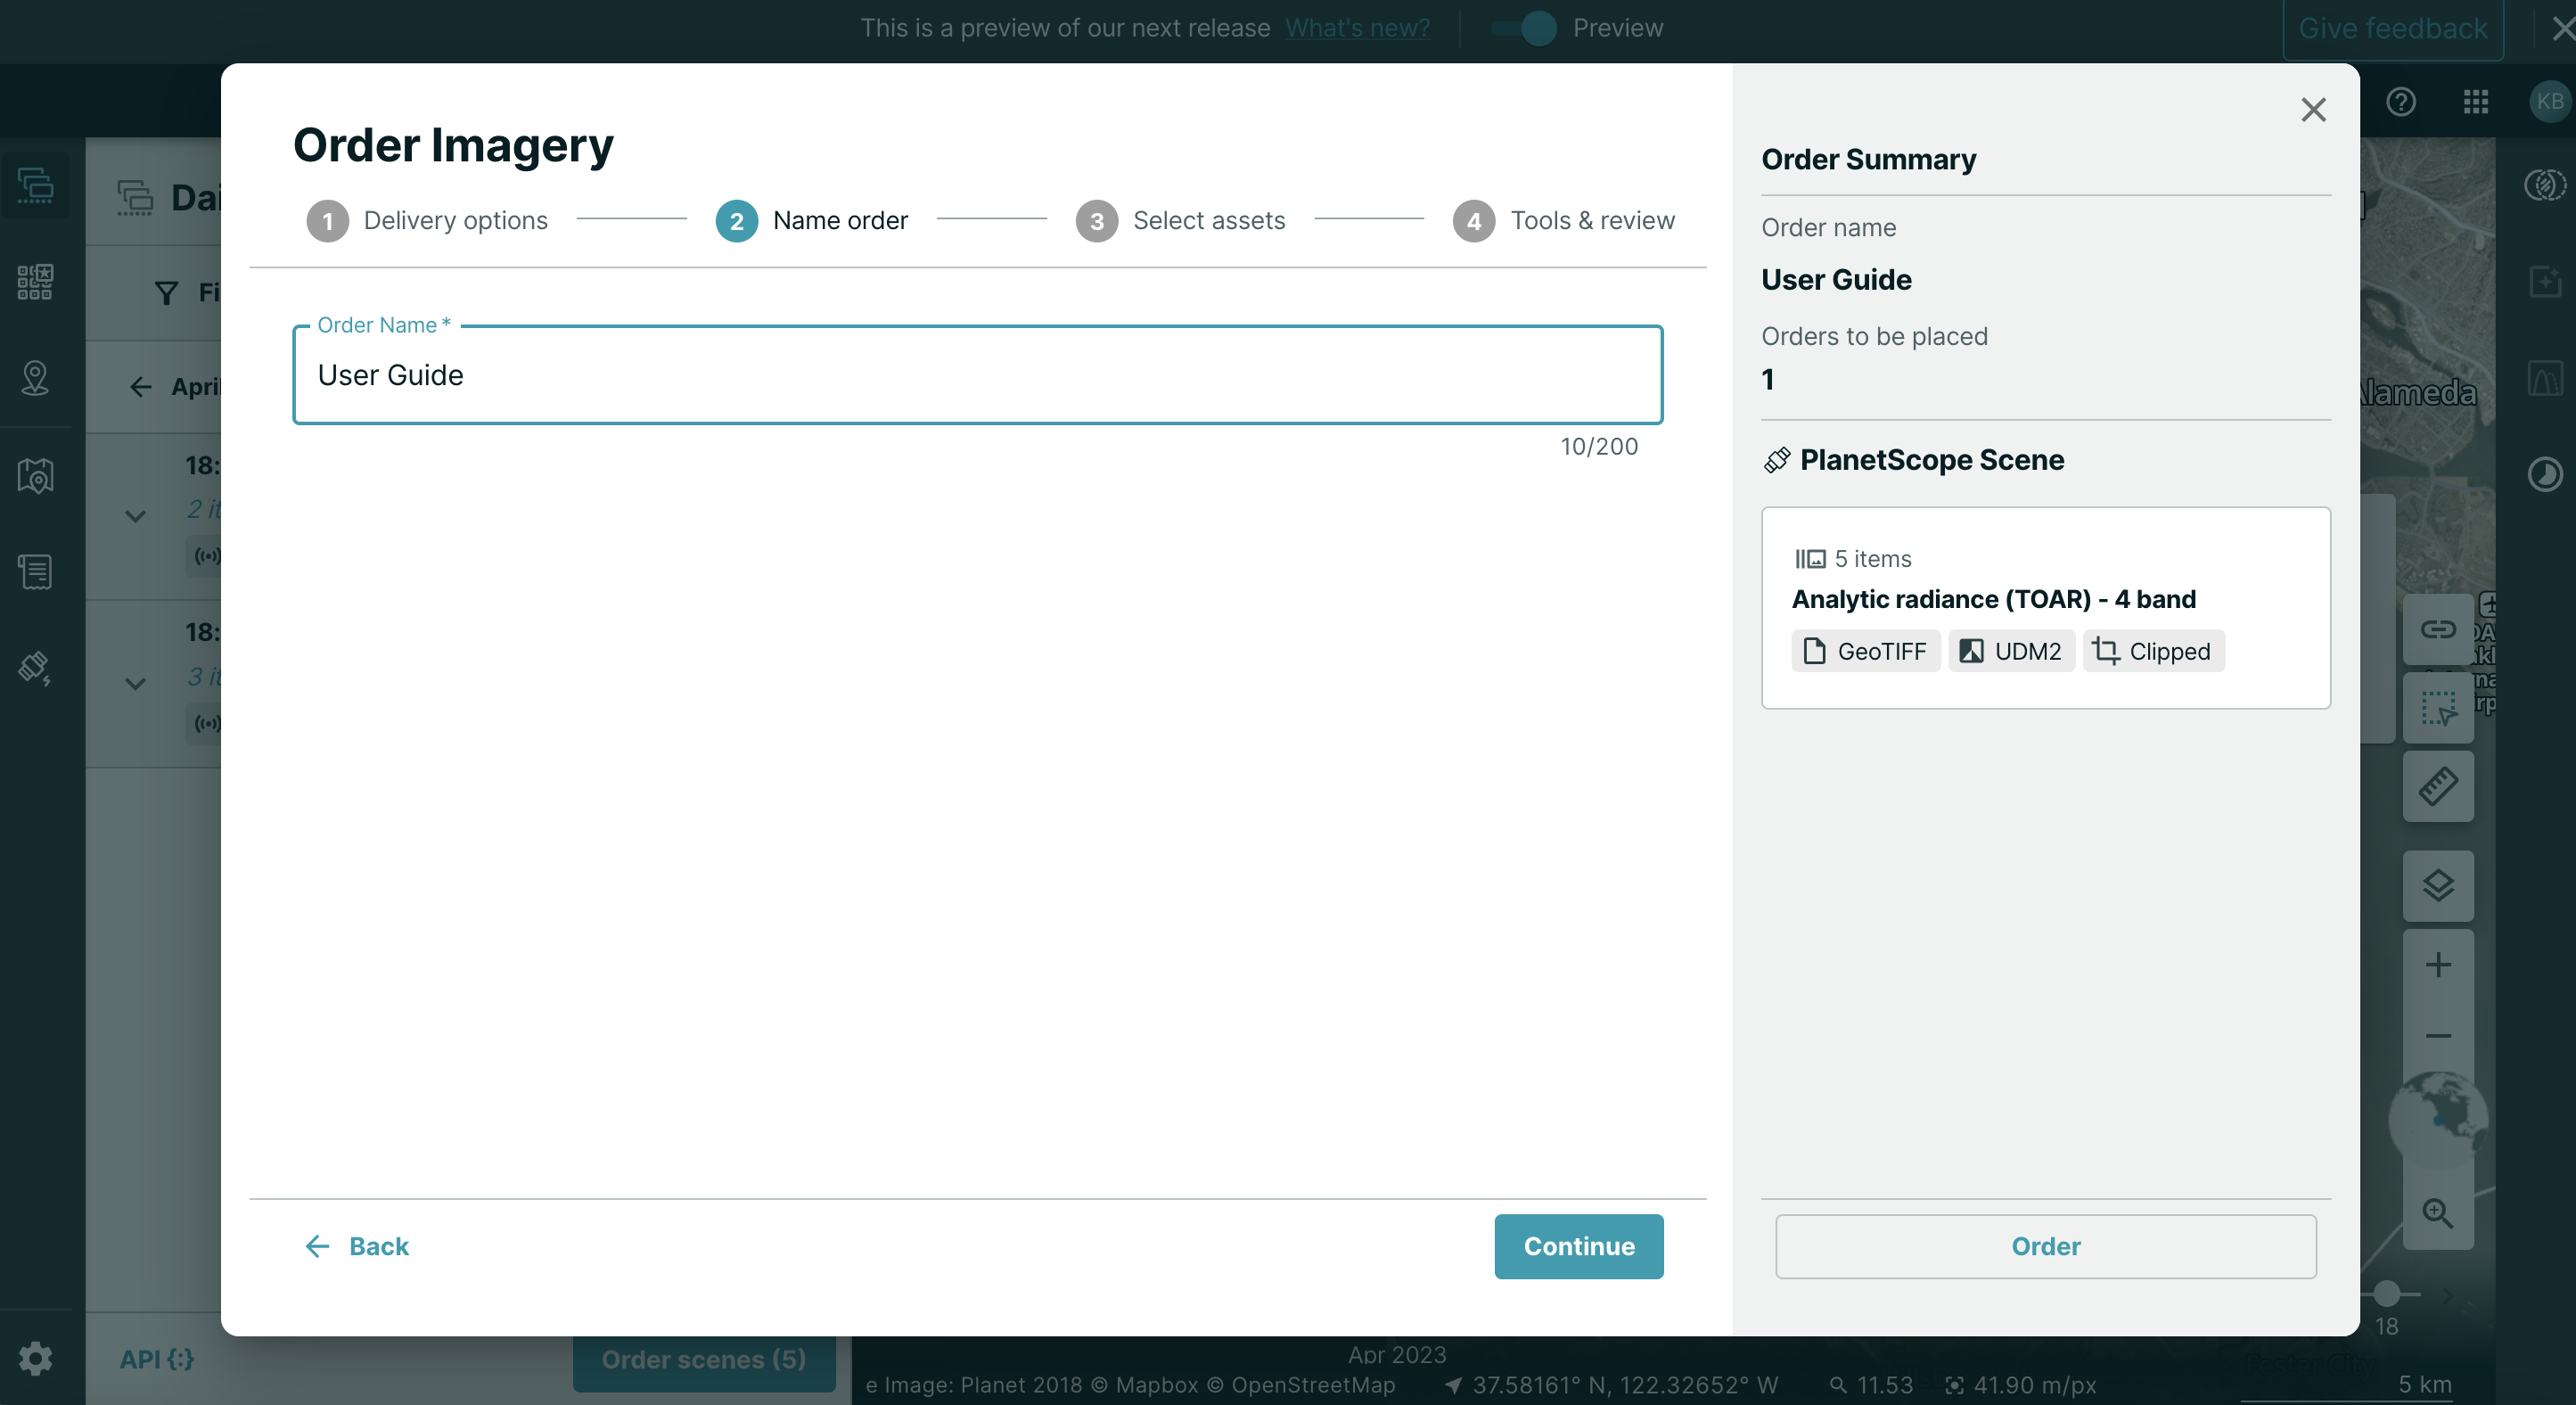
At the second step, the Name field is required and you can choose your own naming convention here.
For the third step, after you have named your order, you have two options. You can make further selections for your order or you can do an express check-out.
To complete the express check-out, you can click Order on the bottom right-hand side of the screen. This will place an order for each selection displayed in the Orders Summary column. Each white box shows a summary of your selections, including item type, asset type, and any tools selected. Each white box will be placed as a separate order, and will be charged to your account accordingly. You should only do an express check-out if you are familiar with the default assets chosen and if you don't want to add any tools (such as composite or harmonization).
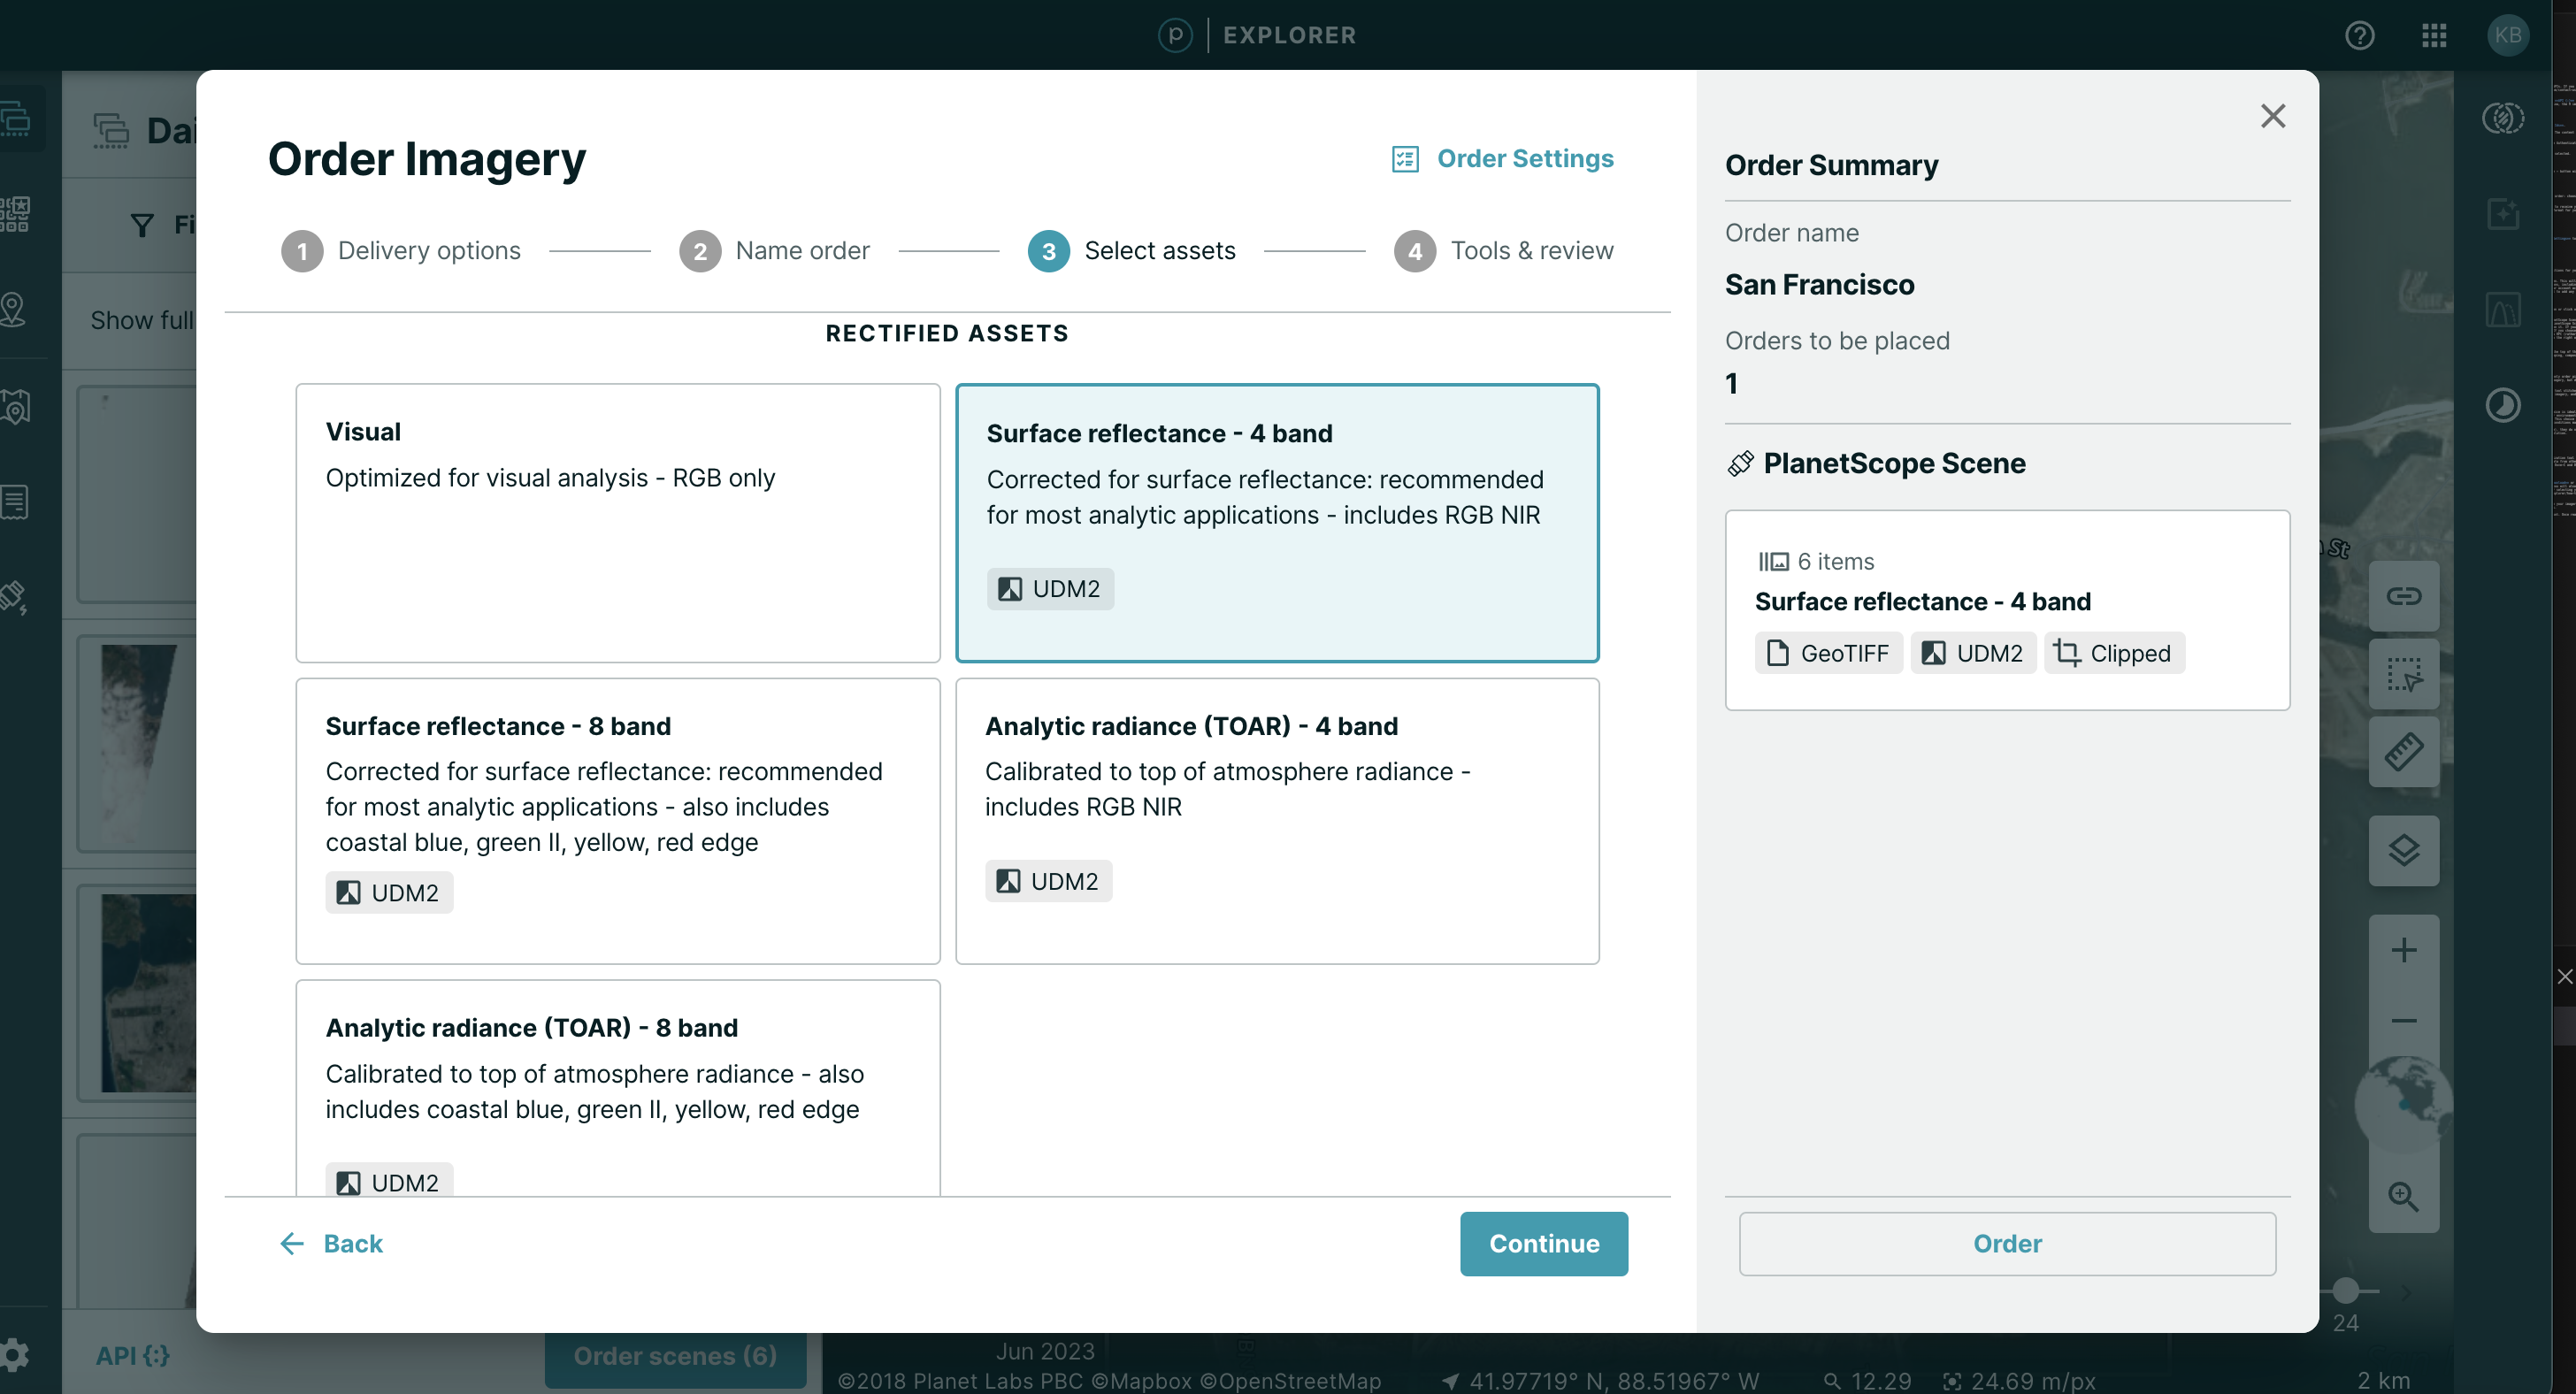
The fourth step is making further selections for your order. To do this, click the Continue button or click on Select Assets at the top header.
At the Select Assets step, you will see the item types listed that you ordered (for example, PlanetScope Scenes or SkySat Collects). Click into the item type that you wish to select assets for. Once you click on the item type (i.e. PlanetScope Scene), you will see a menu of assets to choose from. The default asset is highlighted in teal. You can unselect it by clicking on it. If you would like to order Unorthorectified assets, click + Show More and choose from the menu of Unorthorectified assets. If you choose these assets, you will receive the raw files that did not go through the rectification process. They are delivered as TIFF & RPC (rather than as a GeoTIFF and do not include geo location information.) The asset that you select will show up on the Order Summary to the right of the screen.
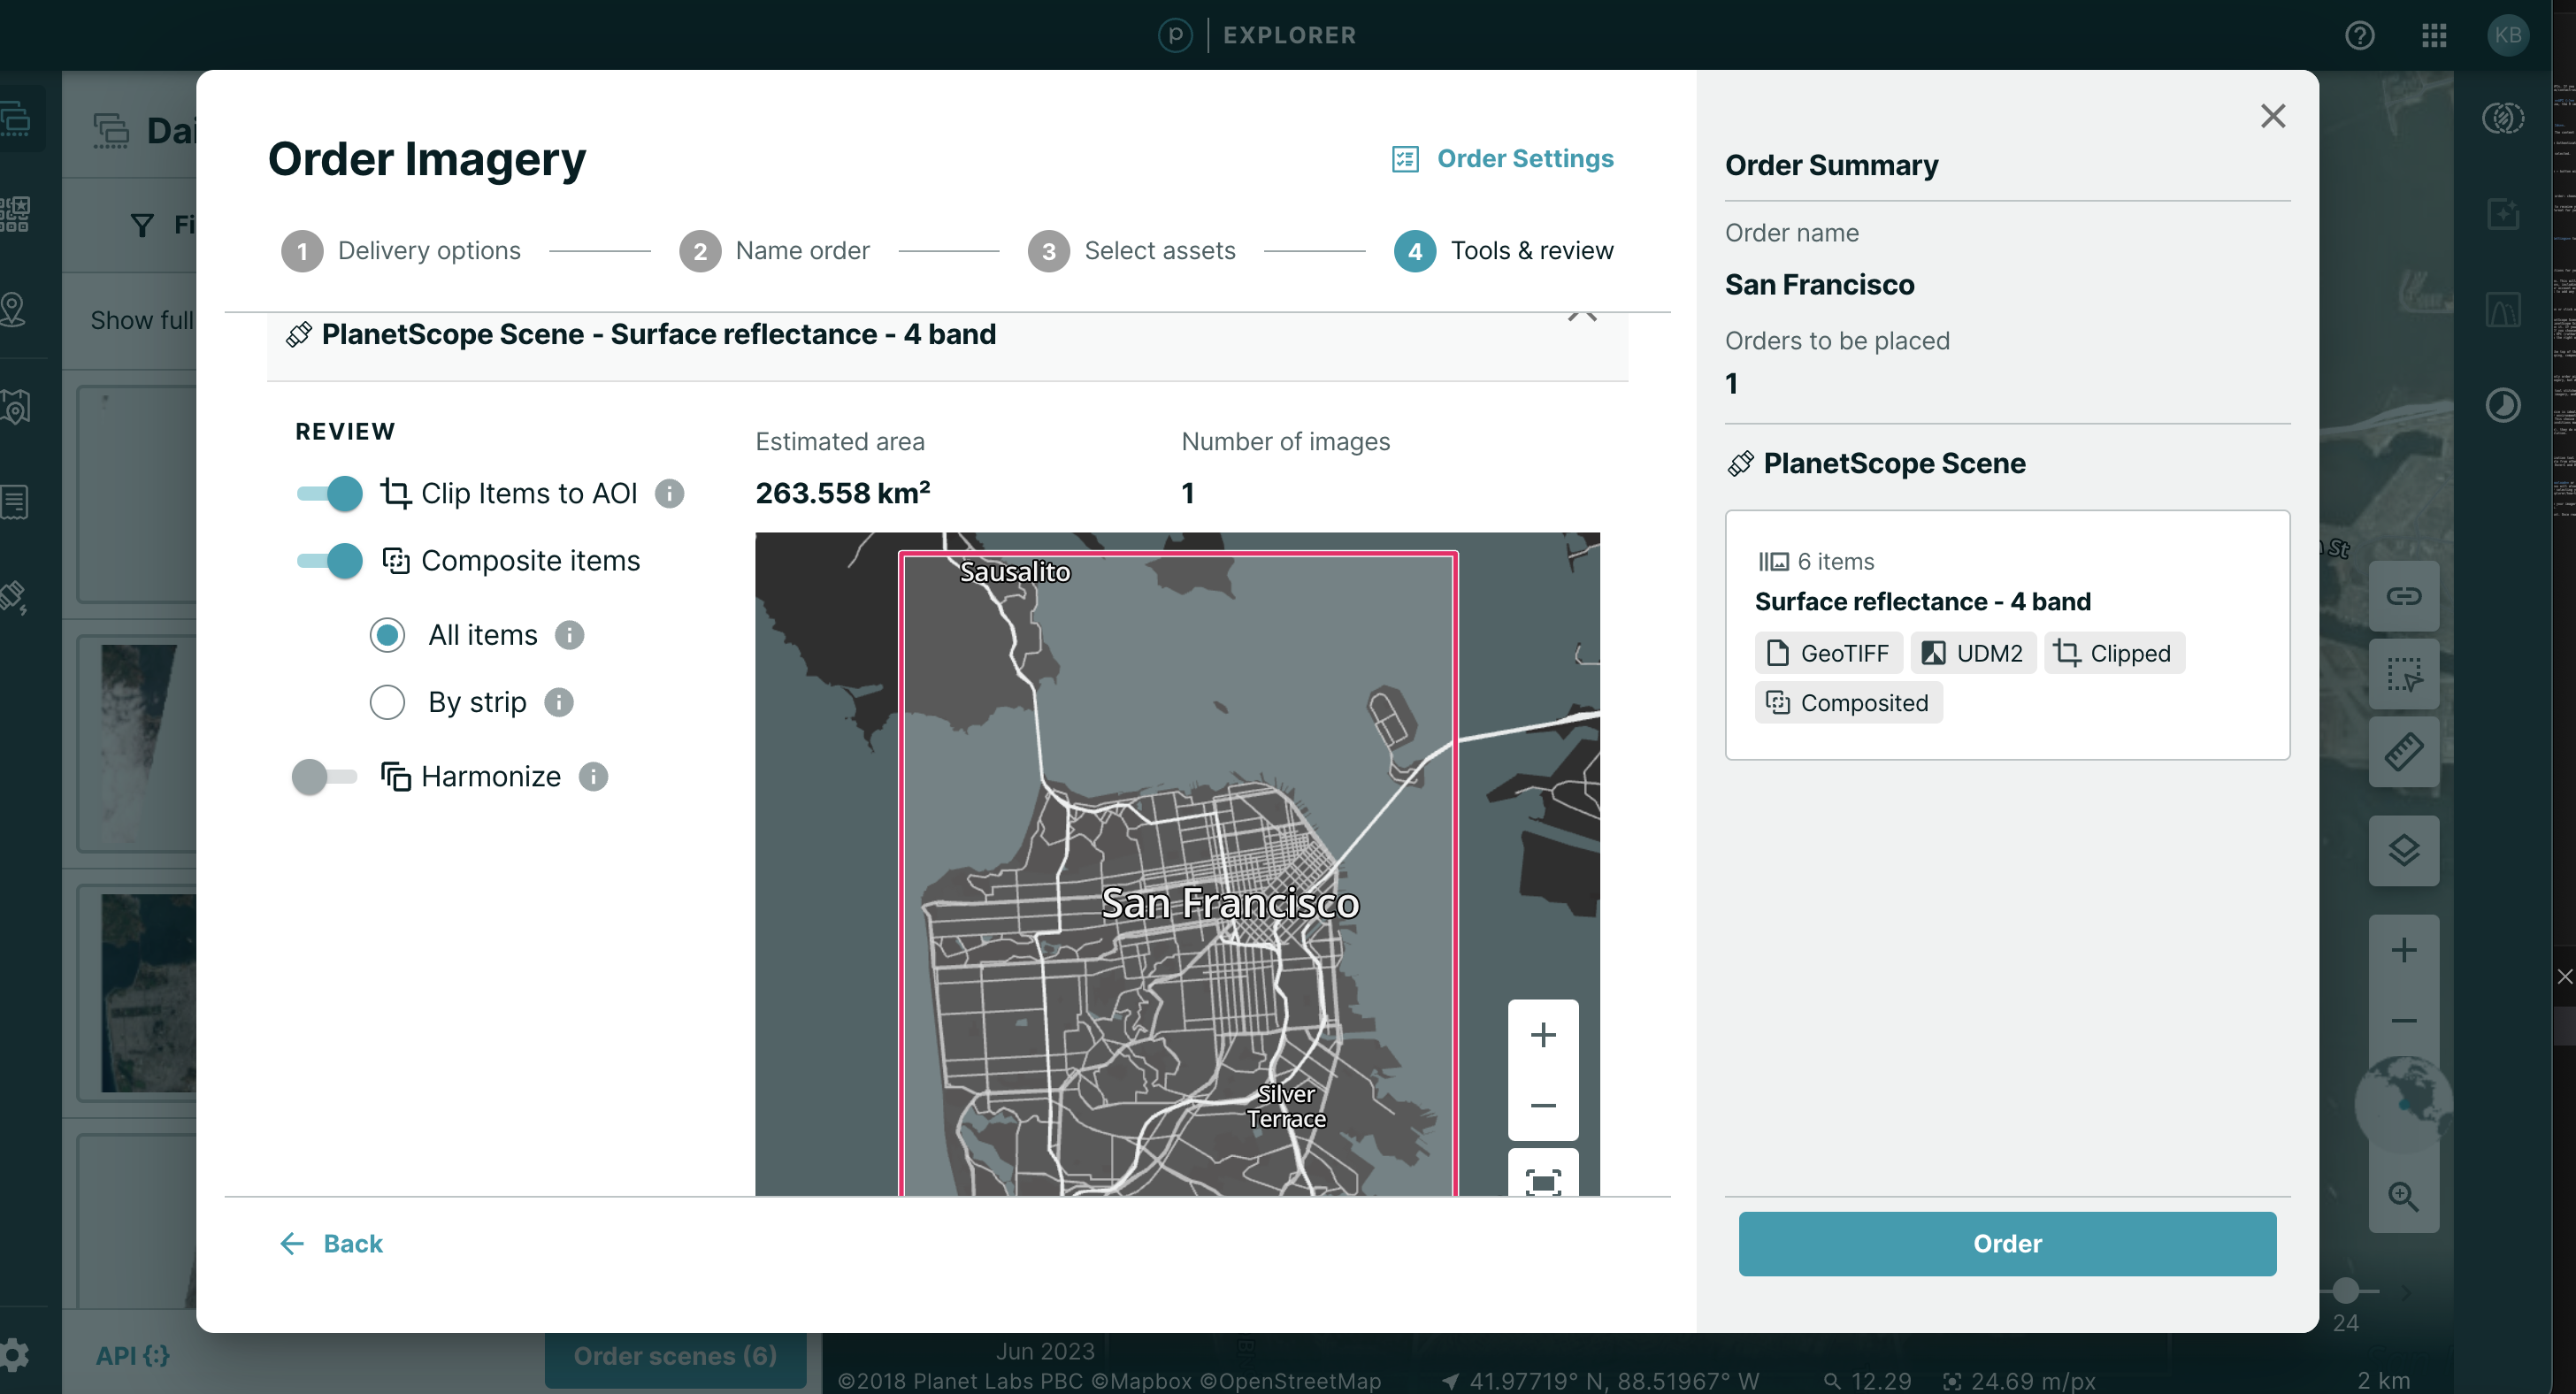
Once you are done selecting assets, click Continue or click on the Tools & Review header at the top of the screen. At this step, you will see a list of all of the assets that you have chosen. Click on each asset to add tools (clipping, composite, or harmonization, where applicable). Your selections will be reflected in the Order Summary on the right hand side.
Note
Some customers have access to clipping imagery (per their contract). When you clip imagery, you only order pixels that are in the AOI you drew. Otherwise, you download the entire scene your AOI touches. If you would like to clip imagery, but don't currently see that option in the interface, please reach out to the support team.
Customers who have access to clipping imagery also have access to compositing imagery. The composite tool stitches scenes together within an order to deliver fewer images with less or zero overlap. This reduces unnecessary overlaps within imagery, and consequently reduces the overall area of imagery delivered.
Two ways to composite an AOI within your order are per strip or everything:
- The first is to composite by strip. Compositing by strip allows for consistency per strip. This choice is ideal for the GIS analyst who is doing pixel analysis and is sensitive to variability in temporal, spatial, spectral, geometric, or environmental conditions.
- The second is to composite all. Compositing all means that all layers are combined into one image. This choice is ideal for the quota-sensitive user who has a primarily visual use case. Seamlines or variability in environmental conditions may appear.
If a customer has a composite that is larger than the stated sq km below (which changes per item type), they do not see the option to use the composite tool. The limit depends on the item type of the input scenes due to differences in resolution.
- High resolution (SkySatScene): Limit of 375 sq km per composite
- Medium resolution (PSScene, REOrthotile, Sentinel2L1C): Limit of 9,000 sq km per composite
- Low resolution (Landsat8L1G): Limit of 1,200,000 sq km per composite
Customers will also have access to the harmonization tool for surface reflectance assets. The harmonization tool ensures consistent radiometric calibration with Sentinel-2 satellites. This helps with combining and comparing Planet data from other sources. We recommend using this option when you are downloading data from varied Planet constellations (i.e. imagery from Dove-C and Dove-R.)
Downloading your Order
When placing an order, there are two options for downloading your data. These options are Direct download or Hosted analysis in Explorer, which will download a Cloud Optimized GeoTIFF (COG).
If you choose Direct Download, you will also be asked to select a file format for your download. After selecting your download preference, continue making your order selections as described above.
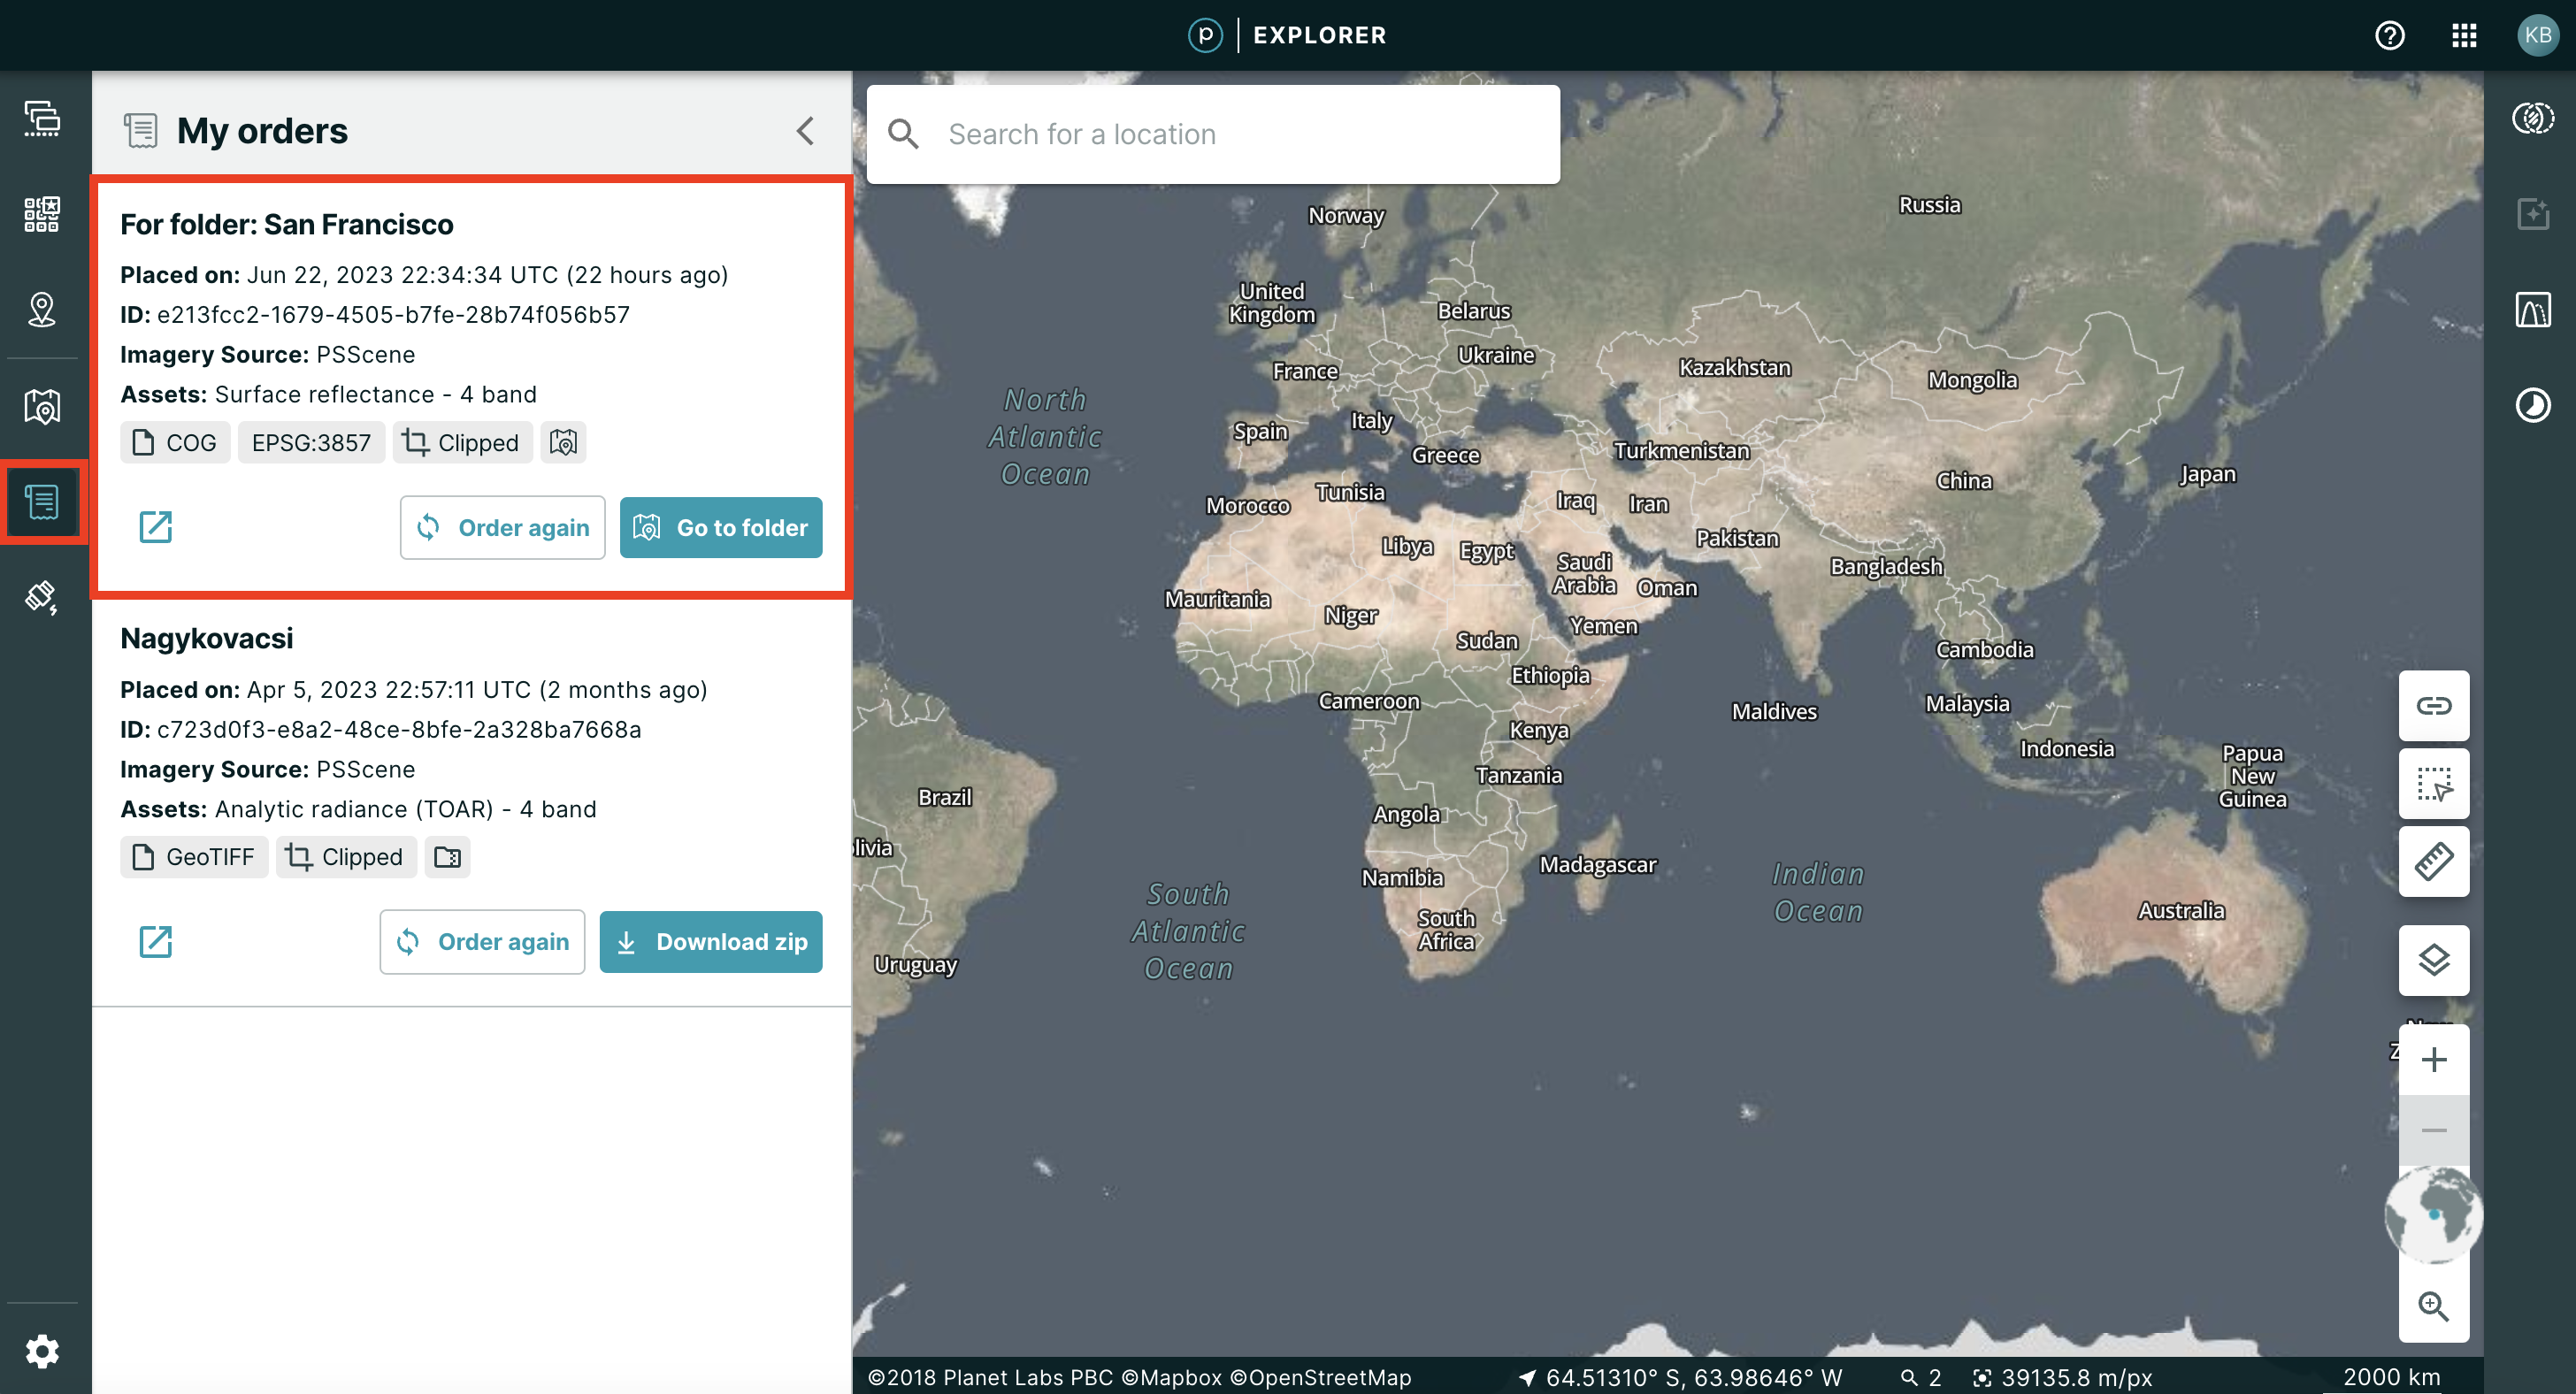
Once you choose Order, you will see a note pop up briefly that you will be notified by email when your imagery download is ready. The left panel will pop open automatically to the Orders tab, and you will see your order in progress.
When the order is ready for download, you will get an email to the address associated with your account. Once ready, you will be able to download a .zip of your assets from the Orders section in the left hand toolbar.
Note
The limit for number of scenes you can request in one order:
- Default = 100
- SkySatCollect = 50
Download a Cloud Optimized GeoTIFF (COG) from Hosted Data
To Download a Could Optimized GeoTiFF (COG) from Hosted Data, select Hosted analysis in Explorer in Step 1 of your order. Continue through the order screen to complete your order, or click on Order on the right-hand side of the screen to complete express checkout.
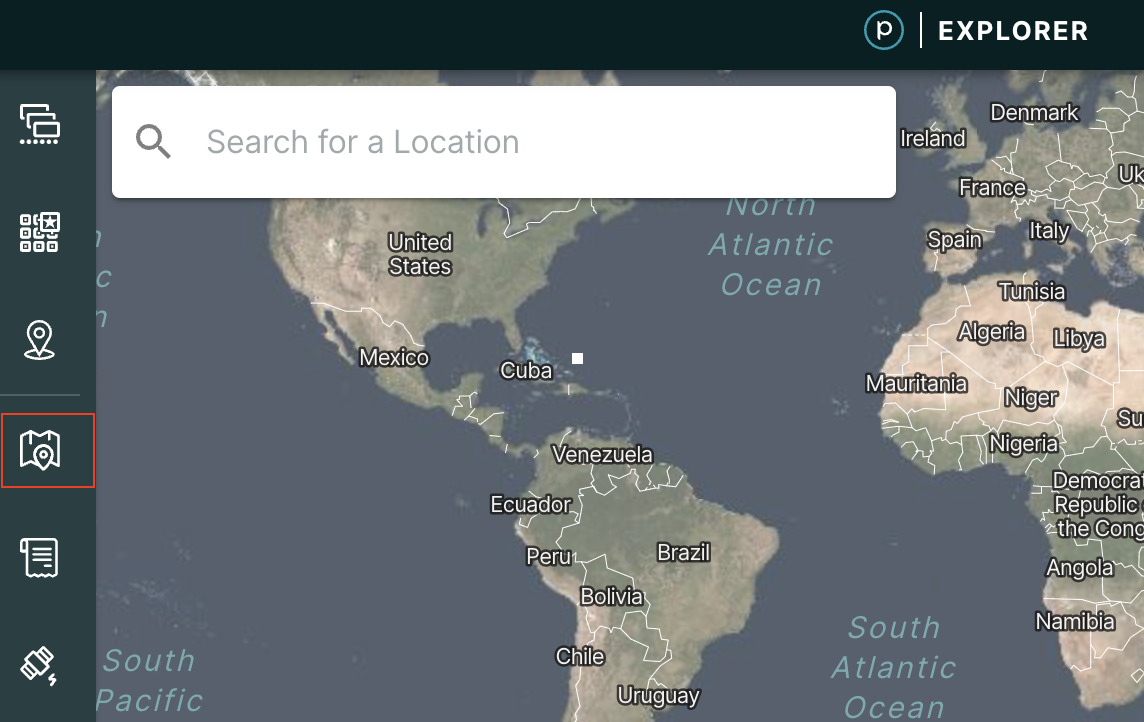
After your order is processed, you will be able to view your order in your Hosted Data by clicking on that icon on the left-hand side of the screen.
Rate this guide: