Add Download Folders to the ArcGIS Pro Catalog
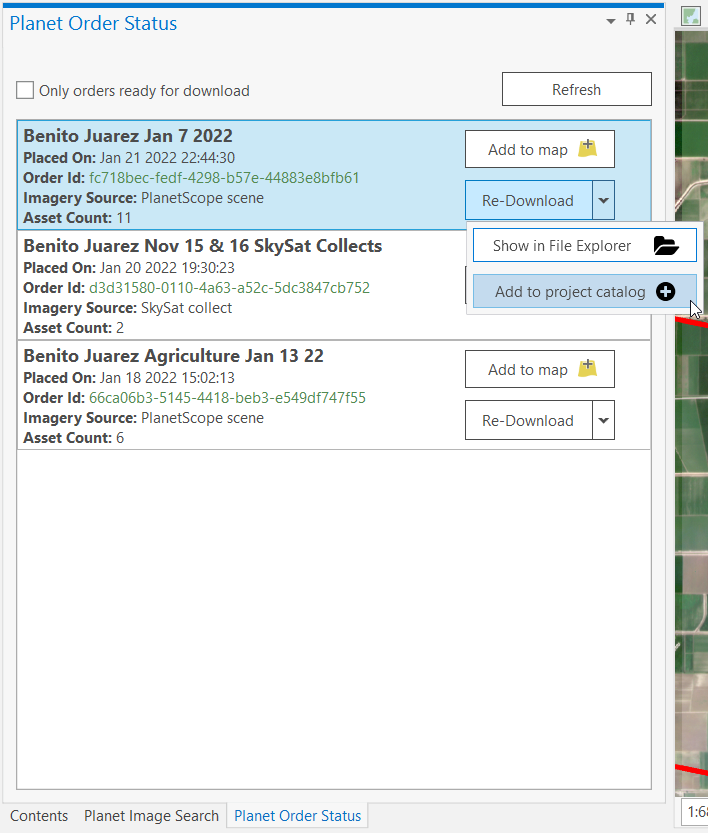
After downloading an order, you can quickly add the download folder as a folder connection in the Catalog. Select the Re-Download drop-down menu and select Add to project catalog.
Adding Imagery to Maps with True Color Band Order
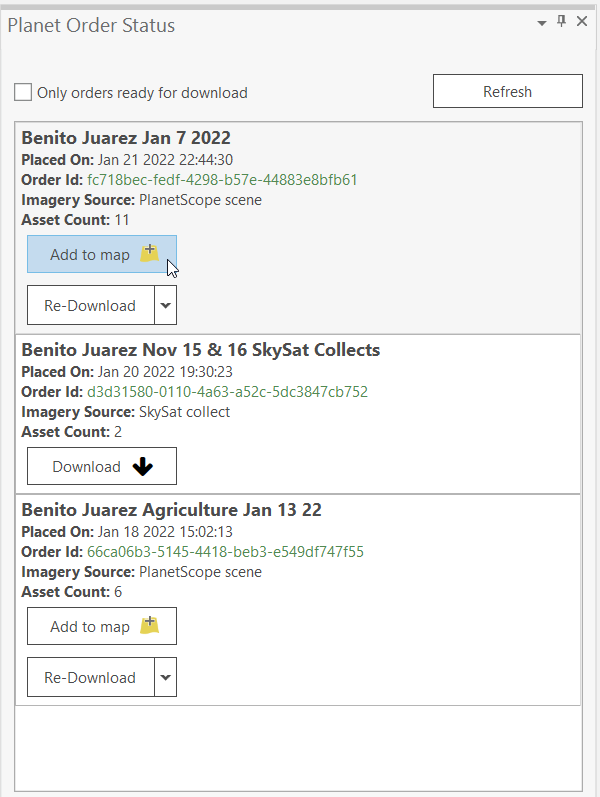
After downloading an order, you can add imagery directly to your maps from the Planet Order Status pane. Select the Add to map option and the imagery will be added to your active map with the red, green, and blue bands assigned to the correct color channels. The imagery will also be added with a Percent Clip stretch.
You can also add downloaded imagery to your map through the catalog pane or File Explorer. By default, ArcGIS Pro will assign bands 1, 2, and 3 to the red, green, and blue channels, respectively. With PlanetScope 8-band imagery, this won’t result in a true color visualization because Planet’s bands are ordered ascending by wavelength. The default bands that are selected for visualization can be changed in the Raster and Imagery appearance settings.
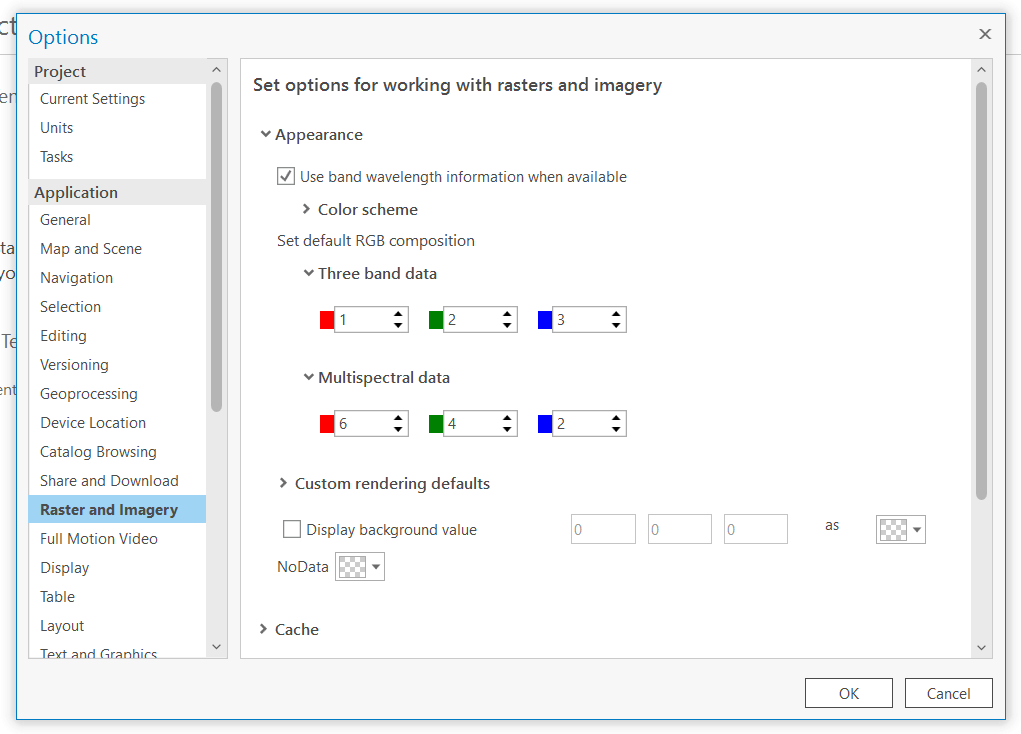
You can access these settings from Project tab > Options > Raster and Imagery. In the Set default RGB composition > Multispectral data section, assign bands 6, 4, and 2 to red, green, and blue, respectively. These are the RGB band indices for PlanetScope 8-band data. When you add 8-band PlanetScope rasters from the catalog or File Explorer to your map, they will now be added with the correct band order for true color visualization.
For more information, see Raster and imagery default options.
Creating a False Color Composite
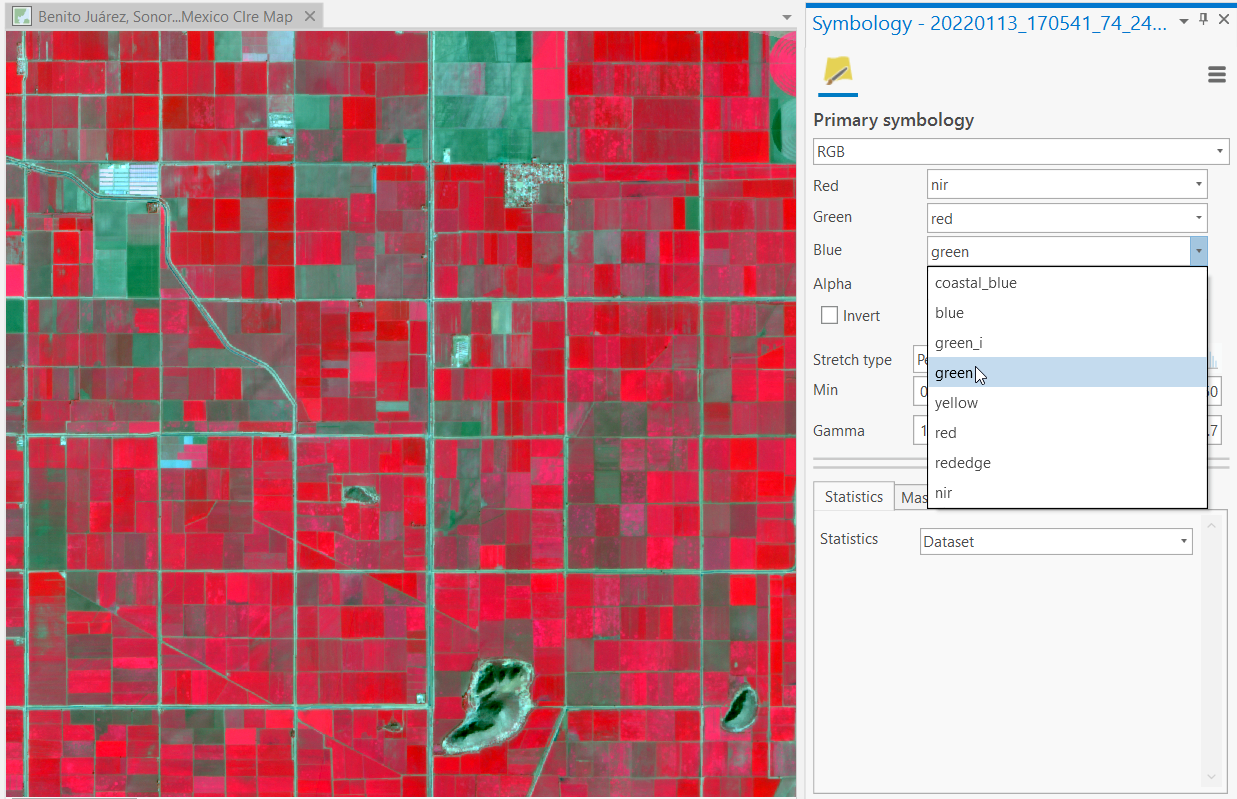
To create a False Color Composite, select your Planet imagery and open the symbology pane. Assign the bands to the color channels in this order: near-infrared to red, red to green, and green to blue. See table below for corresponding band names and index for 4 and 8 band imagery products.
| Color Channel | Assigned Band | 4-band Band Index | 8-band Band Index |
|---|---|---|---|
| Red | Near Infrared | 4 | 8 |
| Green | Red | 3 | 6 |
| Blue | Green | 2 | 4 |
Mosaicing Multiple Raster Products
If your order contains multiple scenes, or if you are visualizing data from multiple orders, you may notice color differences where two nearby scenes meet. This is because each raster in a map is individually stretched based on the statistical distribution of pixel values across the dataset. This difference is only visual and will not impact analysis, such as comparing pixel values over time in the same location. For a more seamless visualization, you may want to create a mosaic dataset to manage your imagery.
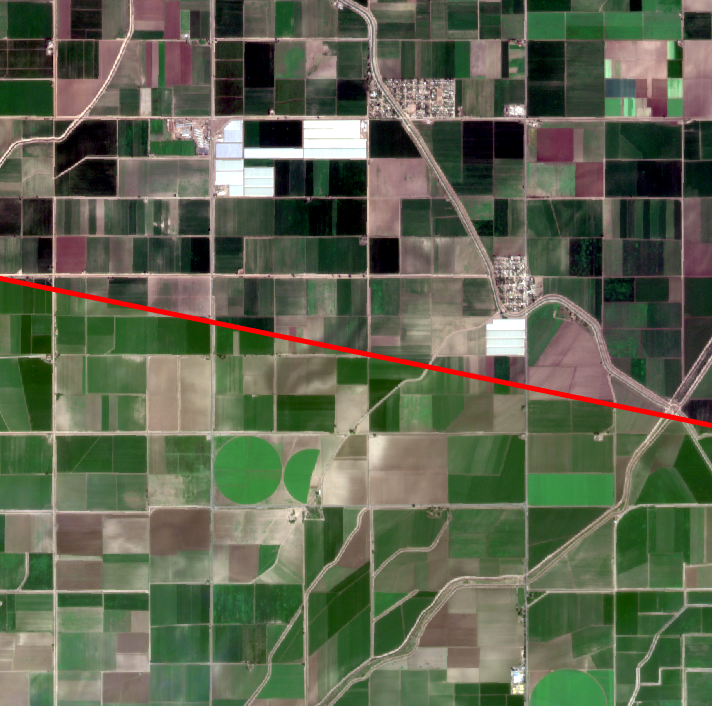
|
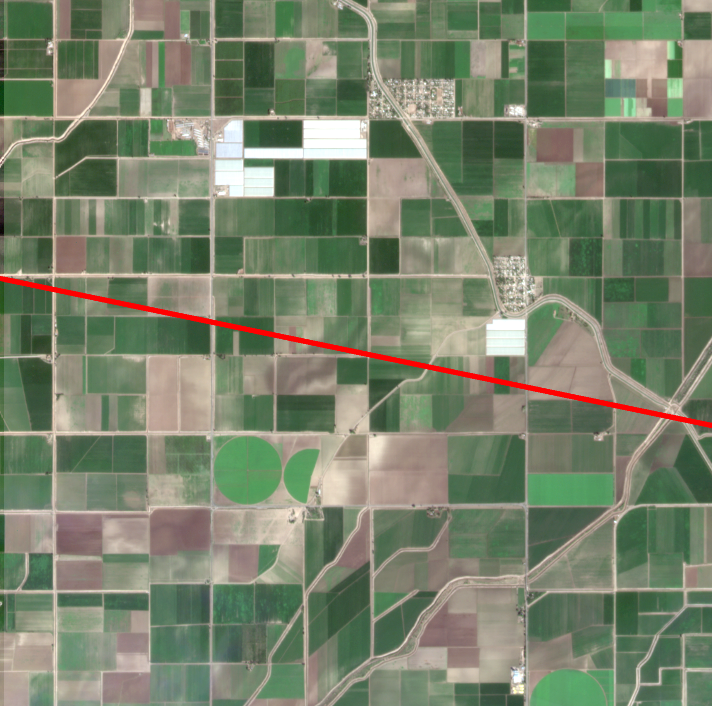
|
You can find documentation for creating mosaic datasets and adding imagery to mosaics datasets here: ArcGIS Pro - Create a mosaic dataset. Note: After adding imagery to a mosaic dataset, bands are renamed to band_index#. You can find spectral band names and orders for Planet imagery in the Planet Imagery Product Specifications.
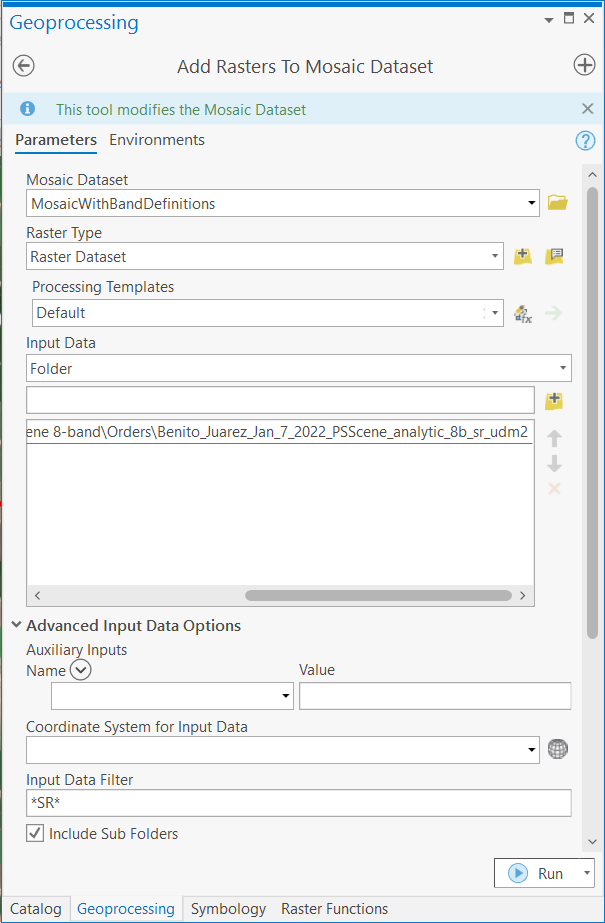
When using the Add Rasters To Mosaic Dataset tool, you can quickly add all rasters from one or many orders at the same time. Choose the folder which has your downloaded Planet imagery as the Input Data. You can use the Input Data Filter parameter to exclude unwanted products, such as Usable Data Masks (UDM). For example, to filter for only Surface Reflectance assets, use the filter ‘*SR*’. Toggle on Include Sub Folders to make sure you capture the entire folder structure from an order download.
For more information, see Using mosaic datasets to manage imagery.
Copying Snippets for Working with Planet API’s
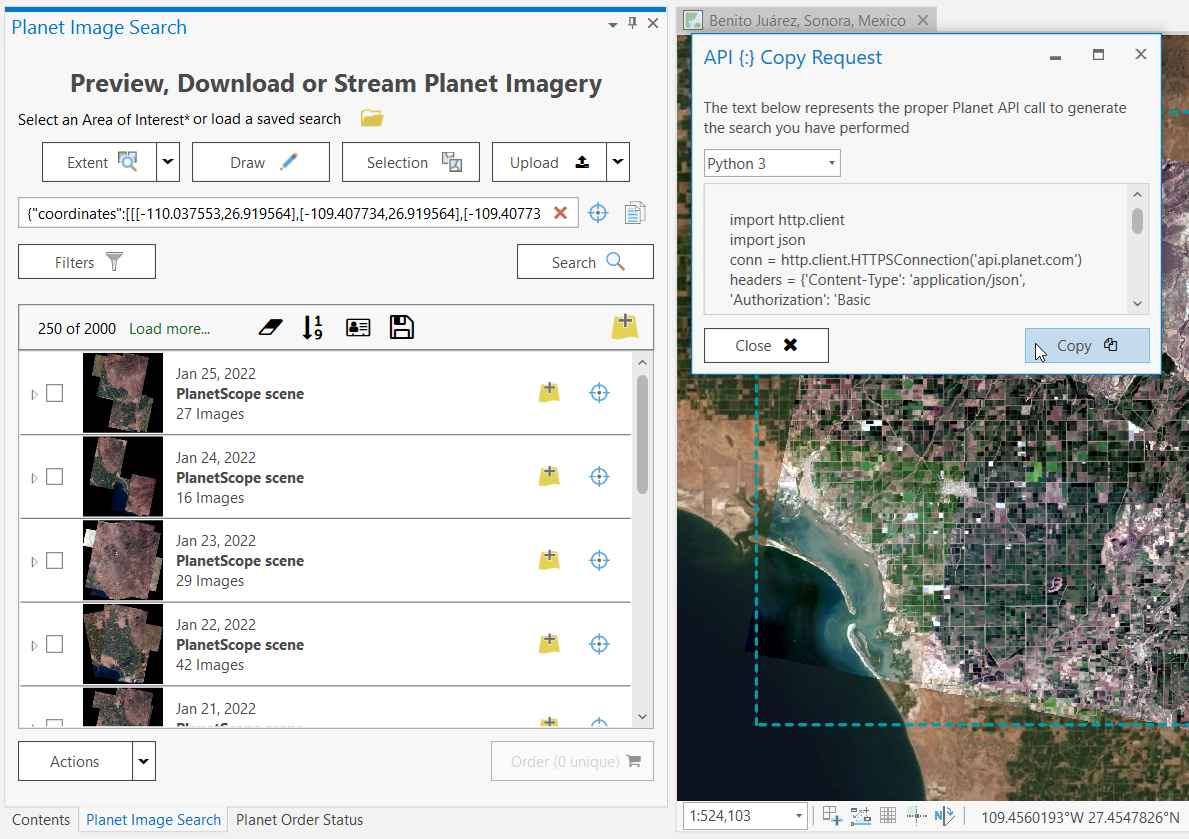
After executing a search for imagery, Planet’s ArcGIS Add-in allows you to copy the search request as a cURL or Python 3 code snippet. Select the Actions drop-down list from the bottom of the Planet Image Search pane and click Copy Request. You can also copy your API key and selected image IDs.
We are continually working to improve our technical documentation and support. Please help by sharing your experience with us.