Overview
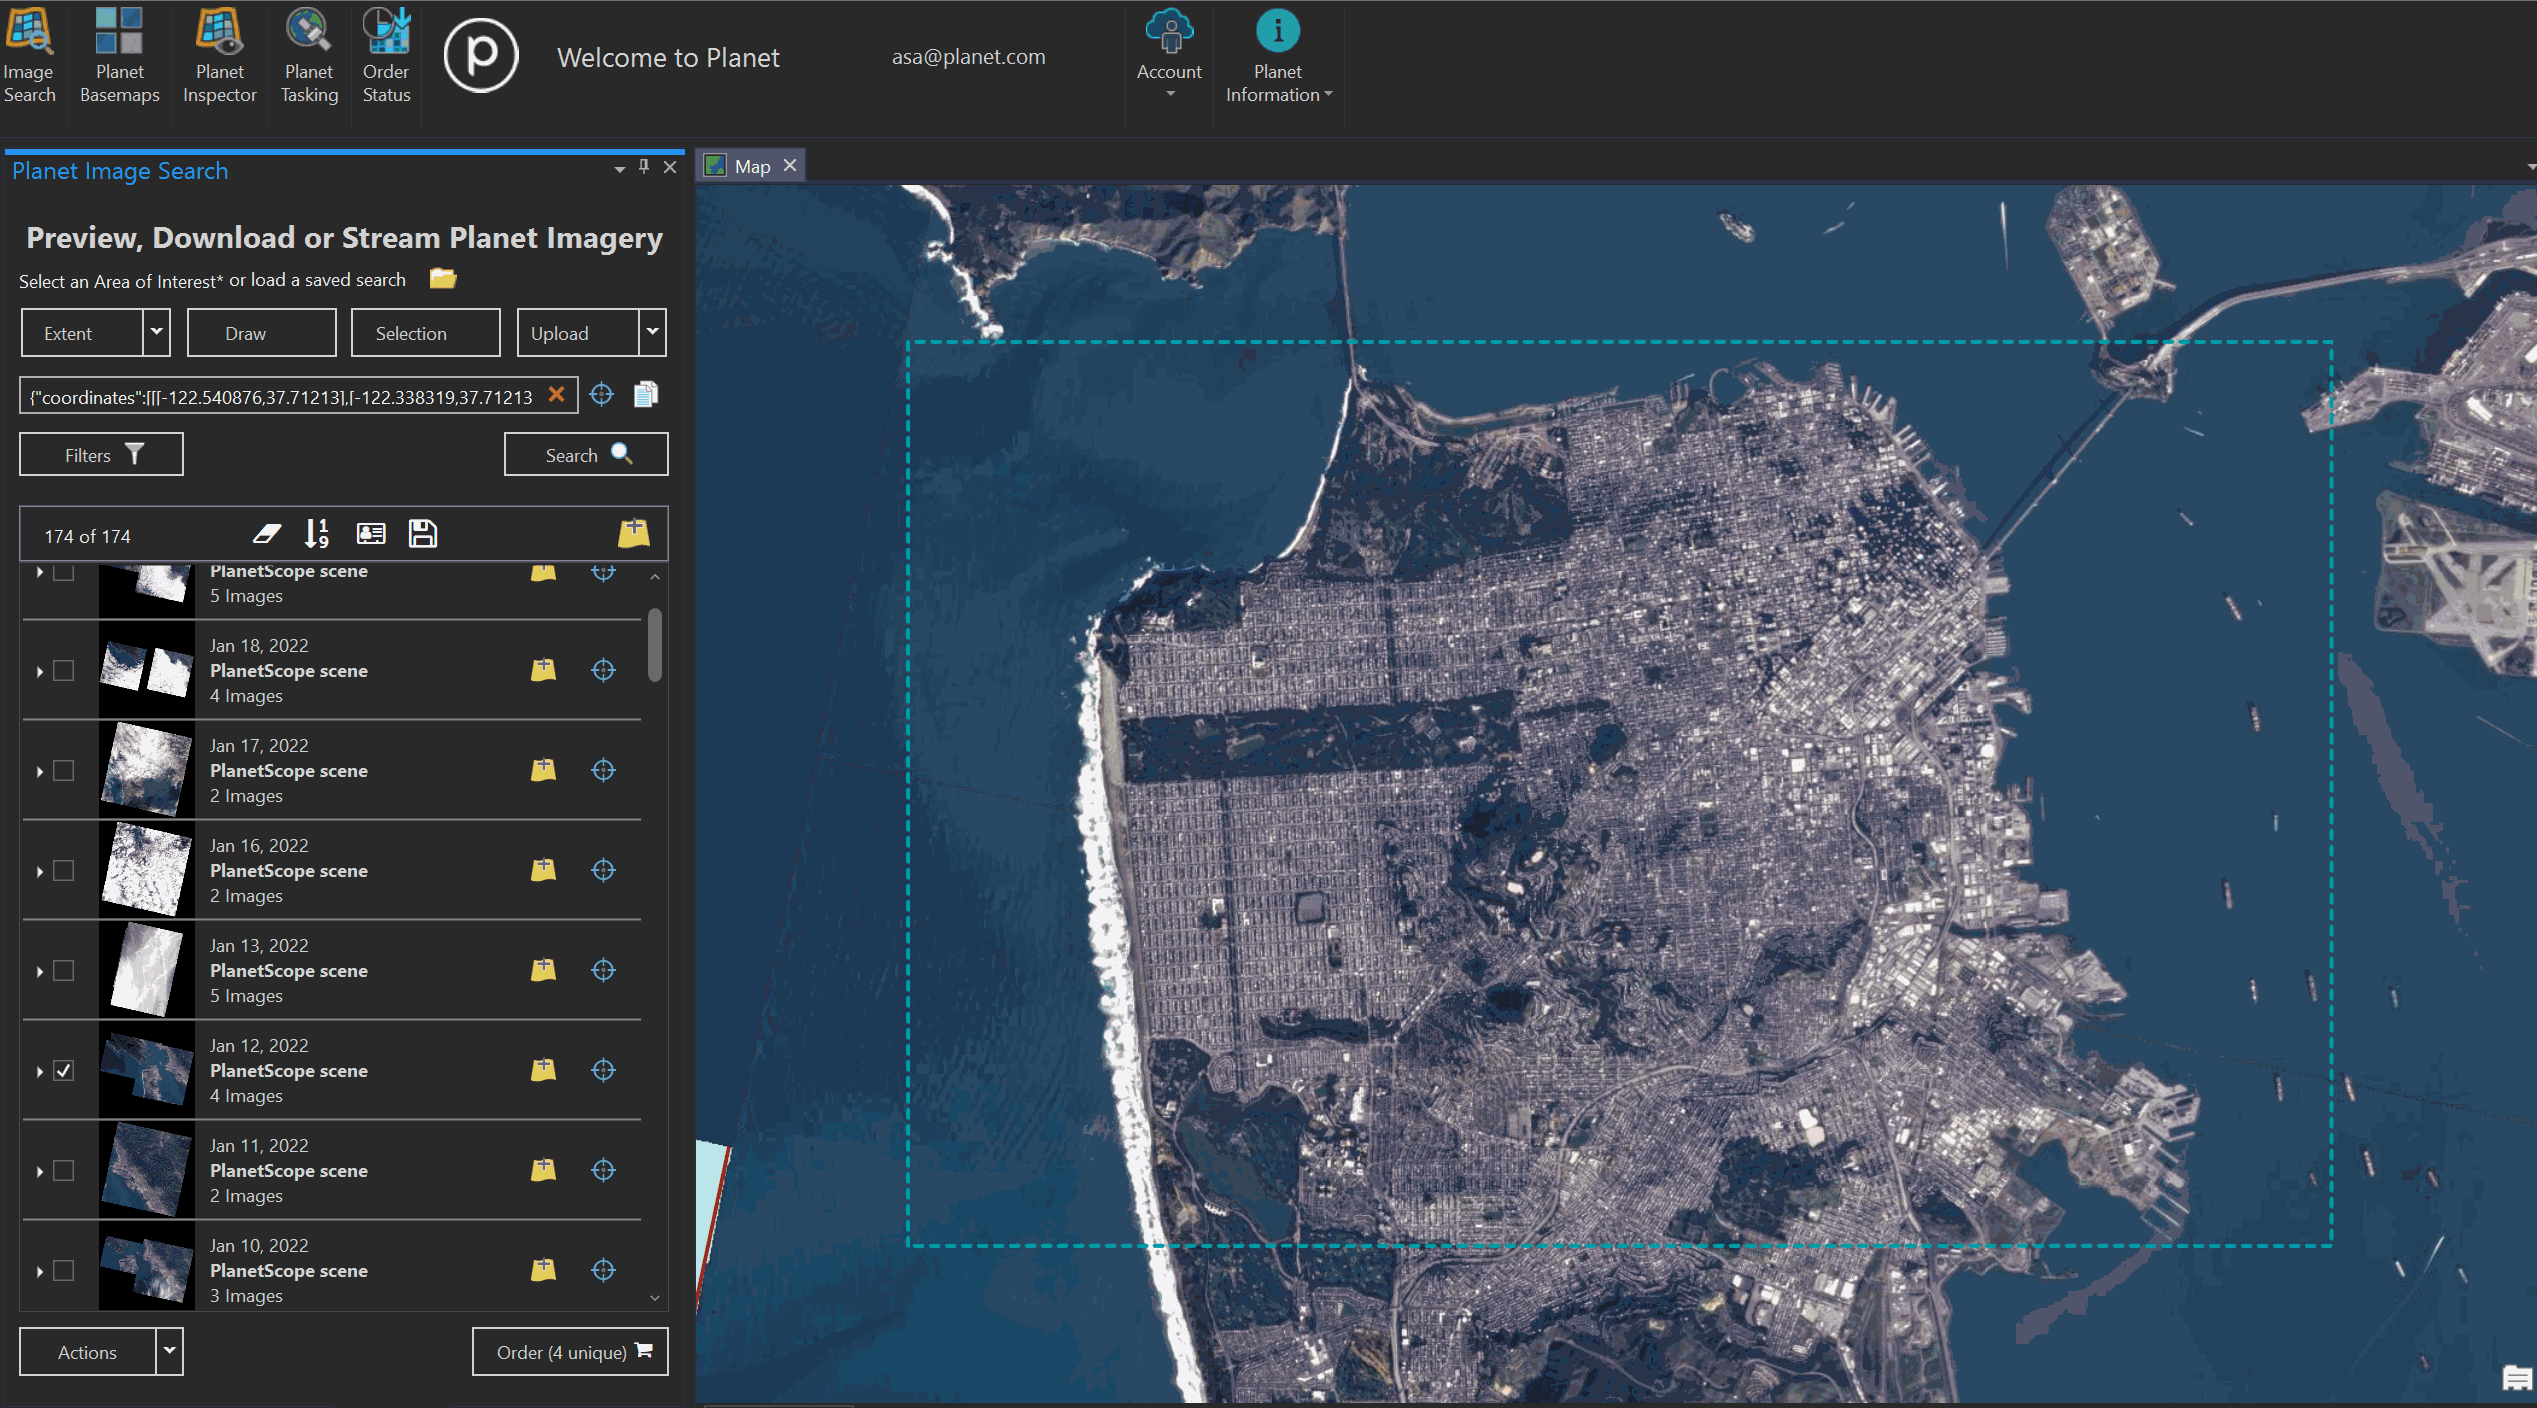
The search, stream and download capabilities for Planet imagery are organized in the Planet Imagery Search Panel in ArcGIS that can be pulled up by selecting the Image Search icon from the Planet Imagery ribbon.
![]()
The Image Search Panel includes images acquired by Planet’s SkySat, PlanetScope, and RapidEye constellations. It also includes open imagery archives like images acquired from LandSat and Sentinel satellites.
Search for imagery
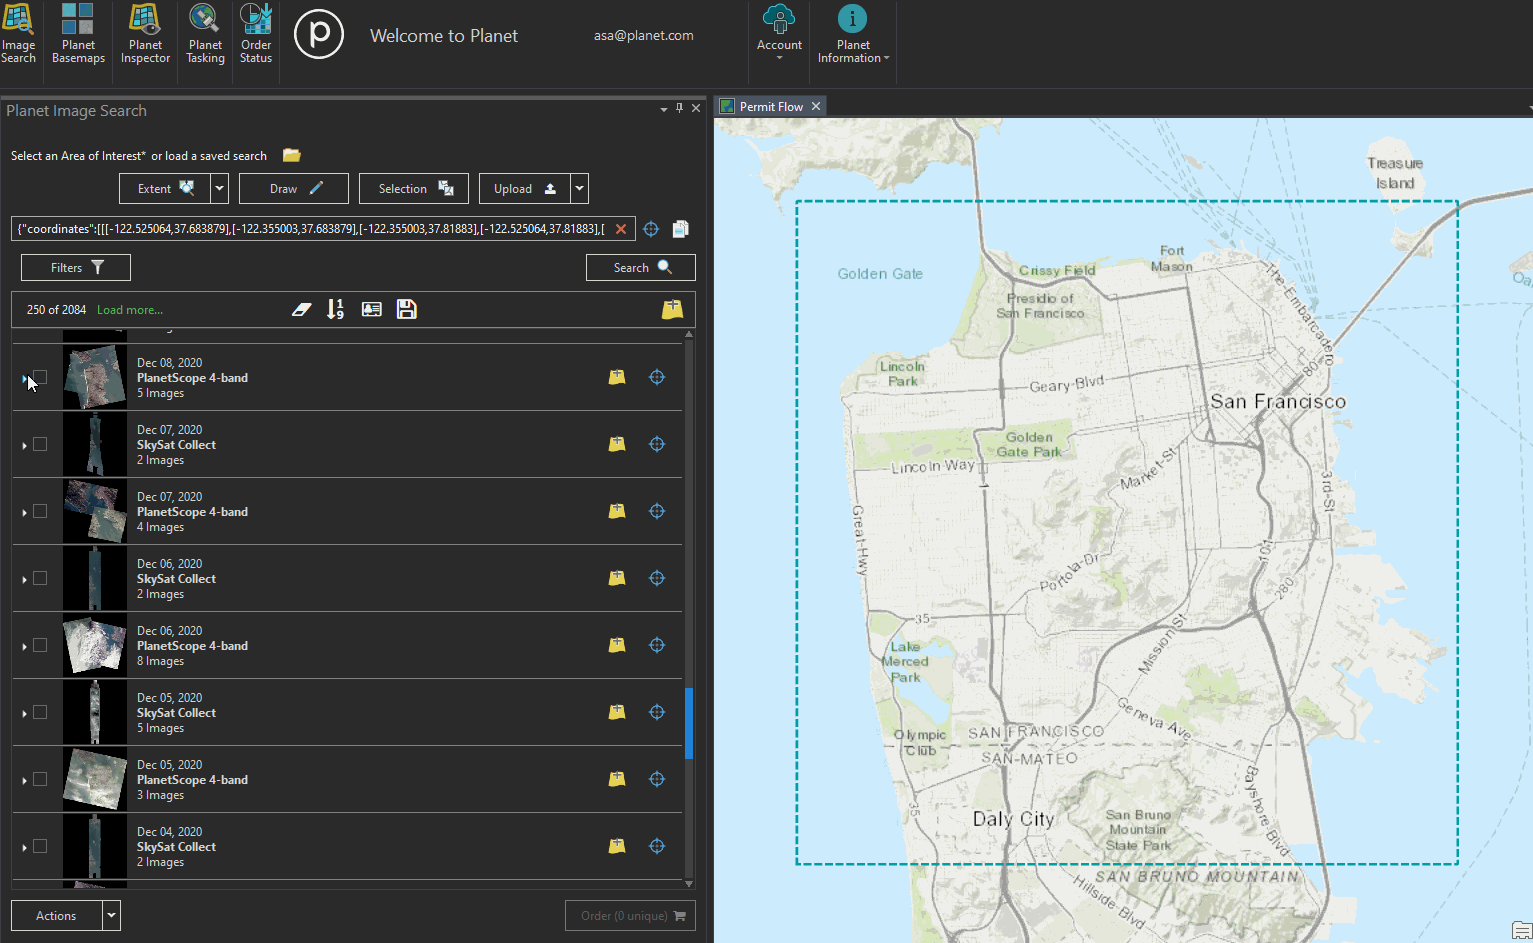
To search for imagery, the only required field is an area of interest (aoi), or alternatively a specific Image ID. On the Planet Imagery Search Panel there are multiple options for selecting an area of interest: e.g., selecting the current map extent, the extent of all active layers in your Pro map, drawing a specific area of interest, or using a selected feature to define a polygon aoi.
Once an area of interest has been set, you can directly search for Planet imagery within ArcGIS. To further refine your search results, select the “Filters” tab to the left of the “Search” button on the Search Panel.
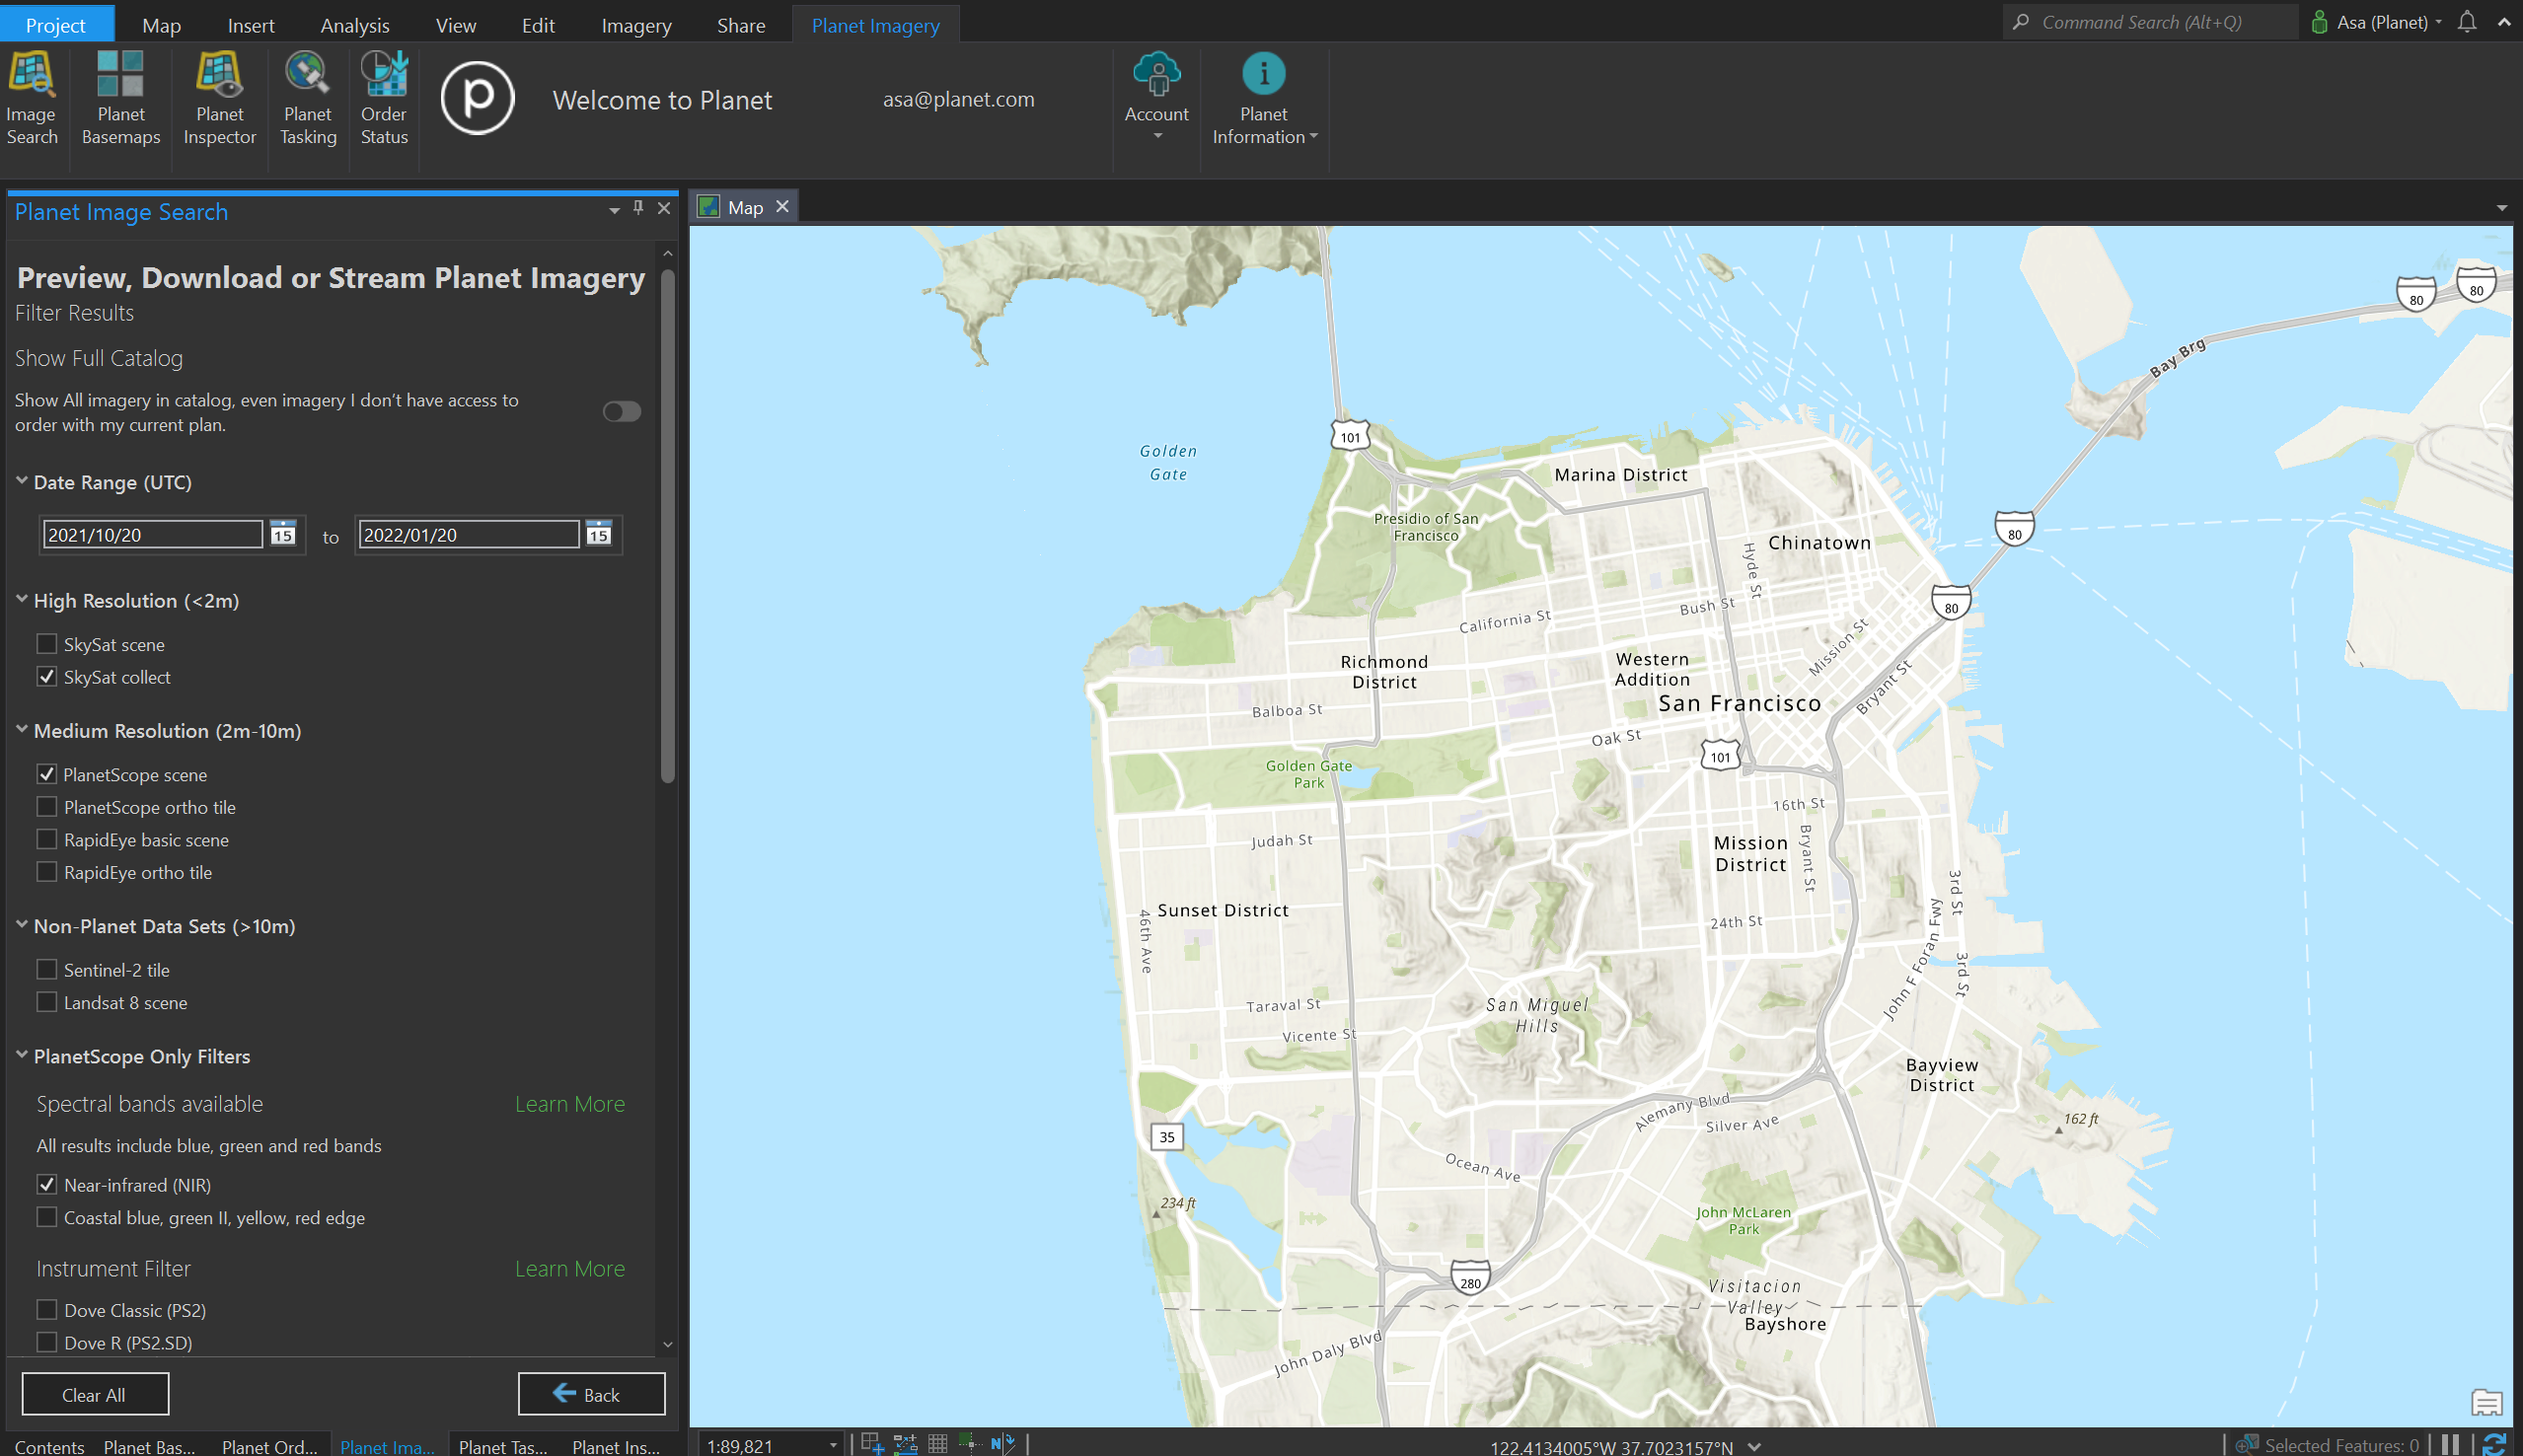
This will open a new panel just for refining your imagery search filters. For example, you can specify a min/max cloud cover threshold, spectral bands, a time of interest, a specific satellite constellation, etc.
Once you are happy with your filters, simply press “<- Back” from the top-left and “Search” from the Imagery Search Panel. This will display a list of images that match your search criteria.
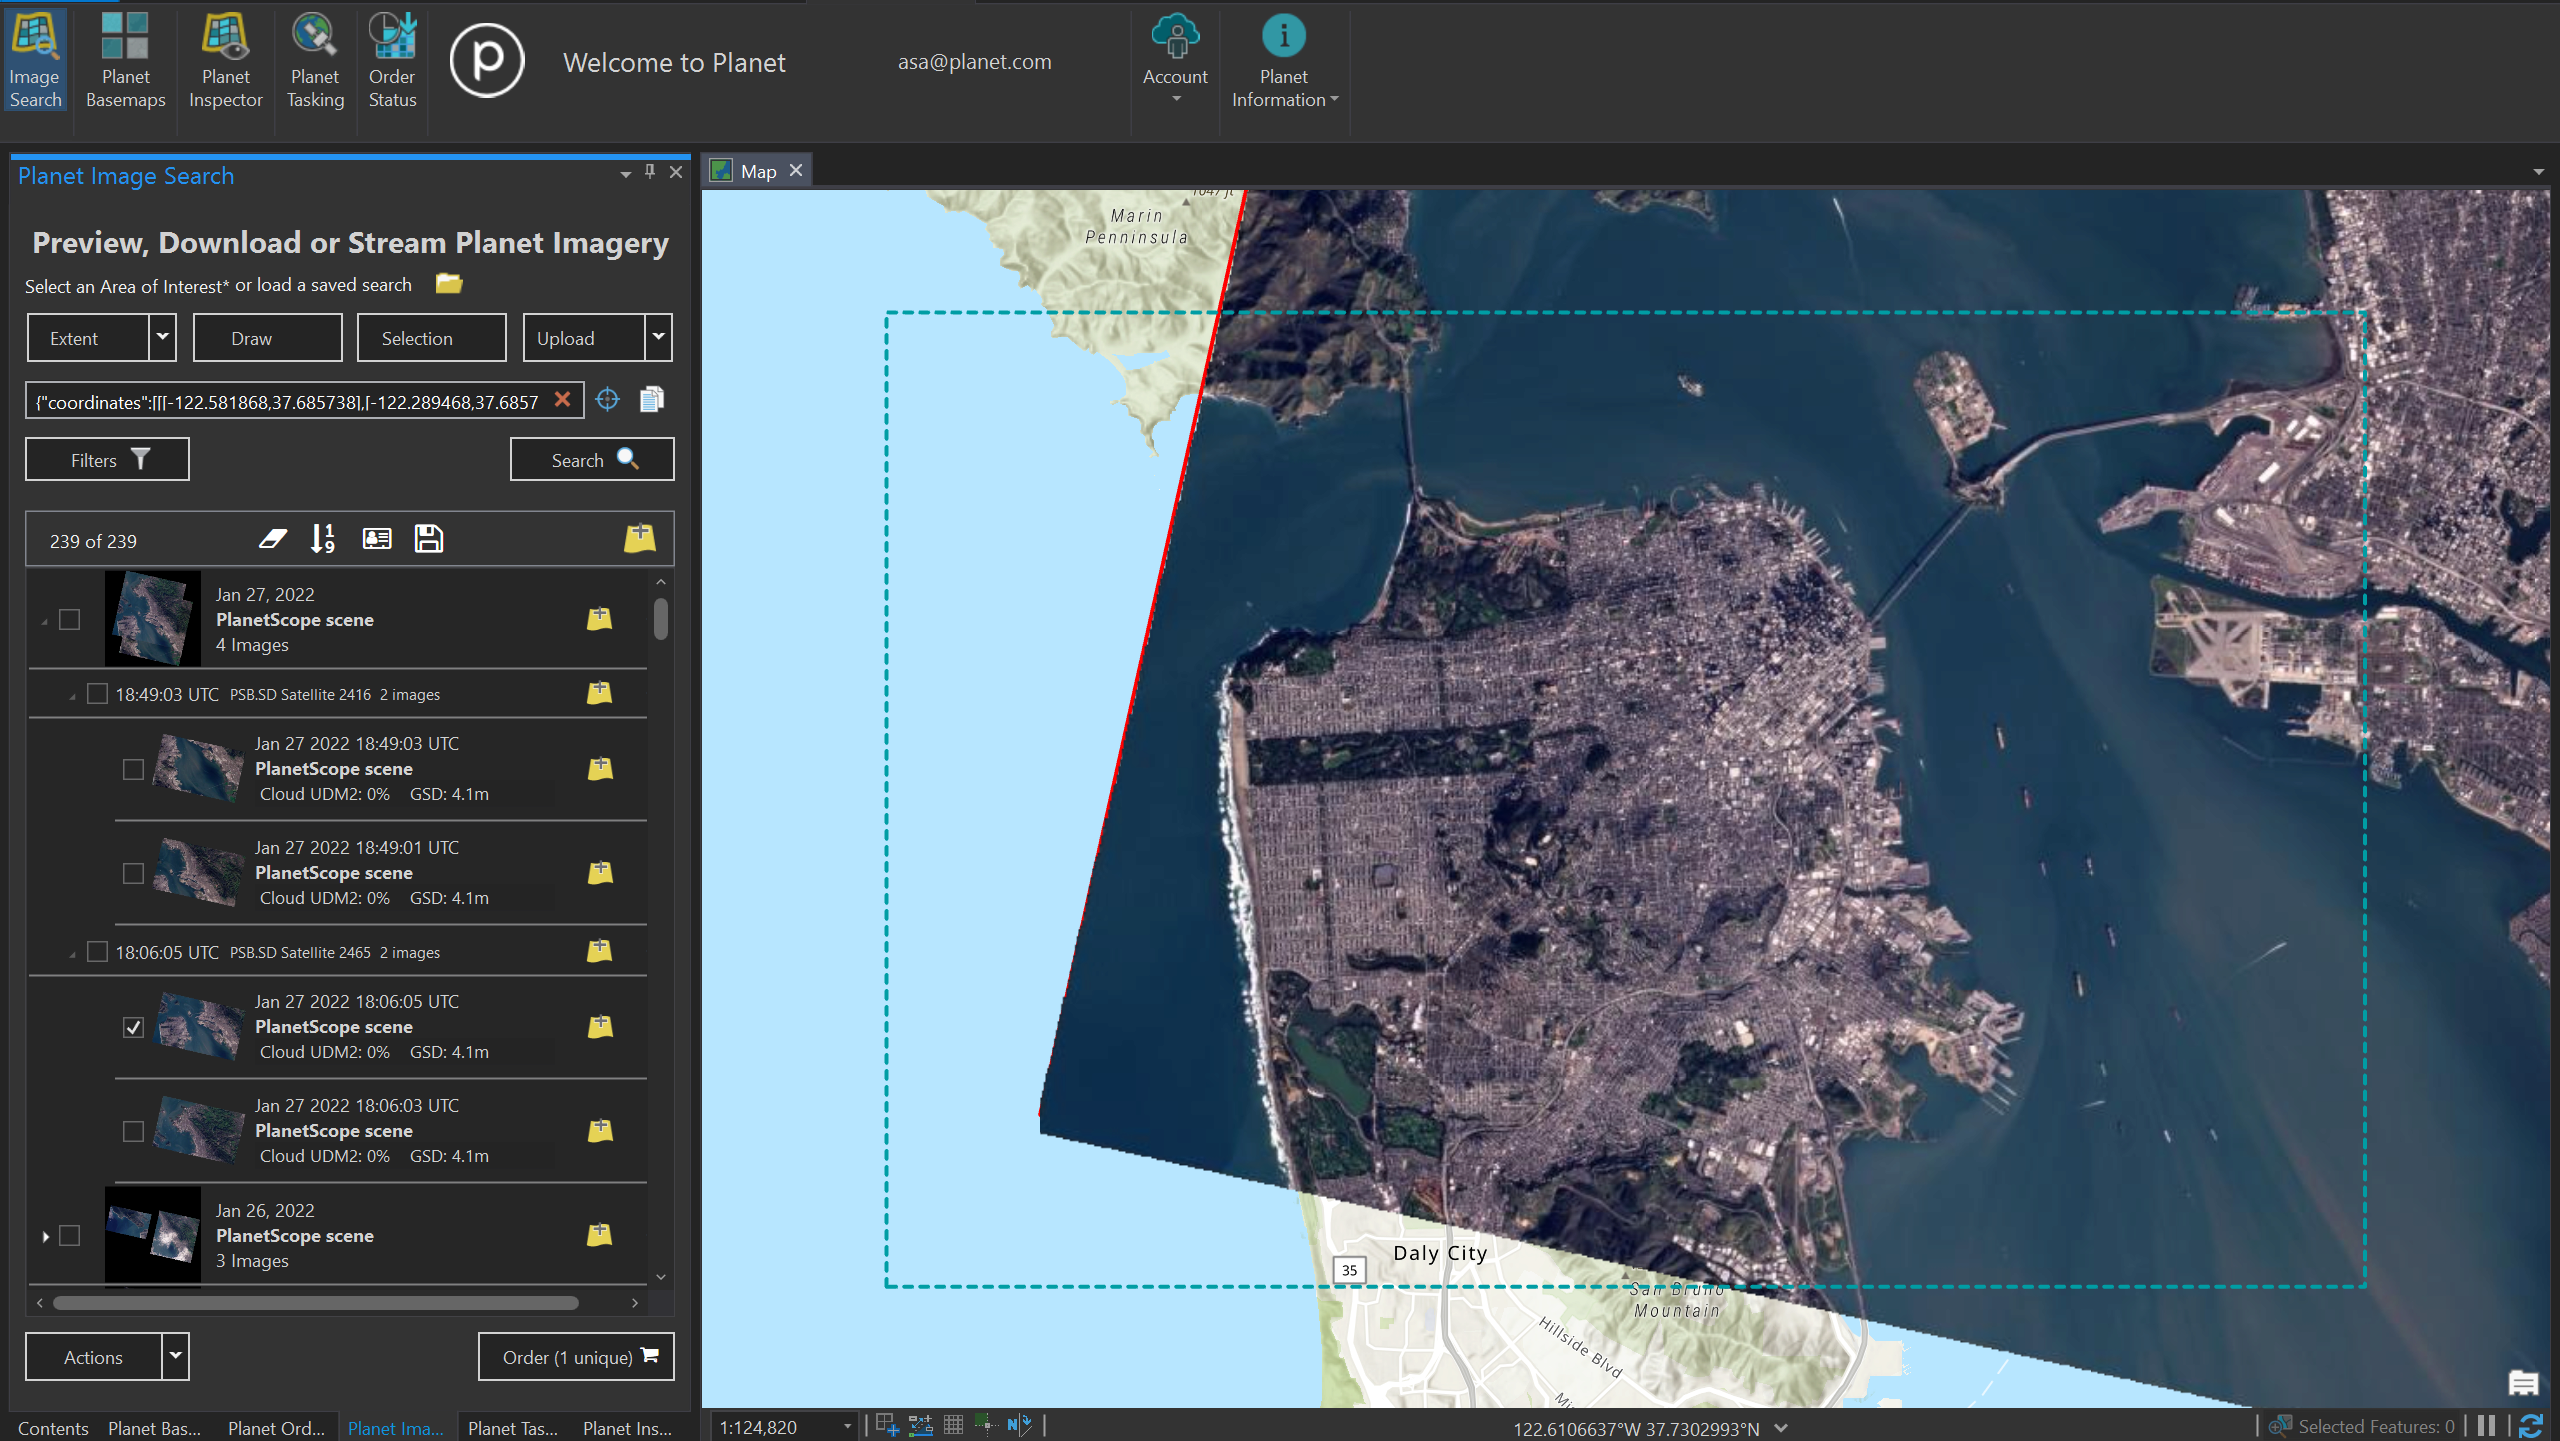
Imagery search results are grouped by date and product type. You can explore your search results even further by selecting the drop down arrows left of each result. This will show each individual image that is included in that set of date and product results. Hover over each image result to see a pop-up window containing the image’s full metadata.
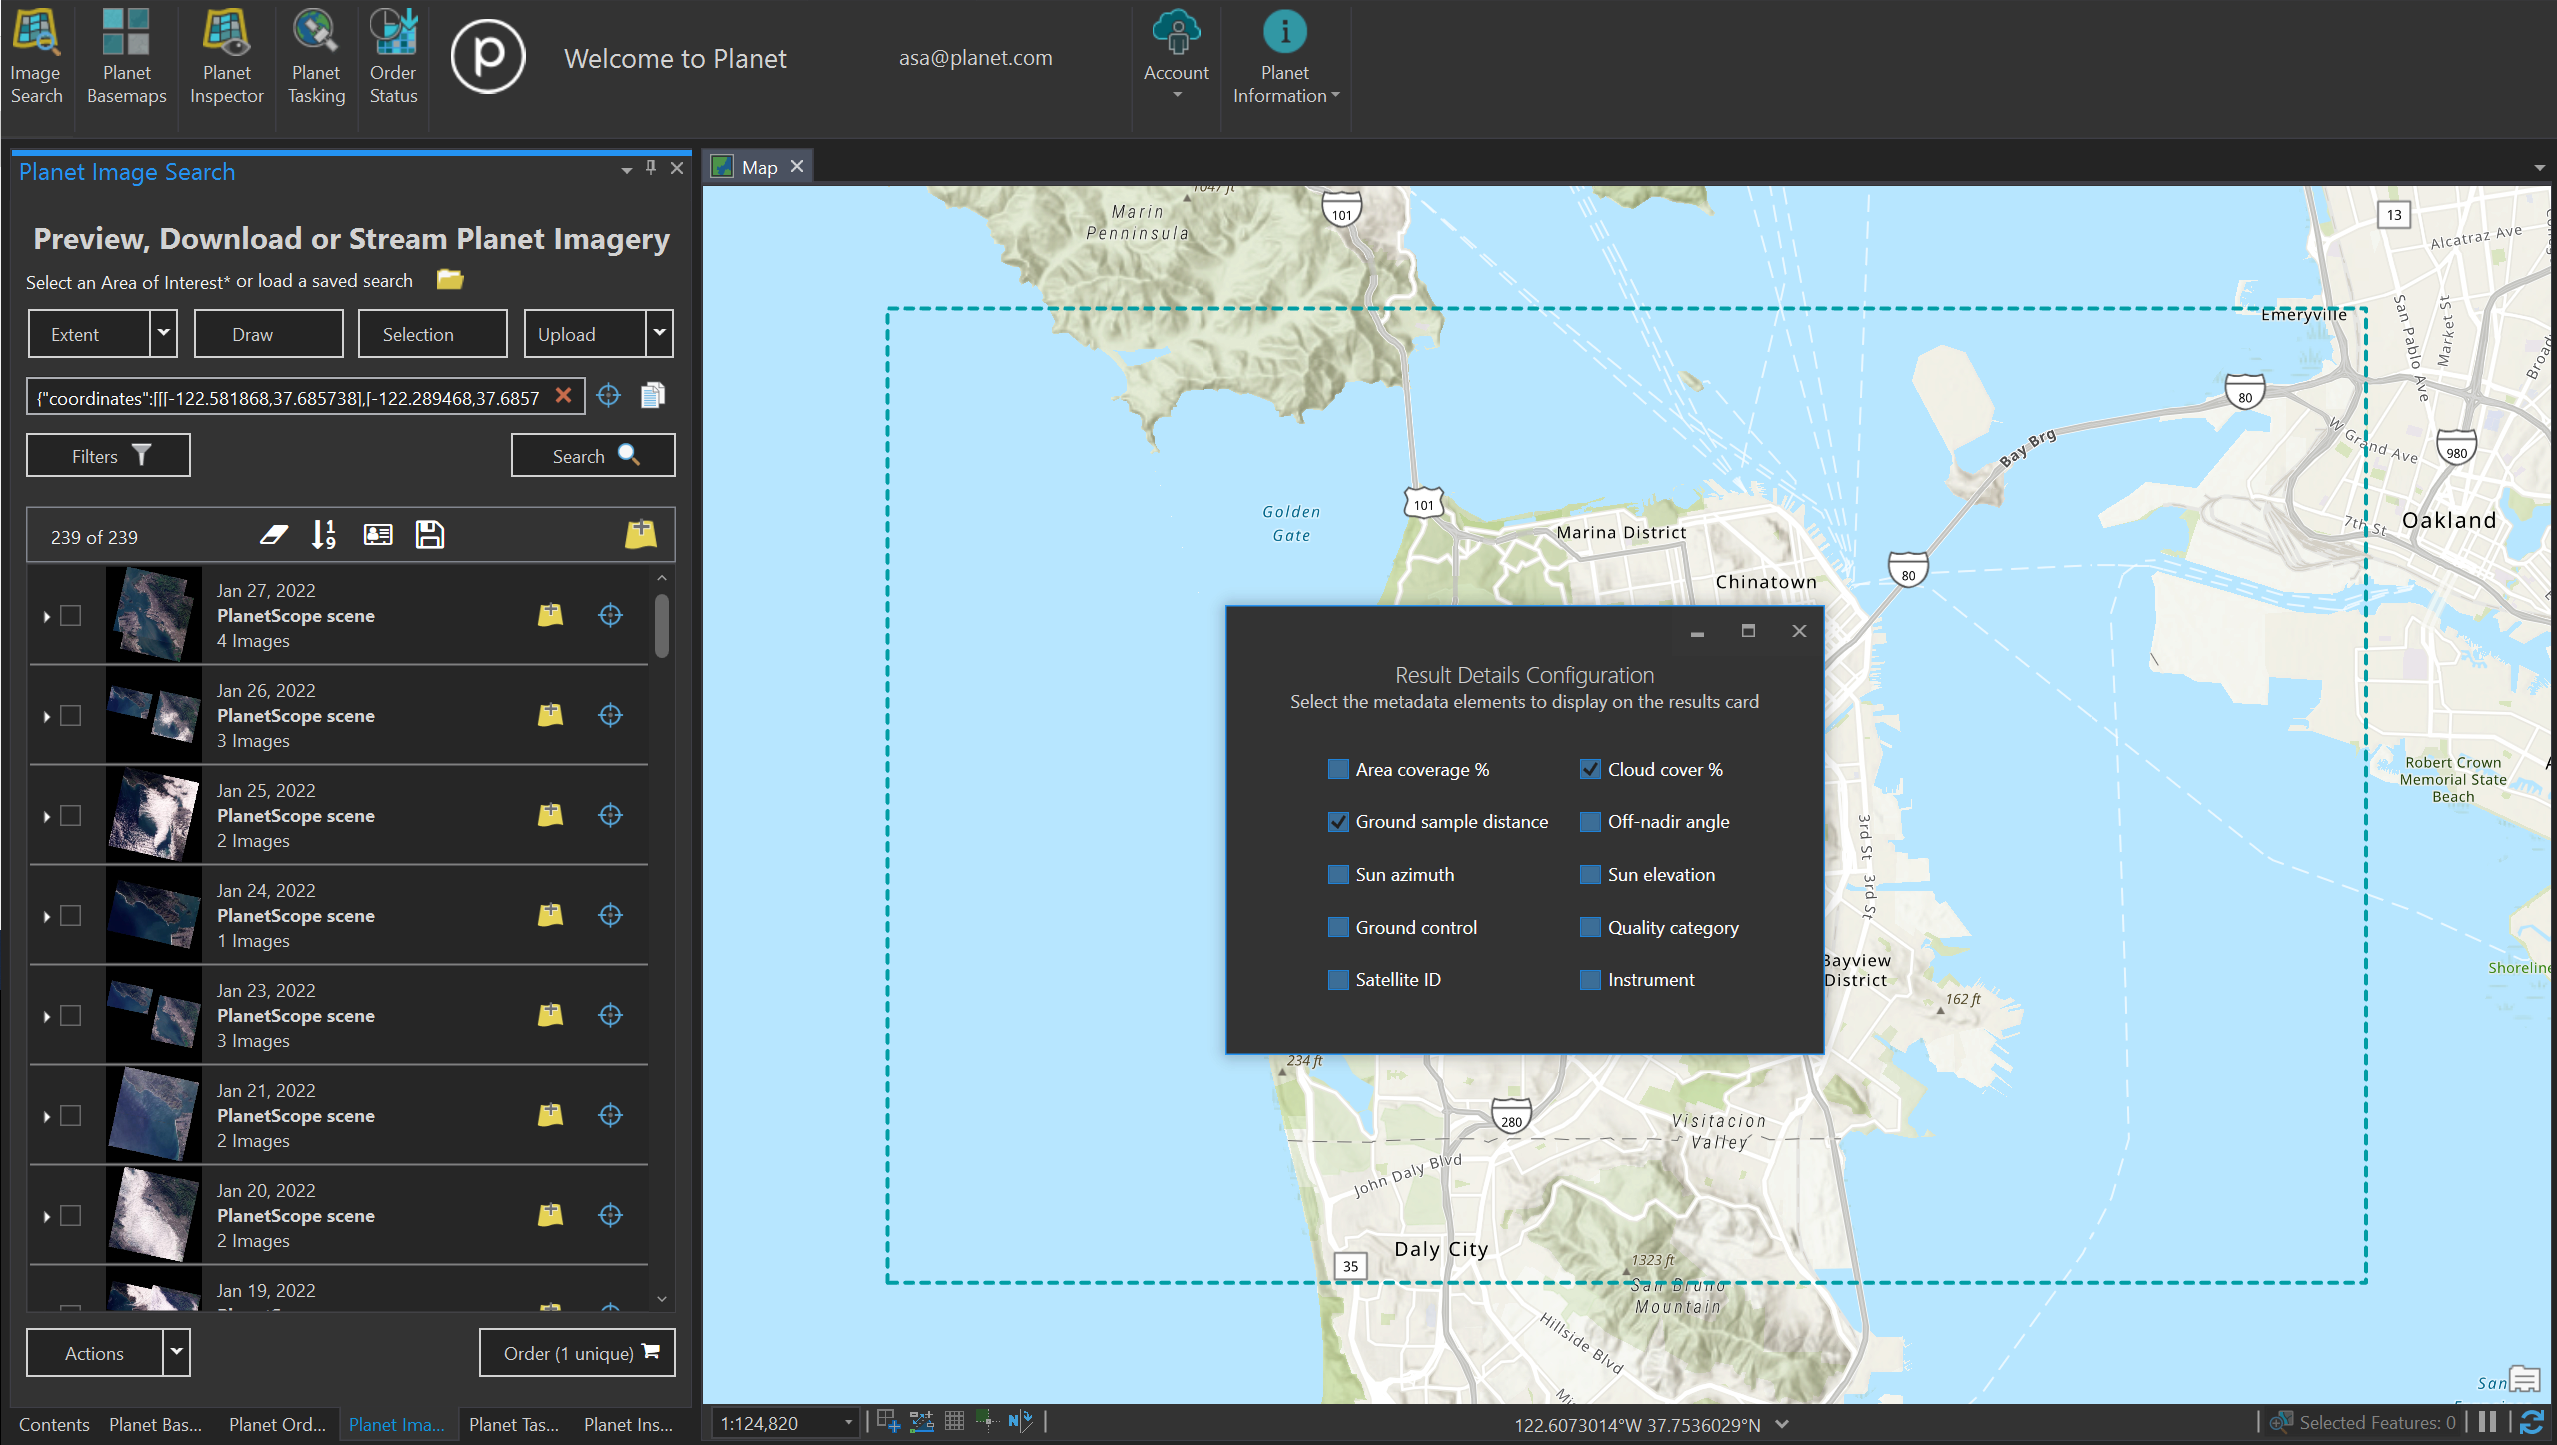
Additionally by selecting the configure results metadata card above the search results, you can adjust the default metadata fields that are displayed for each individual image so that you can inspect each result in greater detail and display the metadata most important to your curation.
Version 2.2 image search updates
In 2.2, you won’t see PSScene3Band or PSScene4Band imagery types anymore in the Imagery Search Panel filters. Instead, you’ll be able to search for 3, 4, and 8-band PlanetScope imagery using PlanetScope Scene and applying spectral band filters.
Search for PlanetScope imagery by bands
In the new image search panel, you’ll be able to search for PlanetScope imagery by selecting “PlanetScope Scene”.
To filter your results to see images that have at least 4 spectral bands (vis, NIR) select the “Near-infrared (NIR)” check-box under the “PlanetScope Only Filters”. Applying this filter returns images that have at least visible and near-infrared bands, but may also have coastal blue, green II, yellow and red edge bands.
To filter your results to only 8-band PlanetScope images, select the “Coastal blue, green II, yellow, red edge”. Once applied, this returns only PlanetScope images that have 8 spectral bands. Note that you cannot select “Coastal blue, green II, yellow, red edge” without also selecting “Near-infrared (NIR)” because NIR data is included in 8-band images.

Search for PlanetScope imagery by other filters
You can further refine your search using the “Instrument Filters” to see PlanetScope images specific to PlanetScope satellite sensors like Dove Classics, Dove Rs, and Super Doves. Earliest Dove Classic (PS2) imagery available on July, 2014 to April 29, 2022. Earliest Dove R (PS2.SD) imagery available is on March, 2019 to April 22, 2022. Earliest Super Dove (PSB.SD) imagery available is mid-March, 2020 to current monitoring.
Under “Advanced Filters”, you’ll find additional filtering options such as “Include only surface reflectance” that, once applied, only return PlanetScope (or SkySat) images that have a surface reflectance asset.
Save search
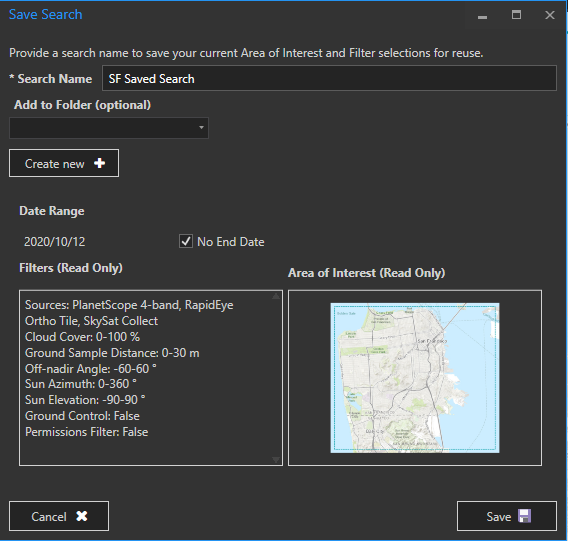
Users executing a similar imagery search many times may be interested in saving that search so that it is easier to recreate. Planet ArcGIS Add-In users can now save their search, which preserves their search filters including their AOI, by selecting the save icon above the search results.
Give your search a name and specify if you’d like to remove the start or end date. Removing the end-date, for example, ensures your saved search applies to new imagery as it becomes available.
Save Searches are portable across the Planet Platform. i.e., Saving a search in ArcGIS will allow you to access that same saved search in Planet Explorer, and vice versa.
Updating saved searches to PlanetScope Scene
For saved searches created using legacy item types like PSSscene4Band or PSScene3Band you will be prompted to update to the new PlanetScope scene item type. If your saved search was created for 4-band images, updating to PlanetScope scene applies the “Near-infrared (NIR)” filter.
Stream preview imagery
For each search result, you can stream preview images into Pro by selecting the “Add images to map” icon right of each search result. We refer to these image tiles as “previews” because they are “browse” quality tile layers that are not full-resolution or full-bit depth and don’t contain any multi-spectral information.
Users can also stream multiple results to their ArcGIS Pro map as preview layers by selecting each result and then clicking the “Add all preview layers to the map” icon above the search results.
Order and download imagery
ArcGIS Add-In users can download Planet imagery directly within ArcGIS Pro. Ordering and downloading imagery will provide access to full bit-depth, multi-spectral geotiff(s) for your selected imagery scenes.
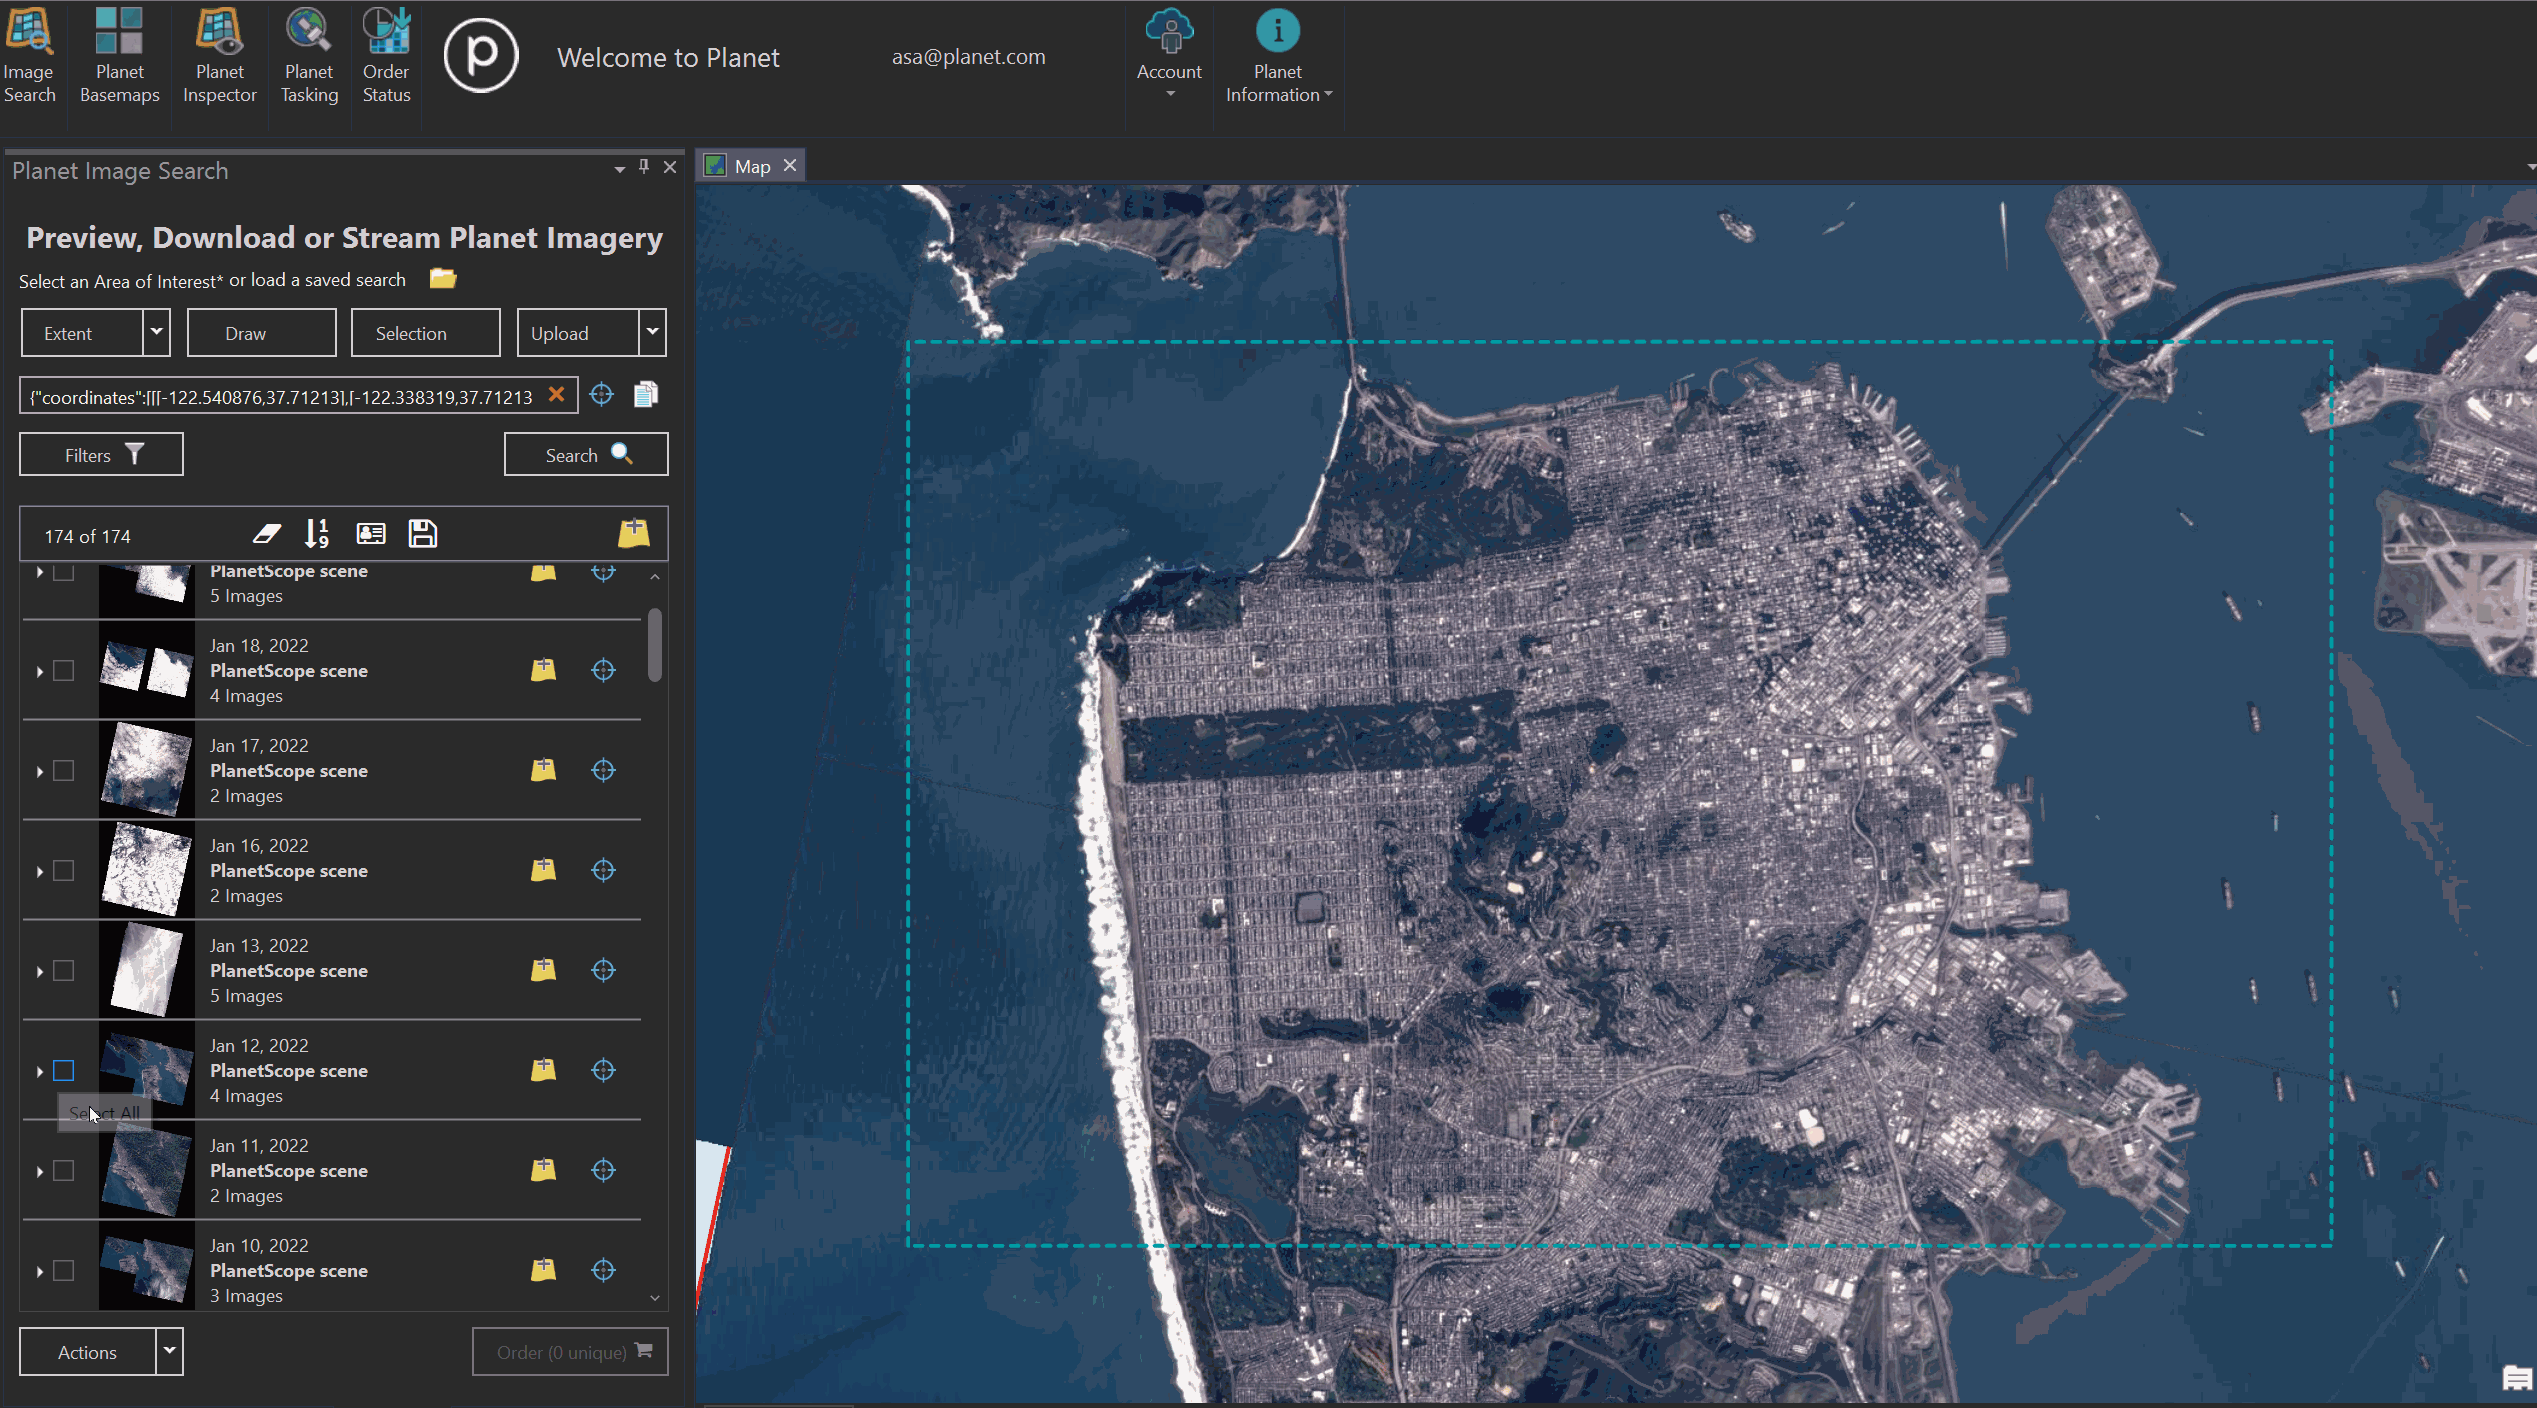
To place an Imagery Order, select the images you’d like to download from the Image Search panel using the check-boxes left of each image. Then select “Order” from the bottom-right of the Imagery Search Panel.
This will pop open an Order Imagery window in ArcGIS Pro. This will pop open an Order Imagery window in ArcGIS Pro. This window will walk you through 3 steps to download your images. This order checkout process is new to the Add-In with V2.1.
Step 1.) Name your Order. Give your order a name, and optionally if the default asset selection on the right hand side is what you’d like to order, you can go ahead and click Order and be done at Step 1.
Step 2.) Select Assets. Select from a list of “rectified assets,” or expand the “Show More” drop down list to select “unrectified” assets.
Step 3.) Tools and Review. Review your order by screening the selected thumbnails, and optionally select to “clip” your images to your AOI(s). Clip in the ArcGIS Add-In now supports arbitrary polygons as well as multipolygons, so long as the vertices count is less than 500.
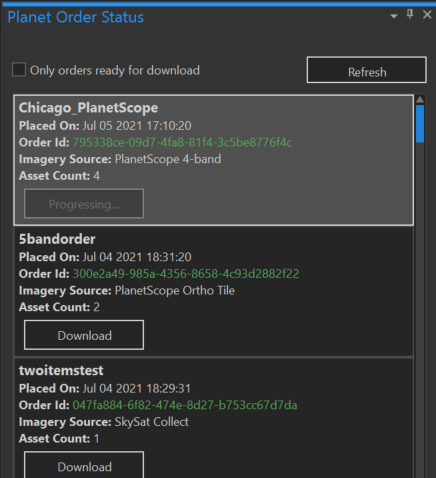
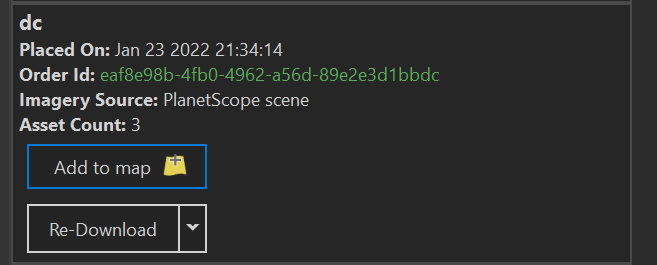
Once an order has been placed you can monitor your order and download it (once available for download) from the Planet Order Status Panel. The Order Status Panel will include orders for imagery scenes and Basemap quads. Once an imagery scene is available for download a “Download” button will be available for the Order. If you’ve already downloaded an order before, there will be an option to “Re-Download”. You can also “Open order folder” which will open the file location you originally downloaded the imagery to.
The Order Status Panel in 2.1+ will also include metadata about your order, including the Order ID, which will link out to the Planet's Order Status page where you can find even more details about your Order Status and inspect issues if any occur.
Add imagery to your map
Once your order has finished processing you can download or “add to map”. Adding to map using the button provided in the Order Status Panel will automatically render your data in true color RGB.
We are continually working to improve our technical documentation and support. Please help by sharing your experience with us.