Introduction
This tutorial will cover how to build a basic web mapping application that utilizes Planet's APIs.
The first few sections cover basic Web Development principles, Planet APIs, and Mapping Libraries. If you are familiar with these topics and just want to start with code, jump to the Writing the App section.
If you would rather view this content video form, you can watch the session "Build Web Applications with Planet data and APIs" from Planet Explore 2020. You can download the sample code for that session here.
Before you start
You will find tutorial this useful if you want to do any of the following:
- Develop a web application that uses Planet's APIs
- Use Planet data with a web mapping library, such as OpenLayers or Leaflet
This is an intermediate tutorial. While it will cover the basics of web mapping, you should already be familiar with the following concepts:
- Web Application Development — JavaScript, CSS, and HTML
- Command Line Interface (CLI)
- Basic spatial concepts
- REST APIs
- Web ("slippy") maps
For coverage of some of these topics, review the Planet 101 section of the Planet School.
Why Make a Web Application?
Web Maps provide many benifits when compared to traditional Desktop GIS, but have their own set of drawbacks. Consequently, it is useful to review both the benefits and limitiations of web app development in general, and web mapping in particular.
The most common benefit web apps provide is accessibility.
Most modern data and service providers expose Application Programing Interfaces (or APIs) for accessing more complex capabilites, often exposed through the web. While useful and versatile, these APIs aren't epecially user-friendly, particularly if you only need one specific capability. You can often make a Web App that takes advantage of a specific feature of an APIs and provides a much nicer user experience relatively easily.
Additionally, since web apps are served over the web, they are both multiplatform and easy to distribute (as opposed to desktop apps, which often require custom installers and other special considerations for each platform you want to support).
These days, web development is a very broad field, which means there many different libraries and frameworks available to handle any number of things you might want to do, making web dev fairly approachable to new developers.
There are some use cases you should avoid when considering whether to make a web app.
The major one is heavy data processing - JavaScript keeps getting more efficient (and browsers more powerful), but its still a fairly slow programming language, and many users have limited hardware. Instead, you should leave the heavy lifting to desktop applications or dedicated servers. You can still expose any results of such processing through a web app using your own APIs.
The GIS sphere has a particularly large number of processiong-intensive use cases - a couple specific things to avoid are:
- Raster transformations (including reprojection, and band math)
- Bulk data operations (anything touching more than around 100 MB data or 10,000+ features)
Common use cases that are a good fit for web apps include:
- Rendering web tiles
- Overlaying vector data raster basemaps
- Searching, filtering, and browsing spatial data
Planet Data in Web Maps
Planet provides both data and APIs that you can make use of in your web maps. We also host several web applications that expose this data, which may be an easier alternative to making your own web app.
Planet Explorer is our flagship web application. Its core function is to search and view Planet data, and to order that data for local (or cloud) delivery. If you are thinking of making a web app for some purpose, its a good idea to see if Explorer already does the thing you need. If it doesn't, Explorer still provides an example of a large web application that utilizes Planet APIs and may help inform how you want to structure your own app. For more information on Planet Explorer, refer to the Planet Apps page
When making a web map that uses Planet data, you'll want to make sure you are familiar with Planet's APIs For detailed information about these APIs, refer to the Planet APIs page.
The following sections will provide a brief summary of each within the context of web mapping.
Tiles API
The Tiles API serves tiles of Planet imagery. These tiles can then be used by a mapping library to display a map in a web-friendly manner. All the images you see in Planet Explorer are served via the tiles API. If you're making a web app, you will most likely be using this API.
If you are new to web mapping, you may be wondering what exactly is a tile? If so, review XYZ Tiles and "Slippy Maps", as it provides a good overview of this topic.
A mapping library will keep track of what tiles correspond to your current zoom level and viewport, and request only those tiles for display.
The Tiles API provides both XYZ and WMTS endpoints, and exposes tiles for basemaps and items (although items are only available as XYZ). In general, these endpoints are structured as follows:
Basemap
- XYZ:
https://tiles.planet.com/basemaps/v1/planet-tiles/BASEMAP_NAME/gmap/{z}/{x}/{y}.png - WMTS:
https://api.planet.com/basemaps/v1/mosaics/wmts(Individual tile URLs are the same as XYZ, above)
Item
- XYZ:
https://tiles.planet.com/data/v1/ITEM_TYPE/ITEM_ID/{z}/{x}/{y}.png
Basemaps API
The Basemaps API provides utilities for searching available Planet basemaps by TOI, AOI, or other metadata. In this context, "basemaps" are harmonized imagery covering a large area (as opposed to scenes, described later).
You will still need to use the Tiles API to display these basemaps, but this API can let you find basemaps that match certain critera, and provide the tile URLs you'll use to display them. If your app uses a fixed tileset, you might only use this API manually while developing the app, to find the tileset you'll use
Alternatively, if you want to support a dynamic set of basemaps, you can integrate this API into your app. For example, if you want to include a time slider to change the displayed map based on the corresponding time, you can use this API to search for basemaps within a given TOI, and new times will automatically show up in the app as soon as they are available from the Planet Platform.
Data API
The Data API provides utilities for searching Planet scenes and items (raw imagery captured by a sattelite) This is normally the first API you'd encounter when using Planet imagery, but it is a little less useful in web mapping context, as basemaps are more visually coherent within a web map. Additionally, nearly all the capabilities of the Data API are already available through Planet Explorer, so if you want a UI on top of the Data API Explorer already fills that need.
However, if you have a use case that requires viewing individual items you can use the Data API to find those items. You will still need to use the Tiles API to actually display the items. The vector geometry and bounds of the item are provided by the Data API, and can be used directly.
If you do use the Data API in your web app, the @planet/client JavaScript library serves as an easy-to-use wrapper for most of its capabilities. I reccomend using it either if you have multiple users with their own API key (I'll go into more details on such use cases later), or want to use the basic capabilities of the Data API in your app.
Analytics API
The Analytics API allows you to search for Planet Analytic Feeds and view feed metadata
Planet provides two types of Analytic Feeds:
- Classification feeds. These feeds are served as basemaps, so while you can discover them using the Analytics API, you must use the Tiles API to display them.
- Object detection feeds. The geometry of these feeds can be retrieved directly from the Analytics API, and then displayed using a mapping library.
This API is best used in conjunction with basemaps to highlight some feature or class.
Orders API
The Orders API allows you to order items for local or cloud delivery. Much like the Data API, the Orders API is less useful for web apps, both because it is more applicable to desktop applications, and because Planet Explorer already exposes much of its functionality.
Tasking API
The Tasking API allows you to task specific locations for high-resolution imaging. This API was released relatively recently compared to the others, so it hasn't seen much use yet in web mapping contexts, but Planet does provide a Tasking Dashboard to expose this capability as a web app.
Web Mapping Libraries
In order to actually visualize the tiles and other data obtained from Planet's APIs, you'll need a web mapping library.
There are a number of different mapping libraries available. As such, it is generrally a good idea to pick the one that best fits your use-case. However, all of them can do basic web mapping, so if there is one you are already familiar with and you have a simple use case, you can just use the one you already understand.
The two most popular general-purpose libraries are OpenLayers and Leaflet, both of which are free and open-source.
Additionally, most commercial GIS providers distribute their own mapping library for integrating with their systems. These include (but are not limited to) ESRI ArcGIS, Google Maps, Microsoft Bing Maps, and MapBox GL JS. If you are already using one of these platforms, then you'll most likely want to use the matching library.
Leaflet
Leaflet is a lightweight mapping library that is good for simple applications. It is small, fast and efficient. Leaflet supports all basic mapping tasks, but lacks more advanced capabilities. I recommend using it if you want to get a simple web map working quickly.
Sample code for creating a Leaflet web map:
const map = L.map('map').setView([37.783, -122.395], 12);
L.tileLayer(
  'https://tiles.planet.com/basemaps/v1/planet-tiles/global_monthly_2020_01_mosaic/gmap/{z}/{x}/{y}.png?api_key='
  + getPlanetApiKey(),
  {
    id: 'global_monthly',
    maxzoom: 22
  }).addTo(map);
OpenLayers
OpenLayers is a comprehensive mapping library that has been under continuos development since 2006. It has a large feature set, and is readily extensible, so you can use it to do just about anything. However, this does come at a cost - the distributable is more than 10 times the size of Leaflet, and the library itself can be complicated to use. I would recommend using OpenLayers if you want to do something more complicated, or need to build a customizable web map integration.
Sample code for creating an OpenLayers web map:
const map = new Map({
 target: 'map',
 layers: [
   new TileLayer({
     source: new XYZ({
       url: 'https://tiles{0-3}.planet.com/basemaps/v1/planet-tiles/global_monthly_2020_01_mosaic/gmap/{z}/{x}/{y}.png?api_key='
            + getPlanetApiKey()
     })
   })
 ],
 view: new View({center: fromLonLat([-122.395, 37.783]), zoom: 12})
});
Other Tools
In addition to web mapping libraries, you'll also need a few core JS tools to manage basic functions. If you are already familiar with web development, you can skip this section.
Node.js and npm
Node.js is a local JS runtime, used to run JS on desktop systems when developing an app. npm is the node package manager, used for downloading libraries and managing your own application, and is bundled with Node.js. While you can technically do web dev without these, you should use them, they'll make development a lot easier.
Code Editor
To actually write your app, you'll need a code editor. This can be a dedicated JavaScript development environment like VSCode, or a plain text editor such as Notepad++, Sublime Text, or emacs.
Web Frameworks
Web Frameworks provide a variety of tooling for app development and composition, and should generally be used for any nontrivial app. Some of the most popular are React, Vue, and Angular. If your organization favors a particular one, use that, as it makes it easy to trade elements between individual applications. Most mapping libraries either integrate naturally with these frameworks or have additional integration libraries.
Writing the App
Now that I've gone over everything needed to make a web map, I'll walk through creating a simple web map.
Prerequisites
- Node.js
- A Planet Account, with streaming access to basemaps or other imagery
Initialization
The first thing to do before writing any code is to setup the app.
If you don't already have have Node.js installed, do that first.
Then, create a new empty directory for your app code to live in.
If you are using a web framework, this is where you would initialize a blank project in that framework. Since this sample app is a trivial example, we'll just use npm init to create an empty Node app:
npm init
Now, install any dependencies - here we are using OpenLayers and the Planet JS client:
npm install --save ol @planet/client
The --save argument tells npm to save these as dependencies in the package.json file that describes our app (which was created by npm init)
Note:
While this example uses OpenLayers, you can change it to use another mapping library by replacing the contents of index.js with the approapriate code snippet from the Web Mapping Libraries section, above. You'll also need to install the alternate mapping library - e.g. use npm install --save leaflet to install Leaflet.
Content
We can now start adding content to the app. All web apps are made of 3 main types of files:
- Layout (HTML)
- Style (CSS)
- Script (JS)
I'll start by creating an index.js file in the src subfolder, with corresponding index.html and index.css files in the dist subfolder.
The index.html file describes the structure of the app. Most of the actual functionality will be handled by the .js file, so this is pretty basic - it includes a page title, some metadata, a header, and a spot for the map, as well as imports for the css and js files.
dist/index.html:
<html>
<head>
 <meta charset=utf-8 />
 <title>Planet Webmap App</title>
 <link rel="icon" href="favicon.ico" />
 <meta name='viewport' content='initial-scale=1,maximum-scale=1,user-scalable=no' />
 <link href="index.css" rel="stylesheet" >
</head>
<body>
 <noscript>
   You need to enable JavaScript to run this app.
 </noscript>
 <div>
   <header class="pl-header mdl-layout__header">
     <img src="planet_white.png" class="pl-logo" alt="logo" />
     <span class="flex-space"></span>
     <button id="logout" onclick="logout()">Sign Out</button>
   </header>
   <div id='map'></div>
 </div>
 <script src="./index.js"></script>
 <script src="./login.js"></script>
</body>
</html>
The index.js file describes the functionality of the app, which is to display a map. This example will use openlayers; if you want to see how to do the same thing in leaflet refer back to the Leaflet slide. For this map, we use the Planet global monthly mosaic for January 2020, with initial zoom level and viewport centered on downtown San Francisco. To find other basemaps you have access to and can add to your web map, you can use the Basemaps API - the following API request will list the 50 most recent basemaps available to you:
https://api.planet.com/basemaps/v1/mosaics?api_key={your api key}
src/index.js:
import Map from 'ol/Map';
import View from 'ol/View';
import TileLayer from 'ol/layer/Tile';
import XYZ from 'ol/source/XYZ';
import { fromLonLat } from 'ol/proj';
import 'ol/ol.css';

import {getPlanetApiKey} from './login.js'

const map = new Map({
 target: 'map',
 layers: [
   new TileLayer({
     source: new XYZ({
       url: 'https://tiles{0-3}.planet.com/basemaps/v1/planet-tiles/global_monthly_2020_01_mosaic/gmap/{z}/{x}/{y}.png?api_key=' + getPlanetApiKey()
     })
   })
 ],
 view: new View({
   center: fromLonLat([-122.395, 37.783]),
   zoom: 12
 })
});
Last but not least, the .css file describes the styling of the app, or how everything looks. Since the mapping library we are using includes its own styling for the map components, we just need to style the header, and reserve a space for the map.
dist/index.css:
body {
 margin: 0px;
}

#map {
 position: absolute;
 top: 70;
 bottom: 0;
 left: 0;
 right: 0;
 width:100%;
}

.pl-logo {
 height: 50px;
 margin: 10px;
}
.flex-space {
 flex-grow: 1;
}
.pl-header {
 background-color: #282c34;
 align-items: flex-start;
 color: white;
 display: flex;
 align-items: center;
}
Authentication
Before continuing with the example, I'd like to go into a brief aside about authentication.
Planet APIs use an API key for authentication. This is a secret sequence of characters used to provide access to our APIs to a single user (be that a person or an organization). You should not expose your API key publicly, which in most cases means it should not be included in source of a web app. However, you still need to use the API key to access the imagery being displayed. The method for accomplishing both these requirements will differ depending upon your use case:
- If all users of your app have their own Planet Account (and corresponding API key), you can use the auth capabilities included in the @planet/client library and allow each user to log in to planet. While this still results in including an API key in requests from the app, you are sending the API key of the user using the app, so the only api key visible is their own. This is the approach Planet Explorer takes, and is what we will be using in this example.
- If instead you want a public app where unauthenticated users can view map tiles, you should set up a proxy server that intercepts valid, authorized requests from your app and appends a service-level API key. This does raise other secrity concerns (such as random users consuming all your tile quota.). Implementation of this is out-of-scope for this presentation.
- If you have an internal-only or single-user app, it is reasonable to use a fixed API key, but this is still not reccomended. If you must use this approach, you should at least use an environment variable or secret store to make it easy to change and avoid leaking it through a file share or version control system.
Adding a Login Page
Note:
If you do not have a Planet Account, skip this section, and modify the app to use a basemap that doesn't require authentication:
- Edit src/index.js and replace the line
url: 'https://tiles{0-3}.planet.com/basemaps/v1/planet-tiles/global_monthly_2020_01_mosaic/gmap/{z}/{x}/{y}.png?api_key=' + getPlanetApiKey()with a freely available basemap, such as OpenStreetMap:url: 'https://{a-c}.tile.openstreetmap.org/{z}/{x}/{y}.png' - Edit src/index.js and remove the line
import {getPlanetApiKey} from './login.js' - Edit dist/index.html and remove the line
<script src="./login.js"></script>
To implement these authentication recommendations, we're going to add a new page that presents a login dialog and saves the API key to local storage Create login.html, to define a dialog with username and password fields and login.js for the login functionality:
dist/login.html
<html>
<head>
 <meta charset=utf-8 />
 <title>Planet Webmap Login</title>
 <link rel="icon" href="favicon.ico" />
 <meta name='viewport' content='initial-scale=1,maximum-scale=1,user-scalable=no' />
 <link href="index.css" rel="stylesheet" >
</head>
<body>
 <noscript>
   You need to enable JavaScript to run this app.
 </noscript>
 <div id="login-container">
   <div class="login-modal">
     <div class="login-dialog">
       <div class="pl-header"><img src="planet_white.png" class="pl-logo" alt="logo" /></div>
       <div class="login-body">
         <div><input id="email" type="text" placeholder="Email address" name="email" required></div>
         <div><input id="password" type="password" placeholder="Password" name="password" required></div>
         <div><button id="login" onclick="login()">Sign In</button></div>
         <div id="error">Error: Invalid email or password</div>
       </div>
     </div>
   </div>
 </div>
 <script src="./login.js"></script>
</body>
</html>
src/login.js:
import '@planet/css/lib/main.css'
import auth from '@planet/client/api/auth';
const STORAGE_KEY = 'planet-token-4ux3ak8eqtypr4dh';
const sessionStorage = window.sessionStorage;

function login() {
 const email = document.getElementById('email')
 const password = document.getElementById('password')
 const response = auth.login(email.value, password.value).then(() => {
   if (auth.getToken()) {
     sessionStorage.setItem(STORAGE_KEY, auth.getToken());
     email.value = '';
     password.value = '';
     window.location.href = '/';
   }
 }).catch(error => {
   password.value = '';
   document.getElementById('error').style.visibility = 'visible';
 })
}
function logout() {
 auth.logout()
 sessionStorage.removeItem(STORAGE_KEY);
 window.location.href = '/login.html';
}
export function getPlanetApiKey() {
 return auth.getKey();
}
window.auth = auth;
window.login = login;
window.logout = logout;

const storedToken = sessionStorage.getItem(STORAGE_KEY);
if (storedToken) {
 auth.setToken(storedToken)
} else if (window.location.pathname != '/login.html') {
 window.location.href = '/login.html';
}
Additinally, add styling rules to the existing index.css file for the new dialog and the logout button in the header of the index page:
dist/index.css:
button {
 border-radius: 5px;
 border-width: 1px;
 padding: 5px 10px;
}
.pl-header > button {
 color: white;
 background-color: transparent;
 border-width: 2px;
 margin: 10px;
}
#login-container {
 position: absolute;
 top: 0;
 bottom: 0;
 left: 0;
 right: 0;
 width: 100%;
 height: 100%;
}
#error {
 visibility: hidden;
 color: red;
}
.login-modal {
 background-color: rgba(0, 0, 0, 1);
 width: 100%;
 height: 100%;
 display: flex;
 align-items: center;
 justify-content: center;
}
.login-body {
 margin: 10px
}
.login-body > * {
 margin: 5px;
}
.login-dialog {
 display: inline-block;
 background-color: white;
 border-radius: 5px;
 overflow: hidden;
 text-align: center;
}
.login-body > div > input {
 width: 100%
}
.login-body > div > button {
 border-color: black;
 color: white;
}
.login-body > div > button {
 color:black;
 border-color: black;
 background-color: white;
}
I'm not going to go into too much detail about how this all works, since the focus here is on the map portion. You can download all the example app files here if you run into any problems getting these changes to work.
Packaging
The last step before the app is ready to run is to handle packaging
Because we rely on third-party libraries for the mapping and authentication functionality, we must include them in our app somehow. You could just link them from index.html, but this gets difficult to maintain with lots of dependencies, so instead we'll add a build step to package.json that does this for us. We'll also add some devDependencies that will be used to actually do the packaging. These dependencies are only used to assist app development, and are not included in the app itself. Modify package.json to have the following content:
package.json:
 "name": "planet-webmap",
 "version": "1.0.0",
 "private": true,
 "scripts": {
   "build": "webpack",
   "clean": "rm -rf dist/*.js",
   "serve": "webpack-dev-server"
 },
 "dependencies": {
   "@planet/client": "^3.0.0",
   "ol": "^6.3.1"
 },
 "devDependencies": {
   "css-loader": "^3.5.3",
   "file-loader": "^6.0.0",
   "style-loader": "^1.2.1",
   "webpack": "^4.43.0",
   "webpack-cli": "^3.3.11",
   "webpack-dev-server": "^3.11.0"
 },
 "browserify-css": {
   "autoInject": true,
   "minify": true,
   "rootDir": "."
 }
}
In addition to the new content in package.json, we also need a configuration file for the packaging. This defines the input and output files, as well as loaders for handling certain file types, like css (since we are importing css files from the mapping library). Create a new file named webpack.config.js:
webpack.config.js:
const path = require('path');

module.exports = {
 mode: 'development',
 entry: {
   index: './src/index.js',
   login: './src/login.js',
 },
 module: {
   rules: [
     { test: /\.css$/, use: ["style-loader","css-loader"] },
     { test: /\.(png|jpe?g|gif)$/, use: [ 'file-loader' ] },
   ],
 },
 output: {
   filename: '[name].js',
   path: path.resolve(__dirname, 'dist'),
 },
 devServer: {
   contentBase: path.join(__dirname, 'dist'),
   compress: true,
   port: 9000
 }
};
Testing and Deploying
Finally, we are ready to build and run the app:
npm run build runs the build script to package the depdencies with your app, outputting the result to the dist folder.
npm run serve runs a local web server hosting this content on localhost:9000.
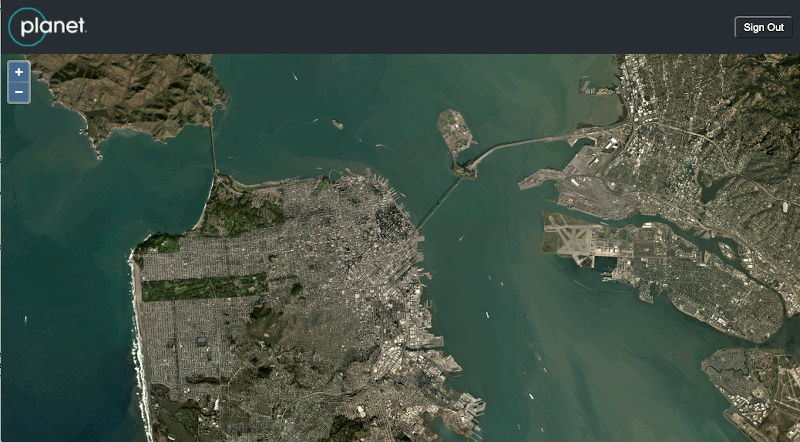
When first navigating to the app, you will be presented with a login dialog:
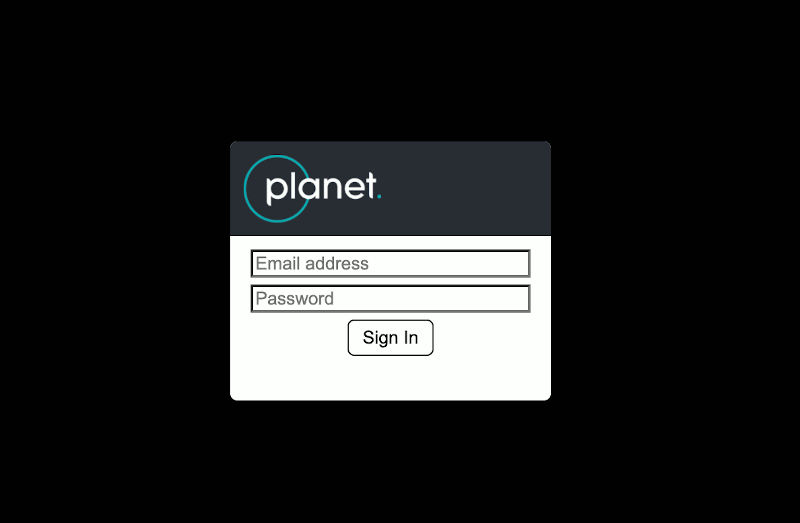
After entering your Planet credentials and clicking Sign In, the app should look something like this:
When deploying the app to a real webserver, you just need to run the build and then copy the contents of the dist folder to your server.
If you run into any problems building and running the app, you can download the full example app here.
Next Steps
This basic example web map is broadly applicable to most use cases, but to actually make it useful, you'll probably want to add more functionality. Depending upon what you need, the steps to do so may vary. Here are some resources to get you started:
Custom Controls
Custom controls can let you extend the capabilities of your web map beyond what is possible with the default functions provided by your mapping library. For example, you could add a time slider that incorporates the Basemaps API to swap between monthly basemaps, or a search box that uses the Data API to jump between different scenes. The methods for writing custom controls differs between the different mapping libraries, but here's some useful resources to get you started:
- Openlayers provides an example of a Custom Control. For your first attempt at custom OpenLayers controls, I'd reccomend copying that example and gradually modifying it to get something like what you want.
- The Leaflet Tutorials page includes a 3-part tutorial on Extending Leaflet; the third part covers custom controls.
Vector Data
While this example only covered map tiles, you can also display vector data (e.g. scene footprints from the Data API or Object Detections from the Analytics API).
- Openlayers provides examples of loading a GeoJSON object as well as a GeoJSON file. You can also apply custom styles to your vector layers.
- To add Vector data in leaflet, you can use the Polygon object. If you have GeoJSON data, you can just pass the
coordinatesof the GeoJSON geometry to the Polygon (Or PolyLine or CircleMarker, for line or point geometries, respectively).
Resources
Planet Resources
- Example Web Map code
- Developer Resource Center
- Planet Explorer
- Planet API Docs
- @planet/client on npm
Other Resources
Rate this guide: