Beginners QGIS Workflow with NICFI data
Introduction
This tutorial will cover basic raster operations in QGIS. You will first mosaic two basemap quads and then clip the mosaic to an area of interest. After clip, you are going to use Raster Calcualtor to perform NIDVI. The steps in this workflow are
- Mosaic Basemap Quads
- Clip to an AOI
- Create NDVI Raster
You can choose to follow all three of the steps, or only follow one step. The workflow is meant for beginners starting to work with NICFI data.
Before you start
- You will need QGIS installed on your machine to perform the raster operations in this tutorial. This tutorial is using QGIS version 3.12 but the raster operations should be available in all QGIS versions.
- You will need to download at least two basemap quads from Planet.
- You will need an area of interest that you want to clip the mosaic. Area of interest can be in GeoJSON or shapefile, and should work with all QGIS supported vector formats.
While this is a simple tutorial, it is recommended that you have basic familiarity with GIS concepts. You can find more on working with raster data in QGIS here.
1. Mosaic Basemap Quads
To start, open a QGIS project and add your GeoTiff basemap quads (It is assumed that you have the two basemap quads stored locally in your machine).
Loading Raster Data:
Layer > Add Layer > Add Raster Layer
On the pop up window, under source, click the "..." and choose your GeoTiff quads. More than one layer can be loaded at the same time by holding down the Ctrl and Shift key and clicking on multiple items. Click Add to add the quads to your project.
1.1 Merge two quads together:
- Click on Raster
- Hover over Miscellaneous
- Click on Merge
- On the Merge dialogue
- In the Input Layers click on ...
- In the Output data type choose Int16
- Click Run
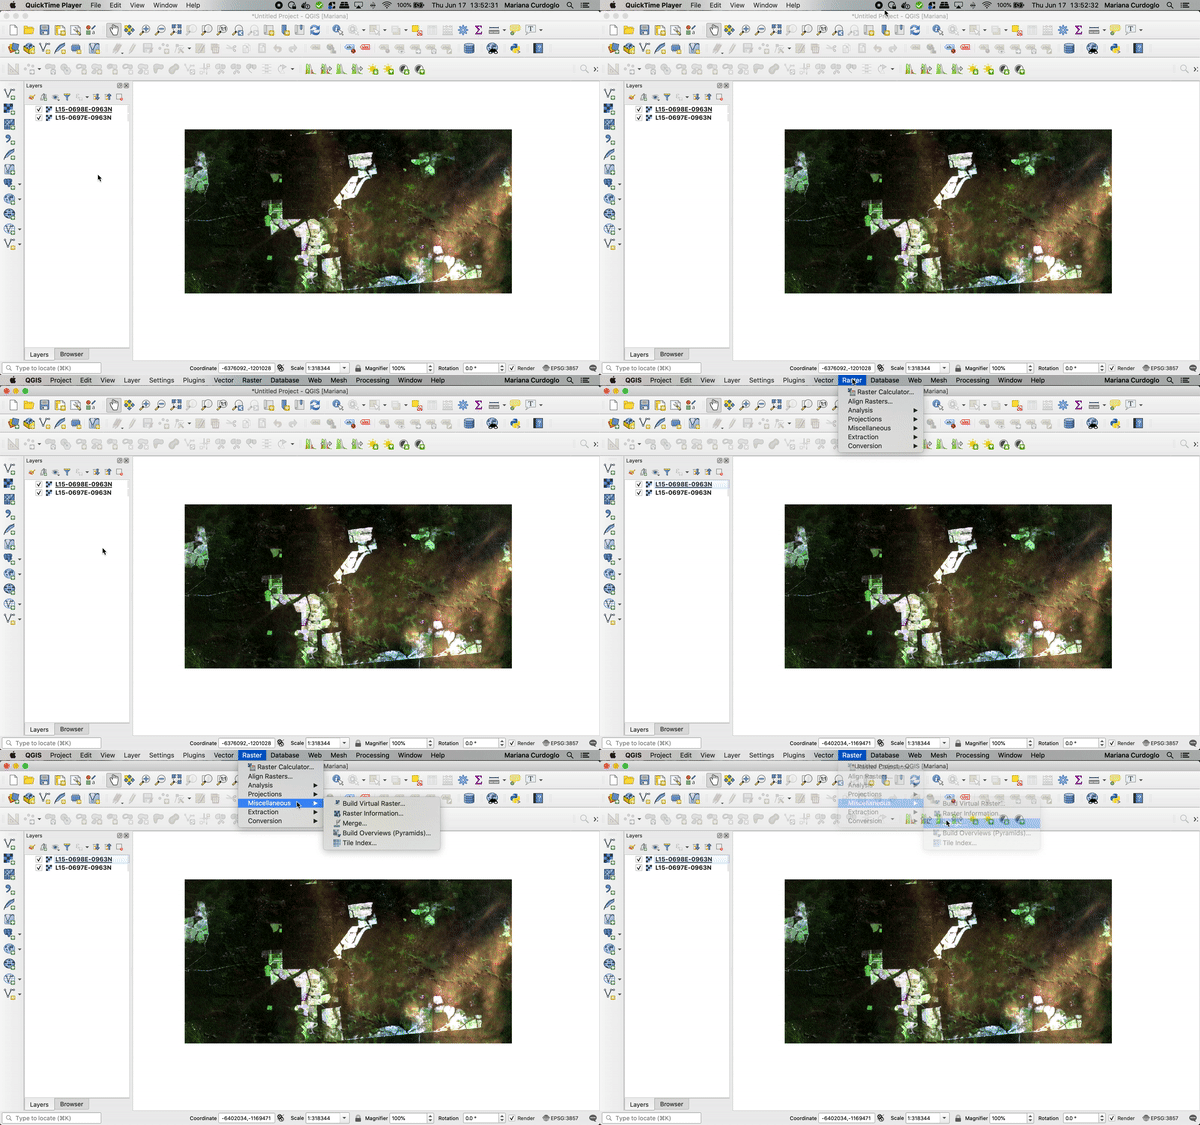
Good Job! You have merged multpile quads together!
1.2 Save the Merge output:
- Right click on the Merge output
- Export
- Click Save As
- Navigate to where you want to save your Merged GeoTiff and provide name
- Choose CRS (Planet mosaic quads are ESPG:3857 - WGS 84 / Pseudo)
- Click OK
2. Clip to an AOI
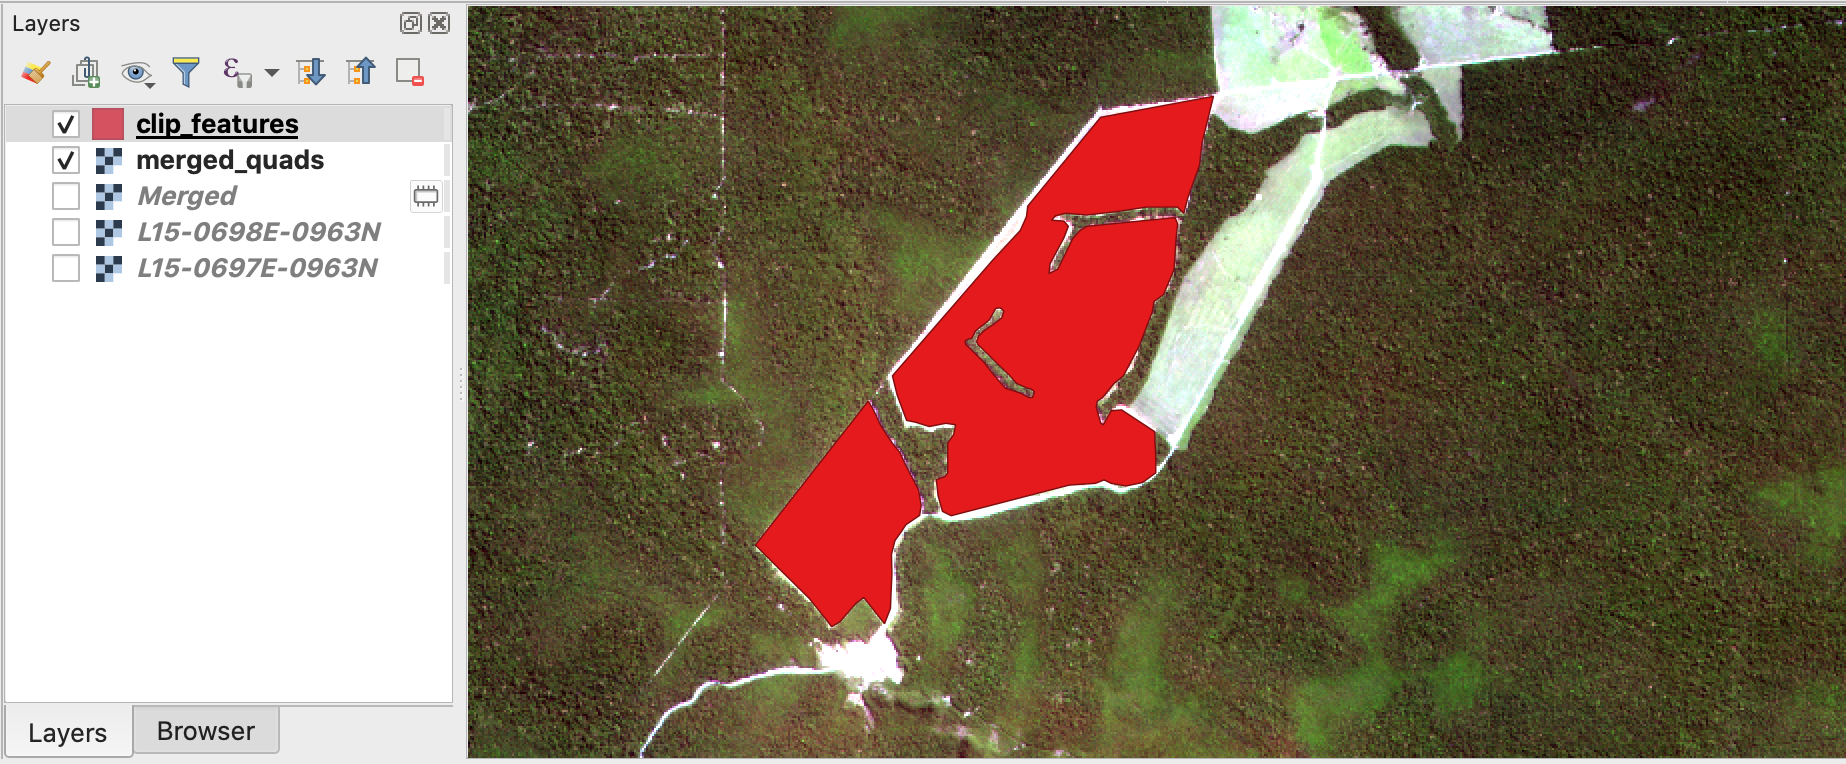
In this step, you are are going to clip the merged GeoTIFF to a area of interst (e.g. shapefile or GeoJSON).
Loading Shapefile Data:
Layer > Add Layer > Add Vector Layer
On the pop up window, under source, click the "..." and choose your clip file. As with the GeoTIFFs, more than one vector layer can be loaded at the same time by holding down the Ctrl and Shift key and clicking on multiple items. Click Add to add the quads to your project.
Example of merged quads before clip.
2.1 Clip the merged raster to features
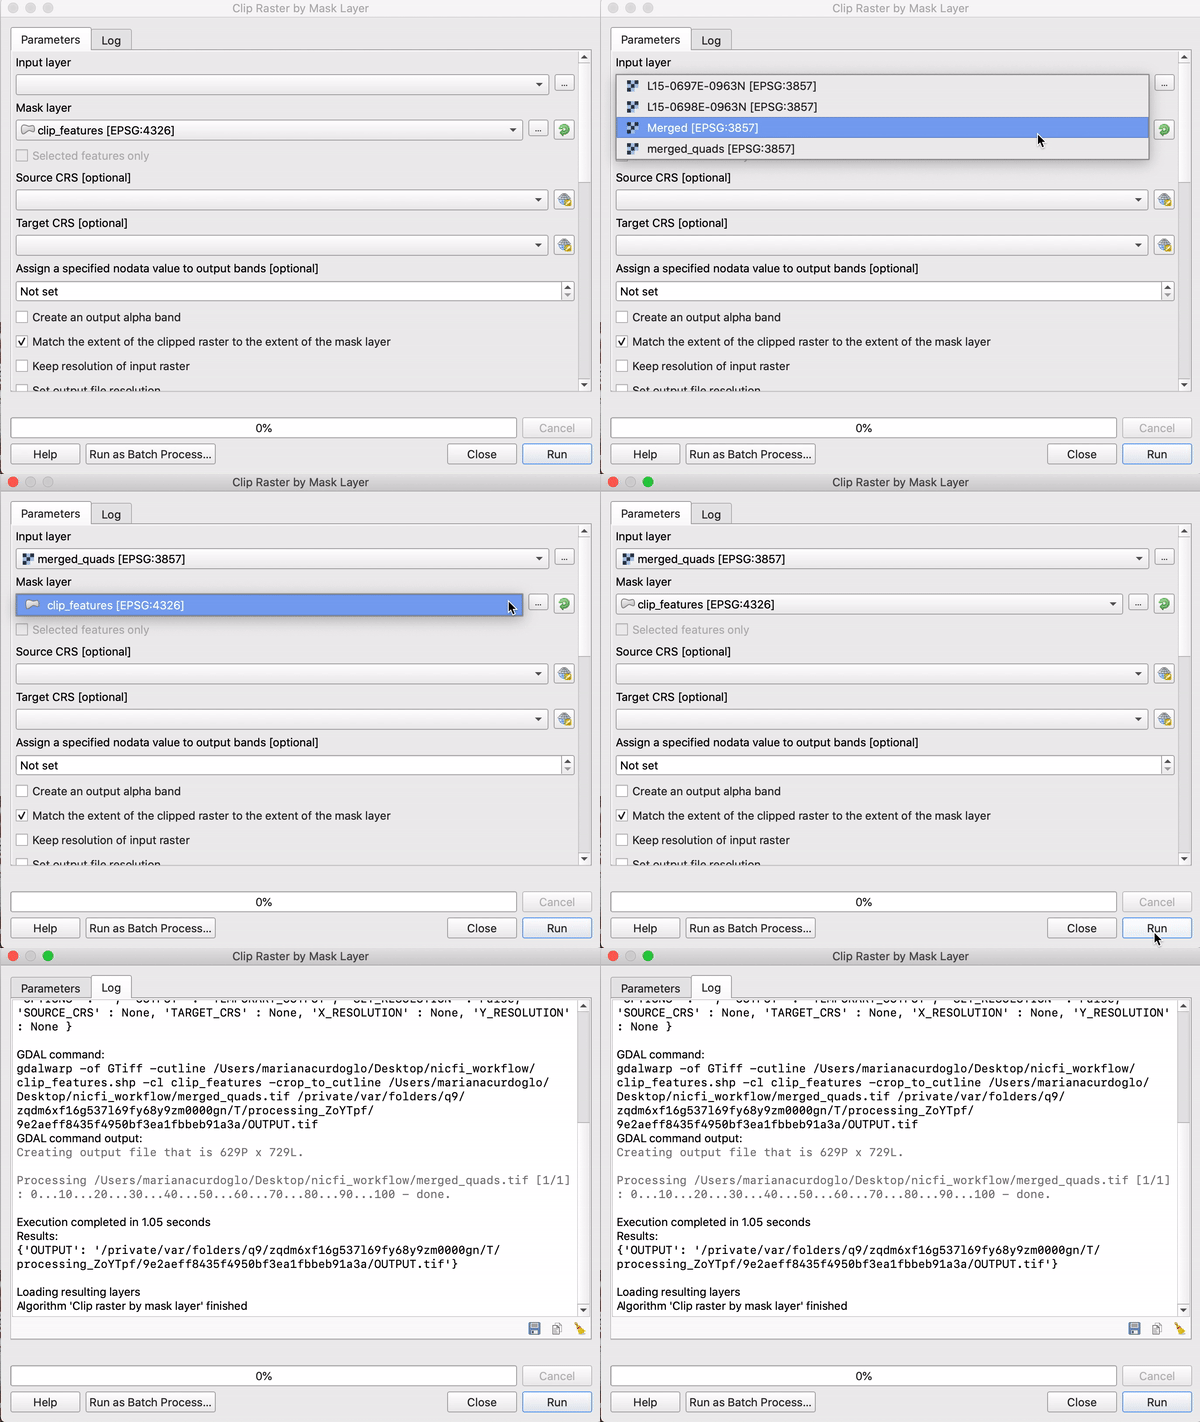
- Right click on Raster
- Hover over Extraction
- Click on Clip Raster by Mask Layer
- On the Clip Raster By Extent dialogue
- Select Input Layer (merged_quads.tif)
- Selet Mask Layer (clip_features.shp)
- Click Run
2.2 Save the Merge output:
- Right click on the Clipped (mask) output
- Export
- Click Save As
- Navigate to where you want to save your Merged GeoTiff and provide name
- Choose CRS (Planet mosaic quads are ESPG:3857 - WGS 84 / Pseudo)
- Click OK
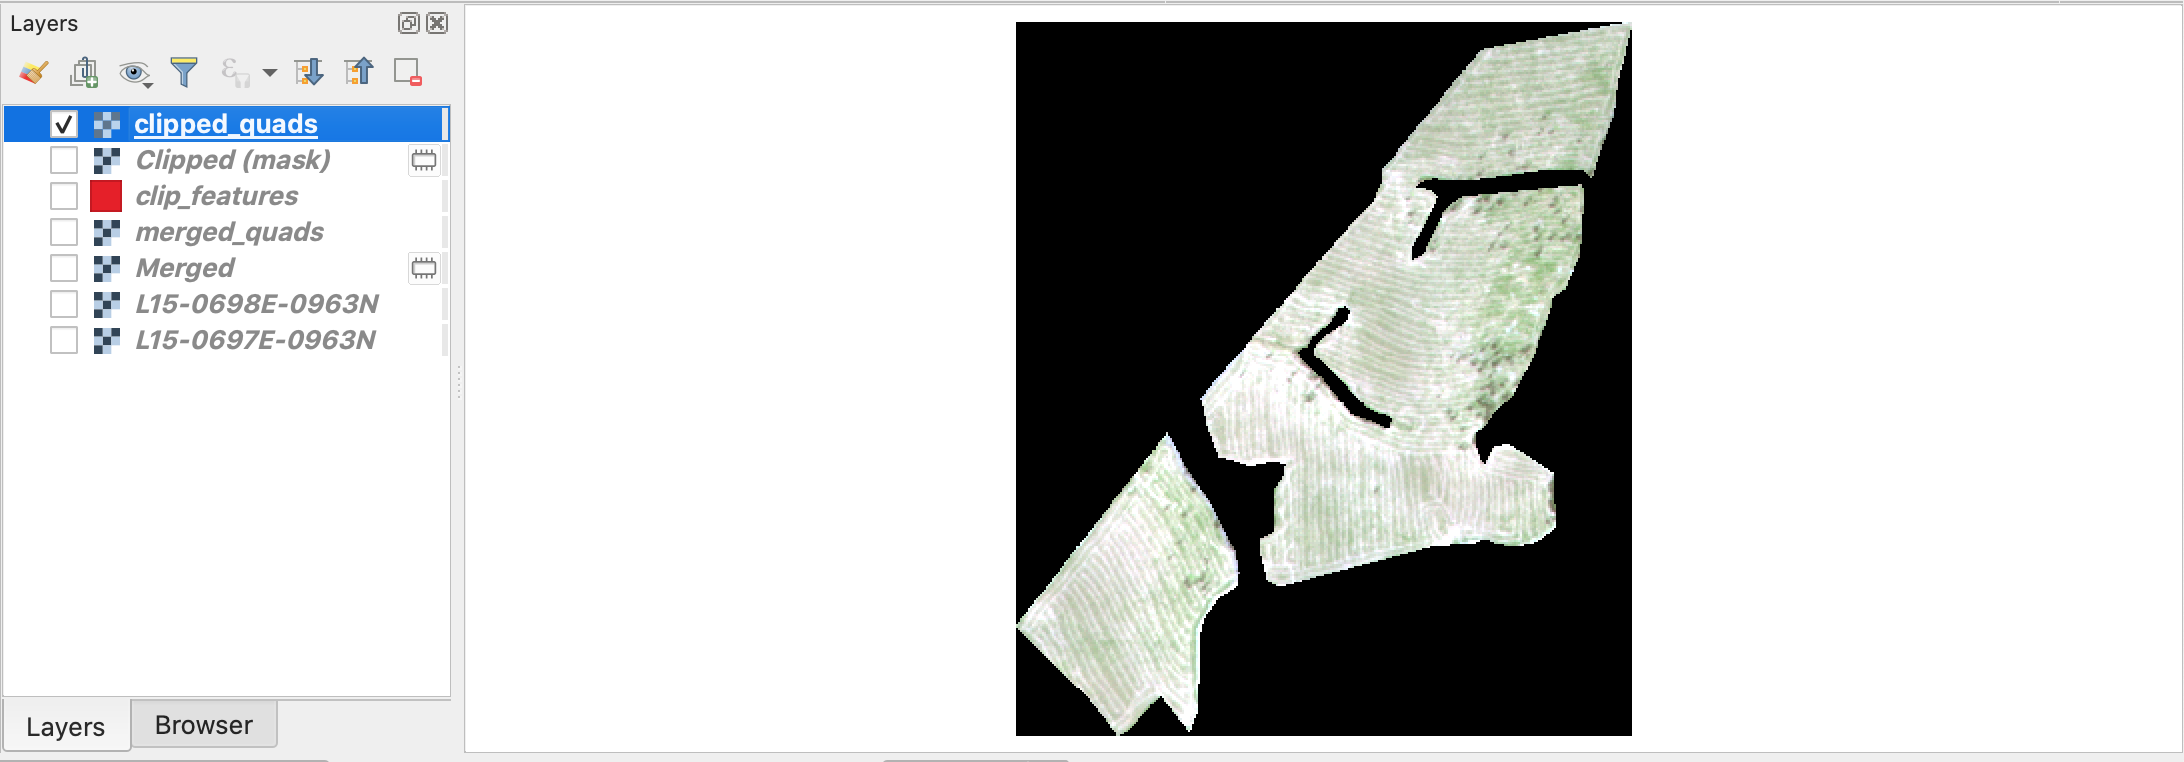
Example of merged quads after clip.
3. Create NDVI Raster
Finally, you will calculate NDVI (Normalized Difference Vegetation Index) and create a new raster with these values.
3.1 NDVI Overview
NDVI, developed by a NASA scientist named Compton Tucker in 1977, is commonly used to assess whether an area contains live green vegetation or not. It can show the difference between water and plants, bare soil and grass, whether plants are under stress, and what lifecycle stage a crop is in.
It compares how much more near-infrared light is reflected by chlorophyll vs visible red light and is given as the following equation:

3.2 Calculating NDVI in QGIS
- Click on Raster
- Choose Raster Calculator
- In the Raster Calculator Expression
- Type
( "clipped_quads@4" - "clipped_quads@3" ) / ( "clipped_quads@4" + "clipped_quads@3" )where clipped_quads is the raster image you want to perfrom NDVI.
- Type
- Save your NDVI by choosing the path in Output layer
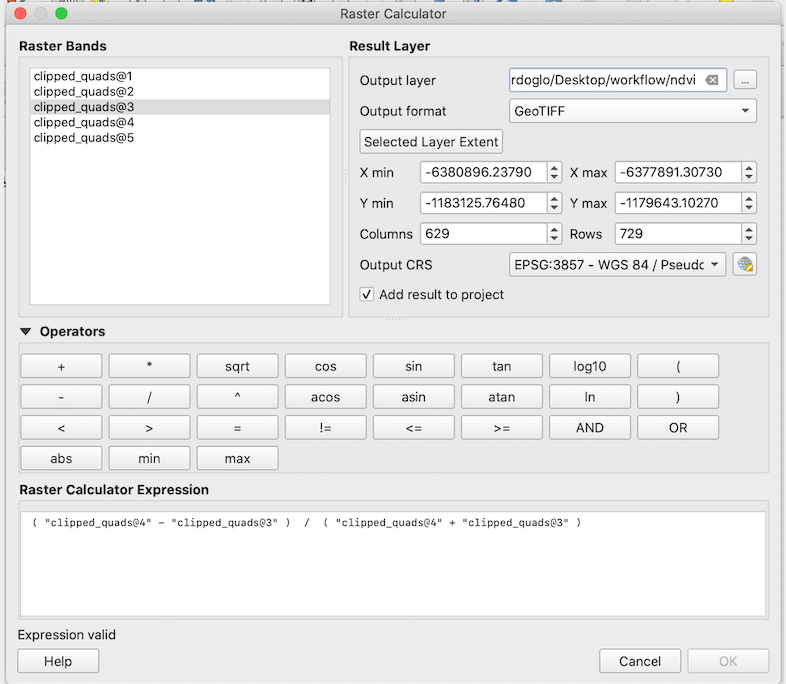
Nice work! The final step is to make the color ramp vegetation friendly.
3.3 Edit Color Ramp
- Right click on the NDVI layer
- Choose Properties
- On the left side click Symbology
- In the Render Type choose singleband pseudocolor
- For mode pick equal interval
- Click Apply and then OK
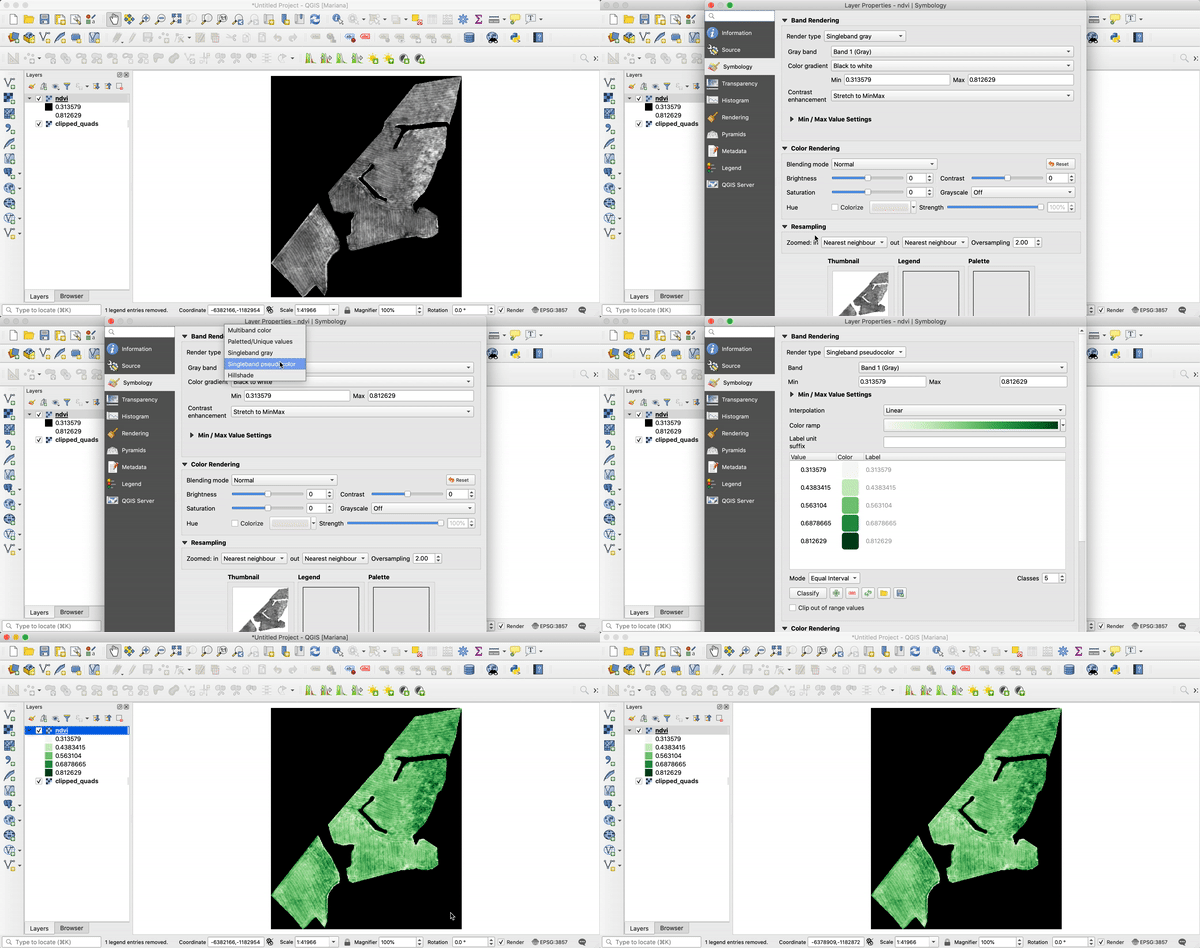
Good work! You have finished the whole workflow!
We are continually working to improve our technical documentation and support. Please help by sharing your experience with us.