Image Quick-looks (QL) are basically downsampled or lower resolution images that can be generated to offer a very rapid, lightway and easy-to-handle option to view satellite sensored data without downloading the original, large datasets. They have been used traditionally in the industry, e.g. by RapidEye customers, to assess cloud coverage and pixel usability on acquisitions before ordering. In this tutorial, you will learn two simple options to generate Image QL from PlanetScope scenes using our APIs and open source geospatial tools.
Side note:
Planet's scenes are considerably smaller in size than those from traditional sensors such as Landsat, Sentinel and even RapidEye. Therefore, QL are not generated as an standard asset on our catalog. Instead, Planet provides lightweight metadata assets that are useful for assessing image quality and pixel usability, such as the UDM and UDM2 assets, prior to download. Head to this tutorial if you want to check out how to work with those products.
Content
1. Environment set up
We will be using:
- Planet CLI V1
- jq
- QGIS v3.6+
- Our Area of Interest in Savoy, France.
Note
Planet V1 SDK and CLI are branched from the main development branch. So be sure to grab the latest V1 branch, which is currently https://github.com/planetlabs/planet-client-python/tree/1.5.2, and can be cloned at the commandline with a call to git clone --depth 1 --branch 1.5.2 git@github.com:planetlabs/planet-client-python.git.
Before using the Planet CLI, make sure you are authenticated to access Planet APIs. You can do that either by setting an environment variable named PL_API_KEY or initializing at the commandline.
planet init
where you enter you Planet credentials (the same email and password you use to log on to Planet Explorer or your account page).
2. QL with Planet's Raster Toolkit
Using the Planet's Orders API, you have a your disposal a large set of raster operations that can be applied to the data before downloading it, essentially letting you process and arrange your image to your desired output all before downloading.
For this exercise, we will use the Reproject raster tool to downsample PlanetScope 3-Band scenes from their original 3m GSD to a coarser spatial resolution. This is the fastest and more scalable approach there is since Planet will do all the processing on our more than 1000 VMs.
Note:
This approach counts agains your allocated download quota.
So, let's start!
Using the Planet CLI, let's do a Data API search over the Savoy AOI for PSScene scenes acquired first week of April, 2020 and check how many scenes we get:
planet data search --geom examples/savoy.geojson --item-type PSScene \
    --date acquired gte 2022-03-01 \
    --date acquired lte 2022-03-07 | jq '.features | length'
Now, let's repeat the step above but instead of using jq to only count items, let's print all the scenes' IDs, concatenate them into a comma-separated string and copy the result:
planet data search --geom examples/savoy.geojson --item-type PSScene \
    --date acquired gte 2022-03-01 \
    --date acquired lte 2022-03-07 | jq -r '.features | map(.id) | join(",")'
You'll copy and use these IDs when you submit an order.
b. Submit order.
Let's make a Planet order using the Reproject raster tool. When using the Planet CLI, the tool (or tools chain) need to be passed as a .json file in the arguments list. Let's create one of those that contains the following JSON object:
[
    {
        "reproject": {
            "projection": "EPSG:3857",
            "kernel": "cubic",
            "resolution": "60.0"
        }
    }
]
Note:
See that in this step we need to define our output dataset's resolution and projection as well as the kernel used for pixel processing. The Reproject tool, as its name defines it, is mainly used for changing image's projections. However, since we are also able to change pixel size, we can use it for our exercise. You have to take into account that we are not using the projection specific to the images we are downsampling but a global Mercator projection and hence the resulting QL might not be as accurately ground-locked as the original images. You can also use the projection specific to each image you are processing by checking on its metadata.
Now, let's use the CLI to submit an order using the Orders API. For input IDs we use the PSScene IDs copied on step 2.a. We need to define the bundle or asset type we want to download, our order name and pass the name of our tools JSON file.
planet orders create --item-type PSScene --bundle visual \
    --id "YOUR-COMMA-SEPARATED-LIST-OF-IDS" \
    --name QL-tutorial-demo --tools examples/reproject.json | jq .
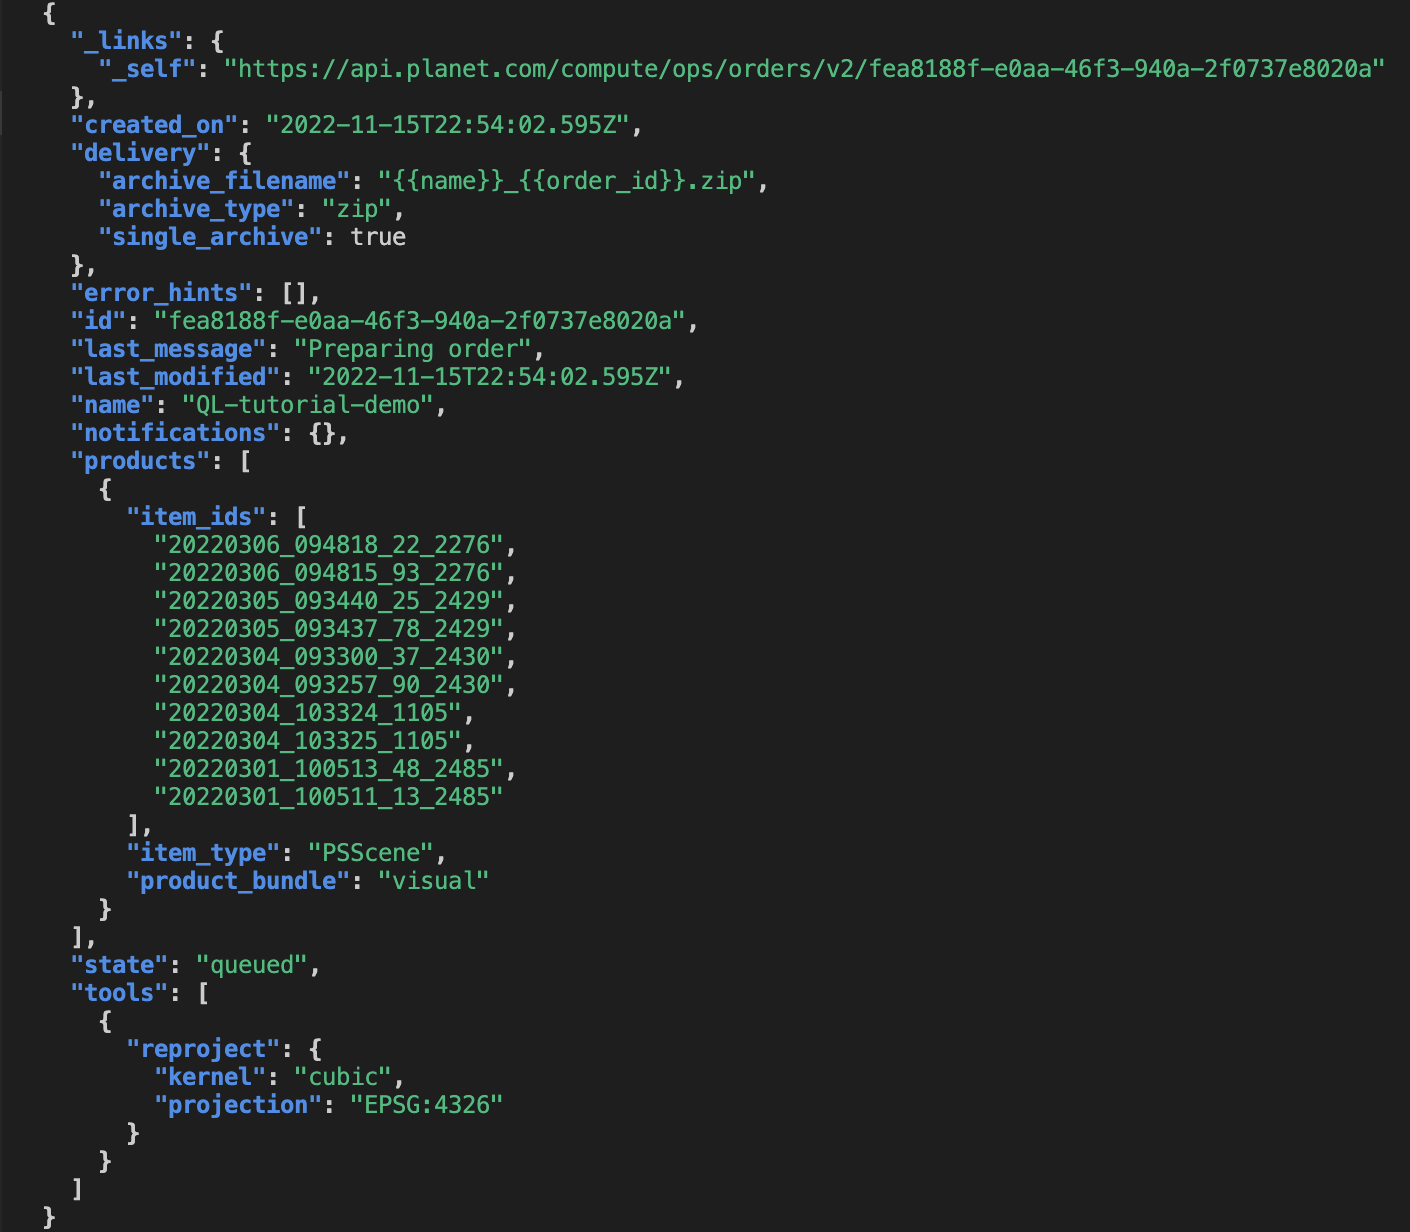
This should output a JSON object containing our order's metadata.
c. Check order status.
On the previous response, you can see that our order status is queued. That means our order has been received by the server and has been put on the processing waiting-list. The orders computing servers will automatically start processing your order as space in the processing engines becomes available so this should not take more than a couple of seconds. Once the order starts being processed though, it will depend on the number of bundles you are requesting and the operations to apply to determine how long your order will take to process. We can always check the order status by sending the below request using our own order-id (from the previous step)
planet orders get "YOUR-ORDER-ID" | jq '"Name: " + .name + ". Status: " + .state'

d. Download order.
Once an order's status has changed to success, we can go ahead and download it with the below command:
planet -v orders download "YOUR-ORDER-ID" --dest ql-demo-orders --quiet
Note:
All of the previous steps can be streamlined and automated using a Python script, which allows for more scalability and less human interaction.
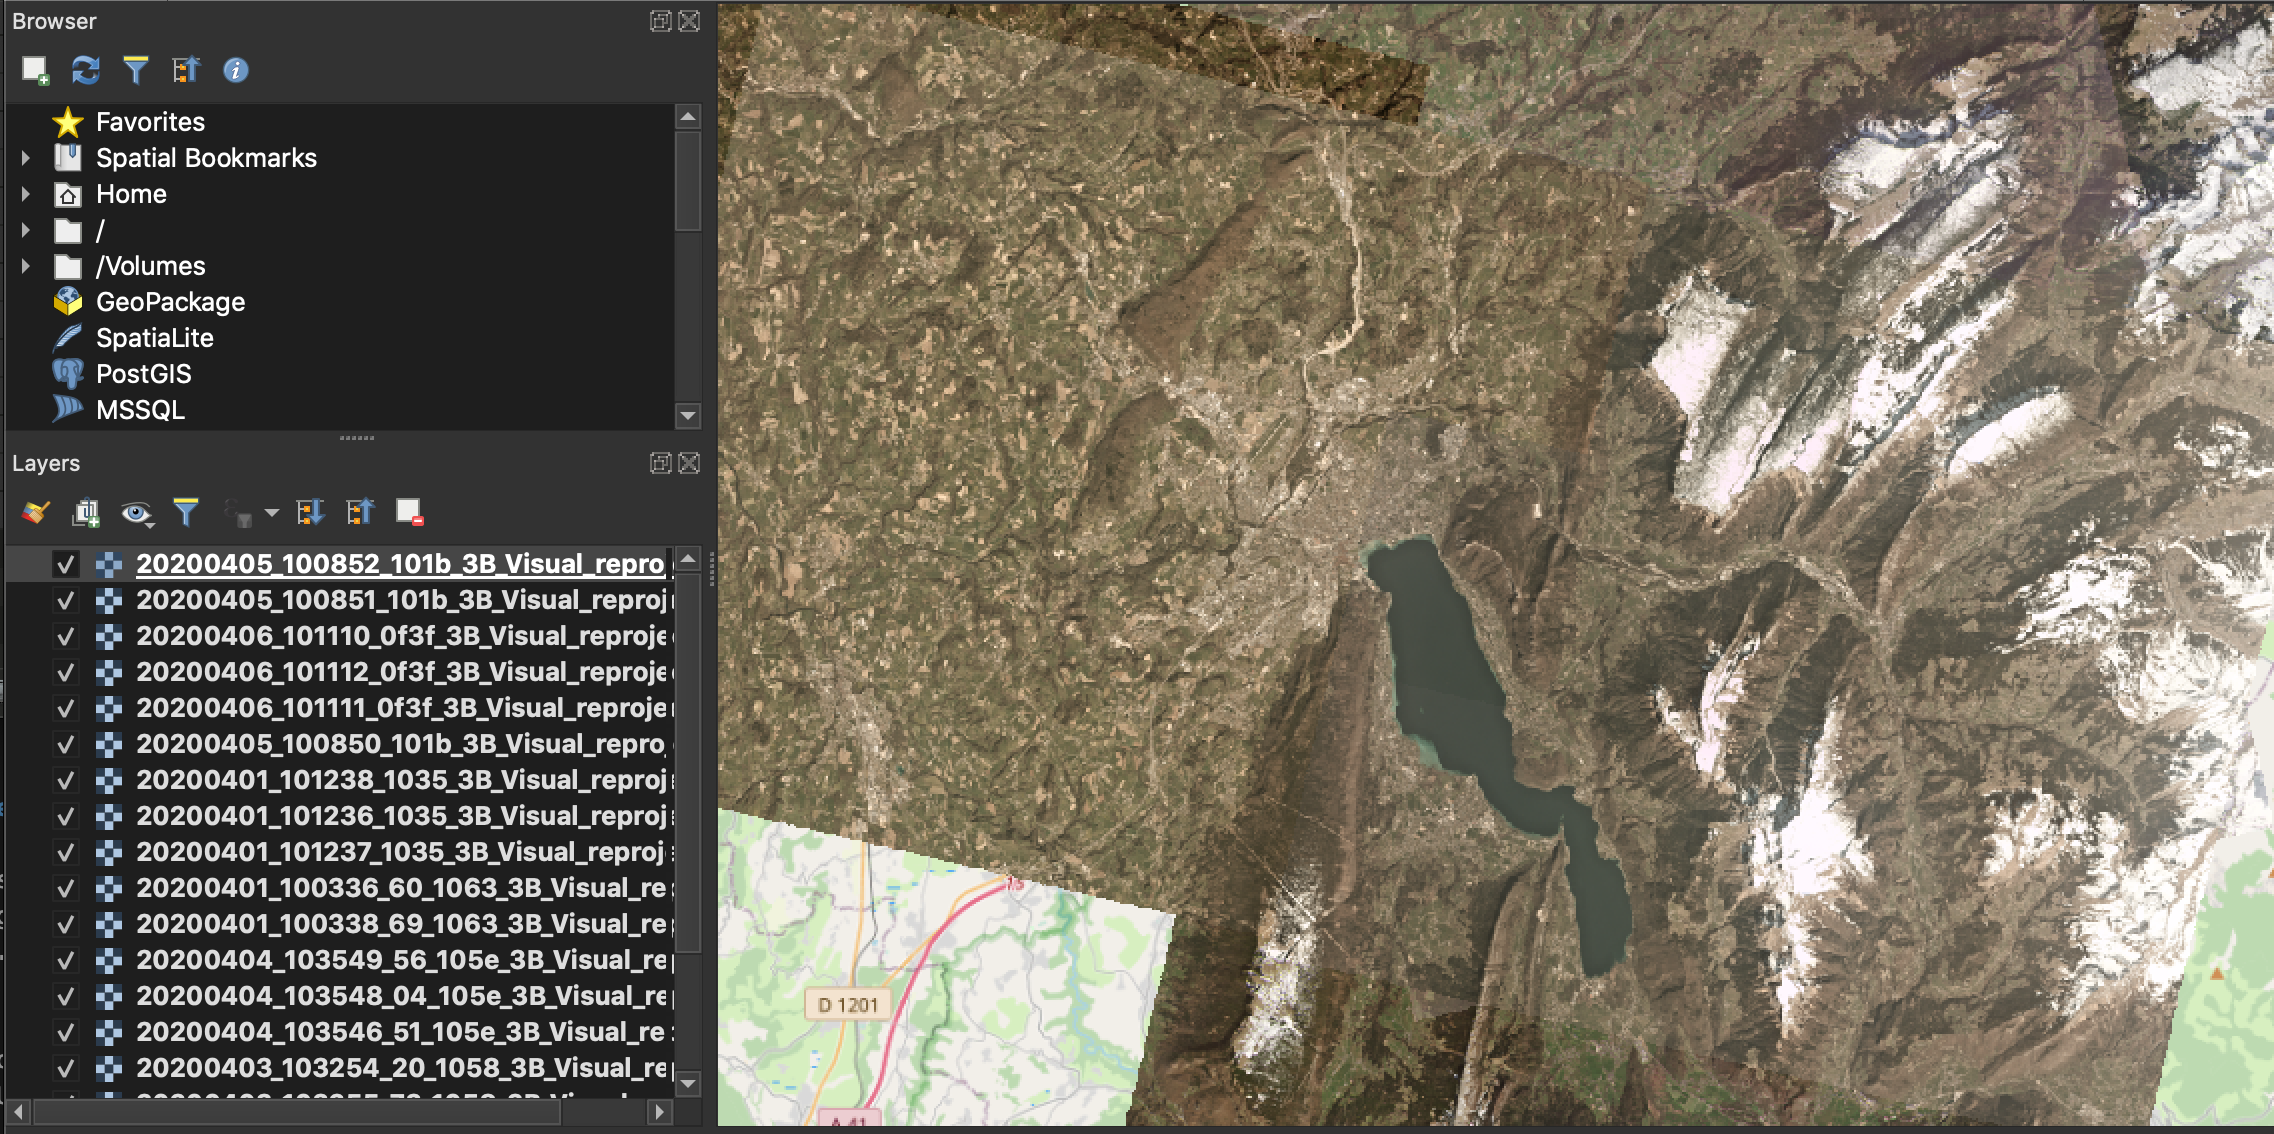
Now, we can visualise our QL on QGIS or any other GIS software.
3. QL in Planet's QGIS integration
This solution technically does not generate image QL but it essentially provides you with the same functionalities a QL does. Planet's integration to QGIS is the easiest and more practical way for you to preview images directly on your GIS workspace. Moreover, the images are streamed at native resolution so you can see features and do visual inspection with the highest spatial detail, hence, rendering the concept of QL obsolete.
Let's do it!
a. Get Planet Explorer.
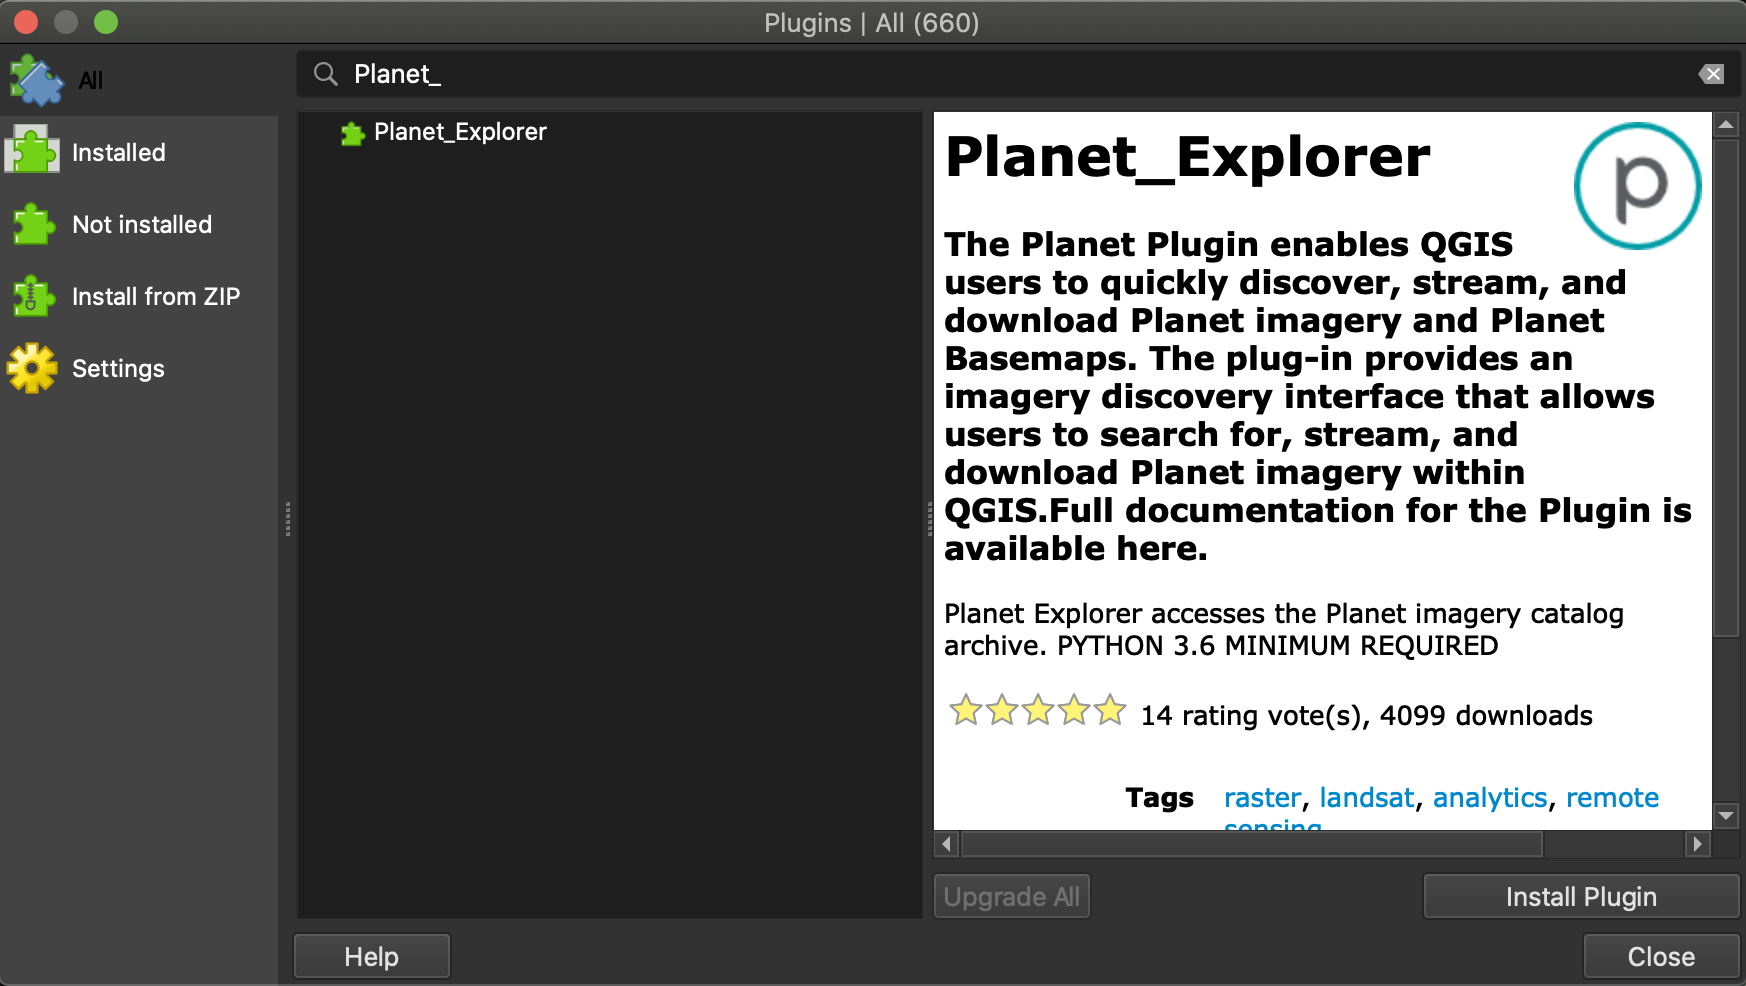
Open a QGIS workspace and navigate to the QGIS Pluging manager: Plugins > Manage and install plugins...> All. Search for Planet_Explorer and click on Install Plugin once it shows up.
Info
The plugin can be found on QGIS's market place from version 3.6 on.
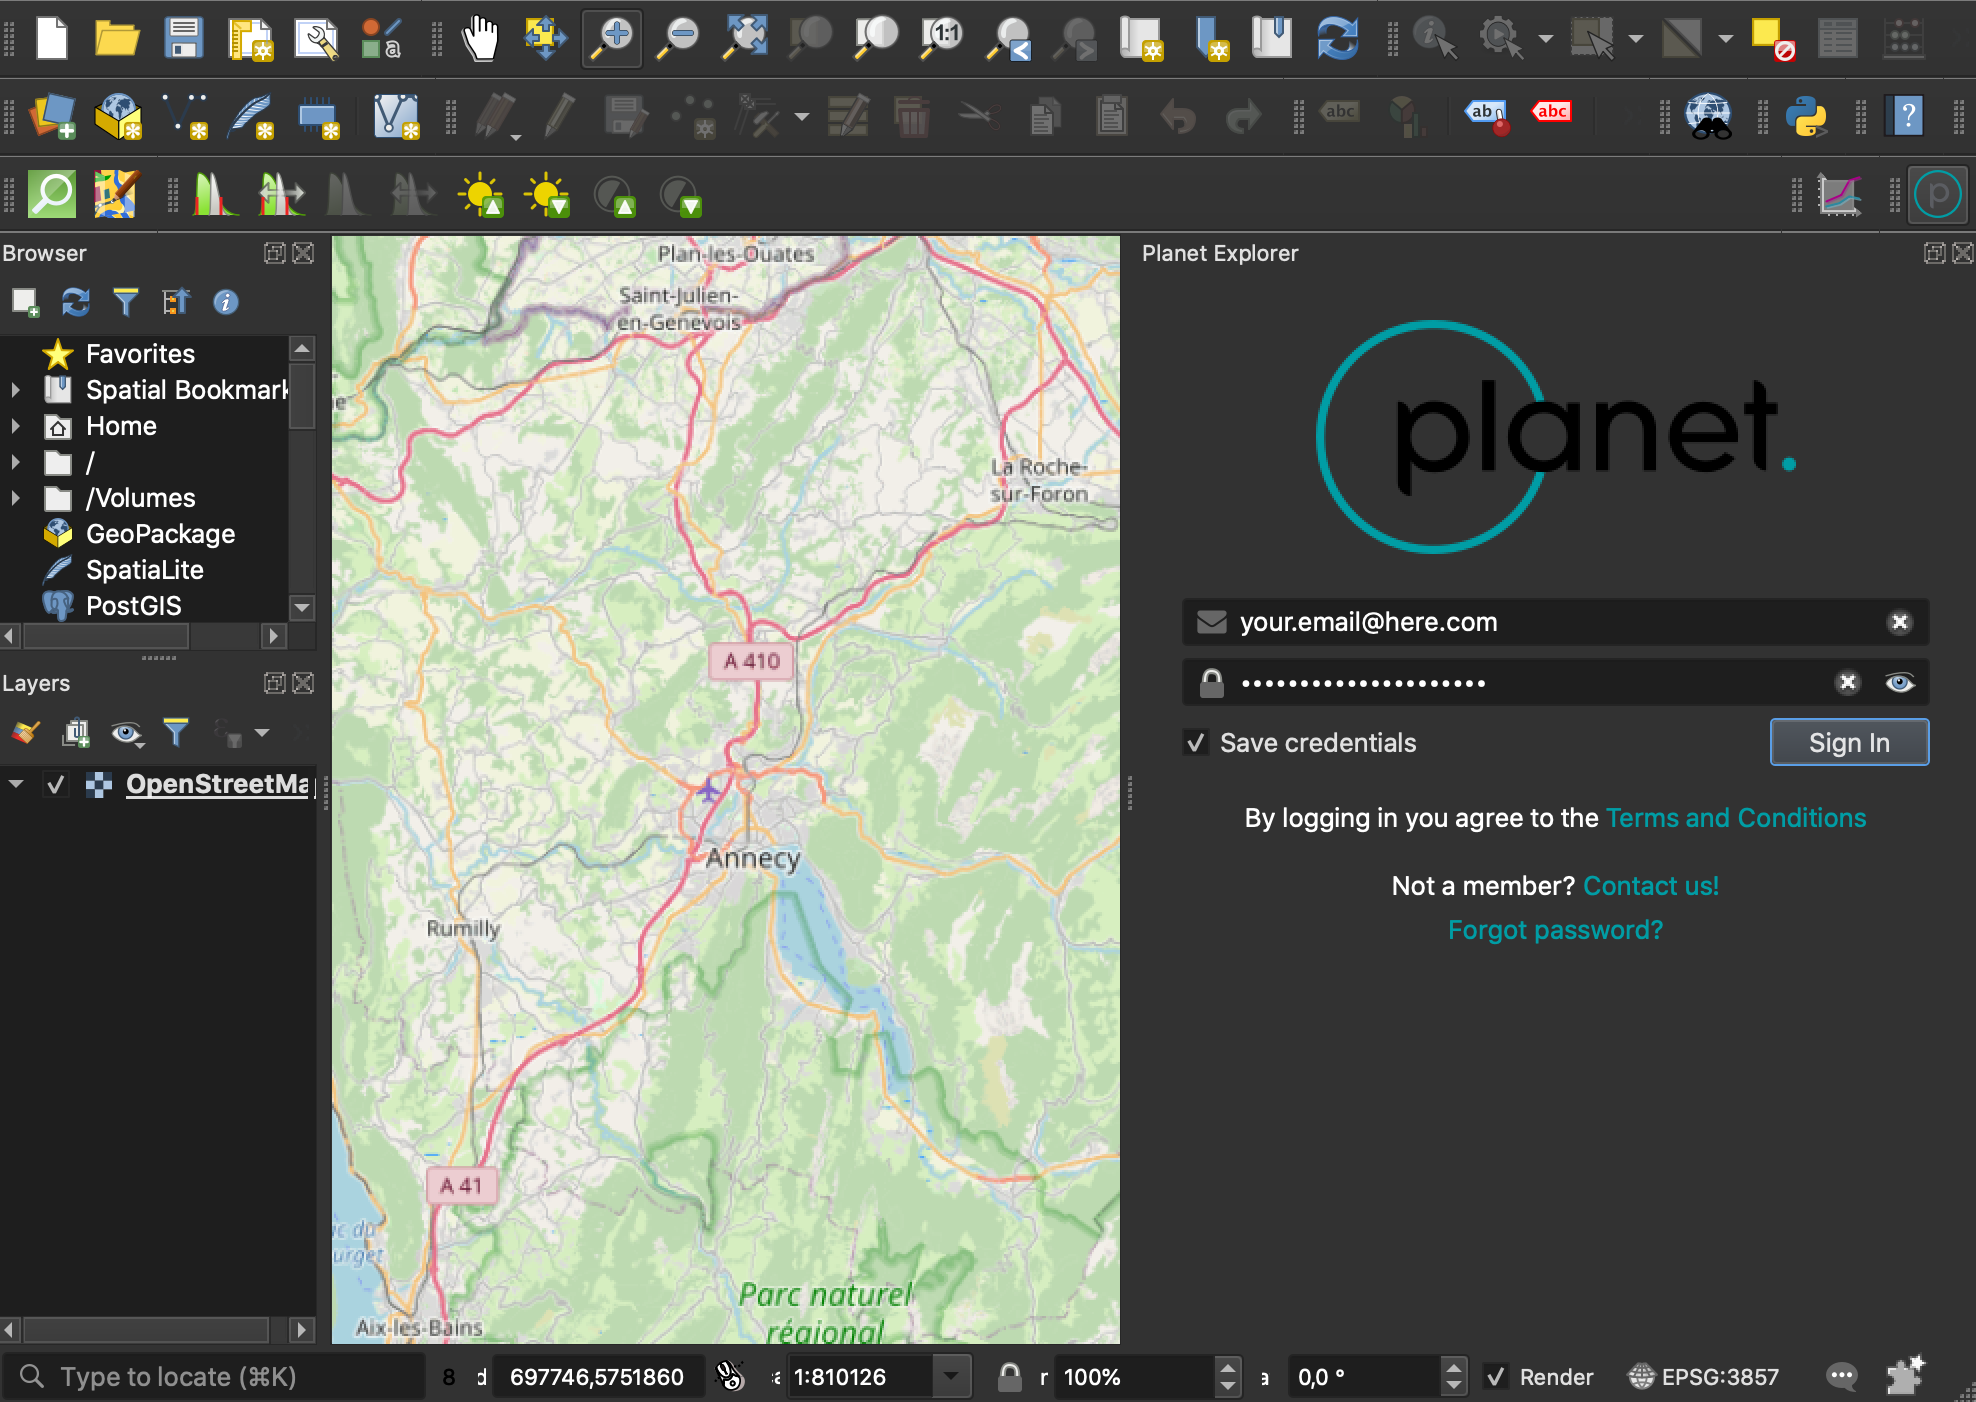
Once installed, the plugin will be added to your QGIS panels on the top left side. Click on the Planet logo to open and authenticate using your Planet registered Email and Password.
b. Define your scene ID list
Now that you are logged in, we can proceed to define the images we want to preview by doing a search. We can replicate the search done in step 2.a. For that, we will need to load our Savoy AOI onto our workspace and select the geometry using the Feature Selection tool.
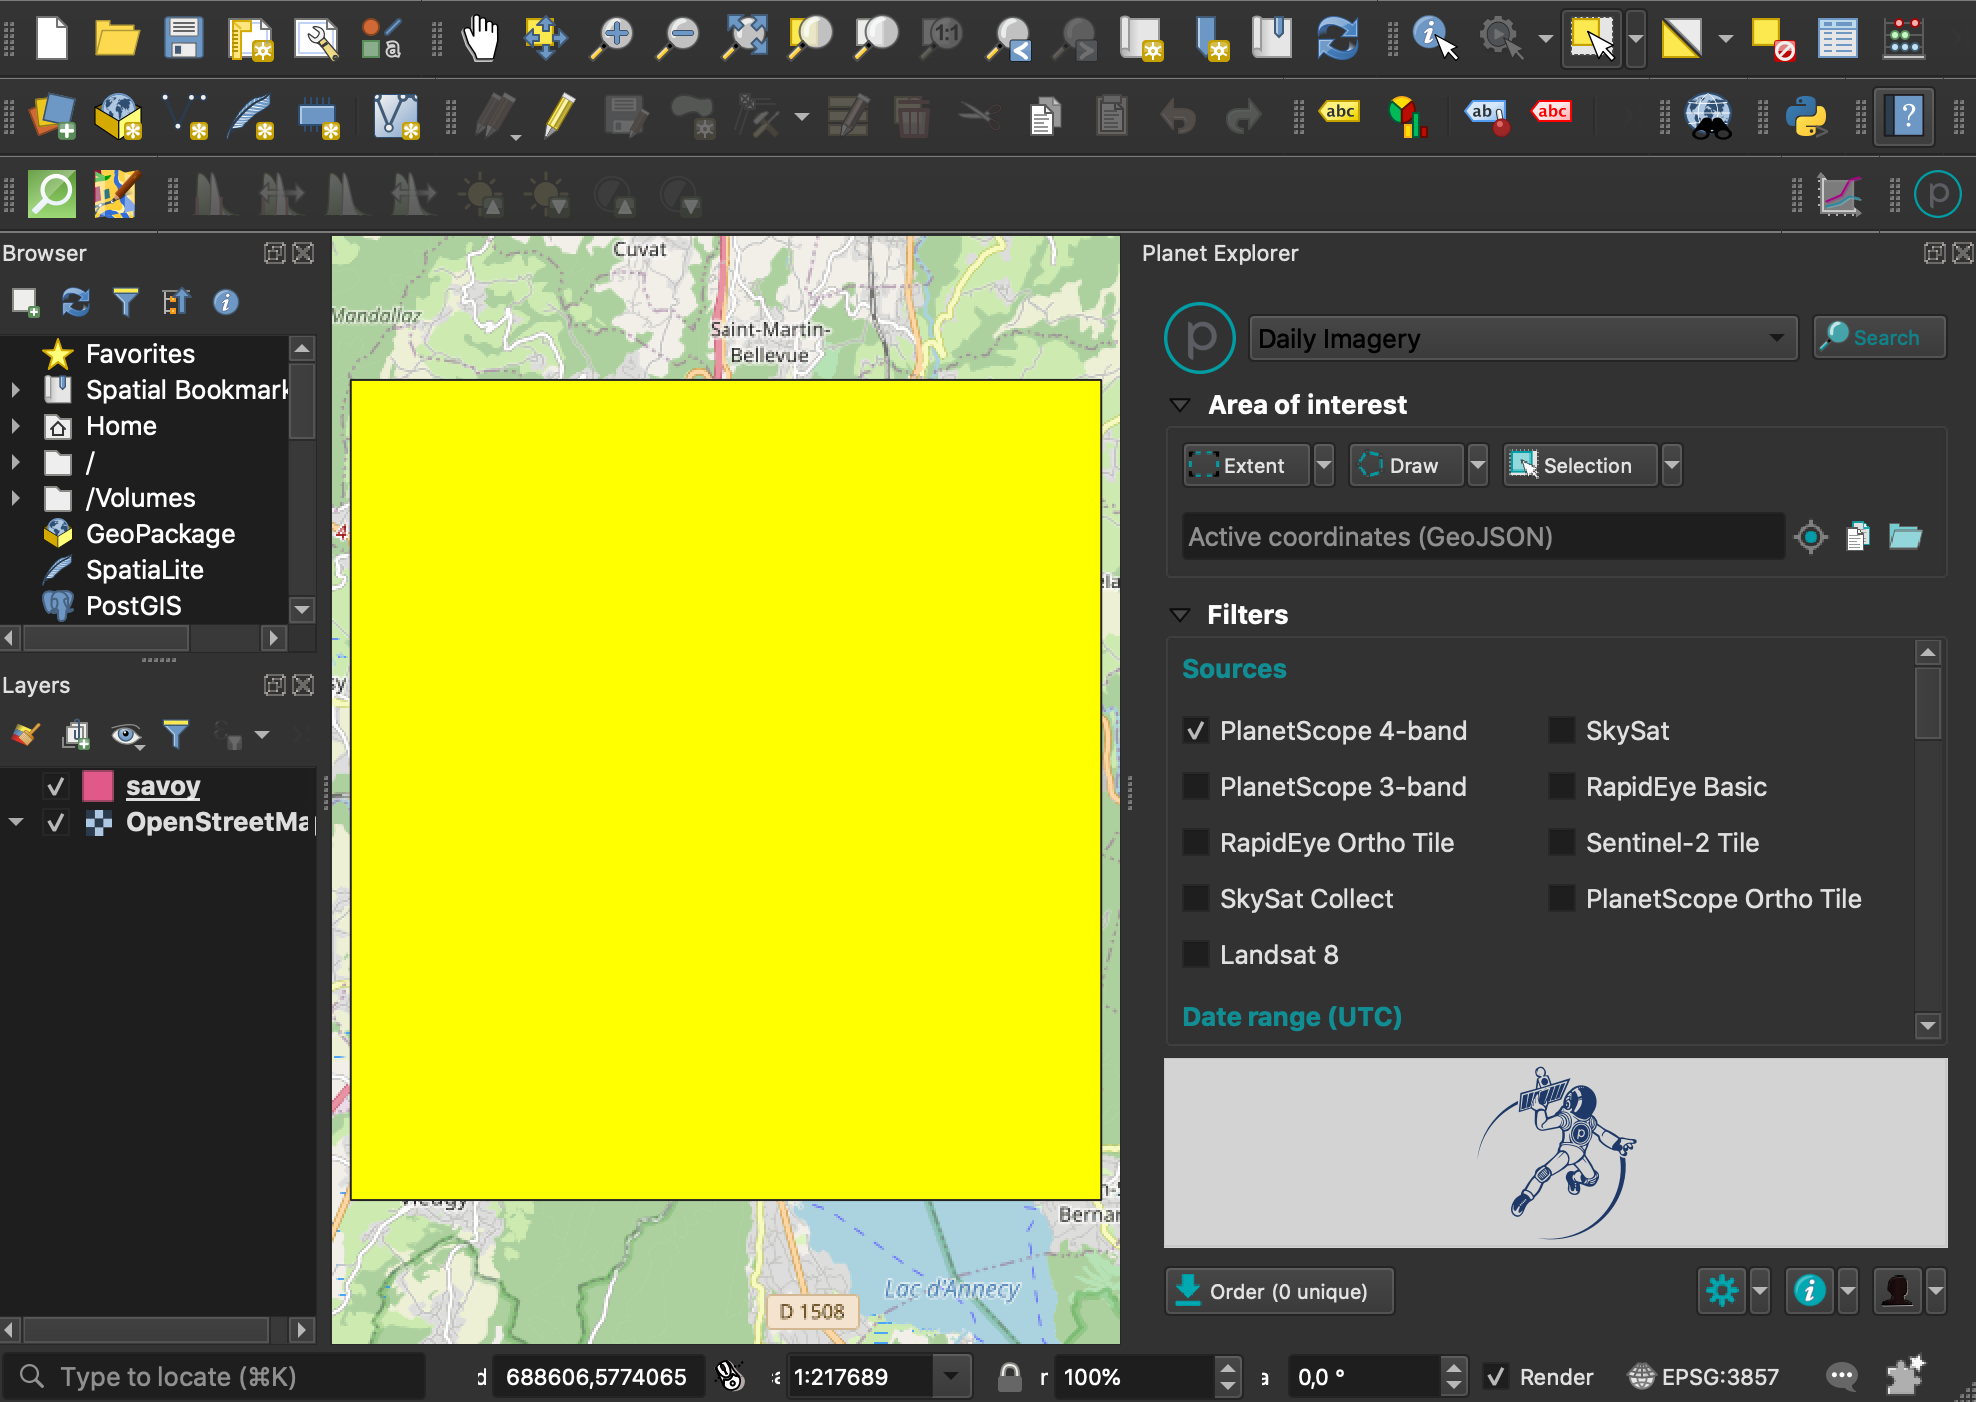
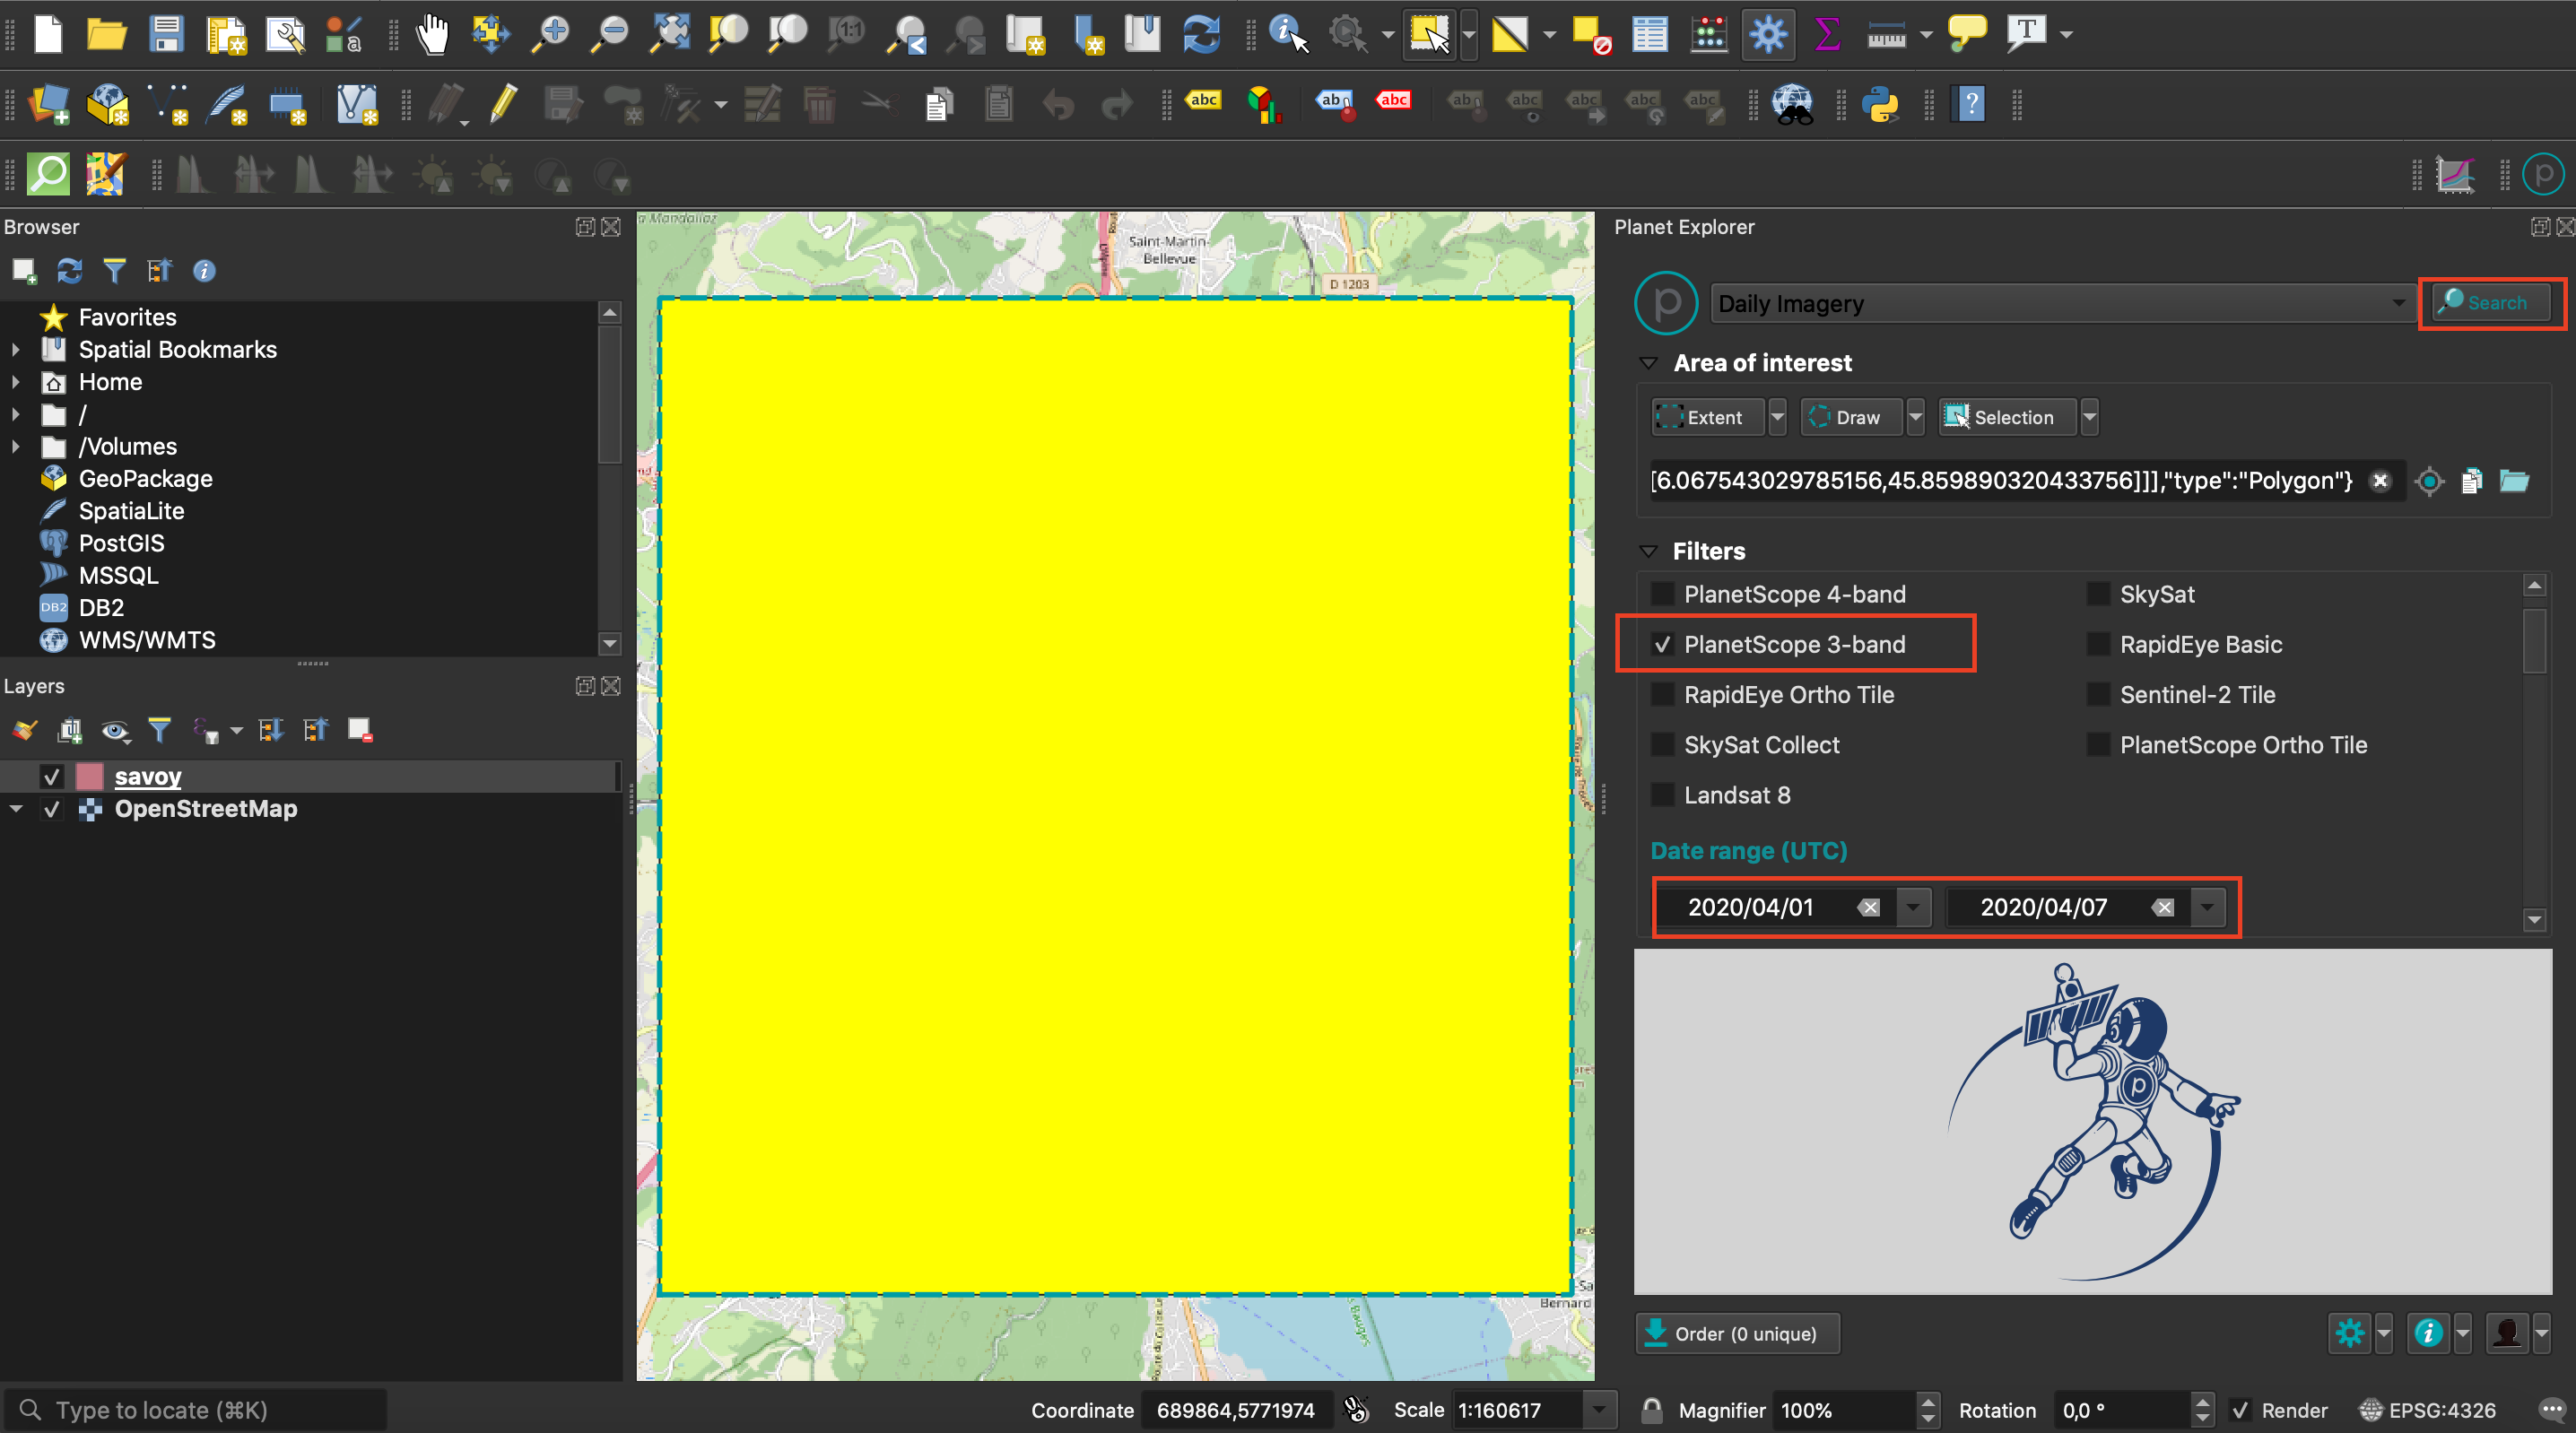
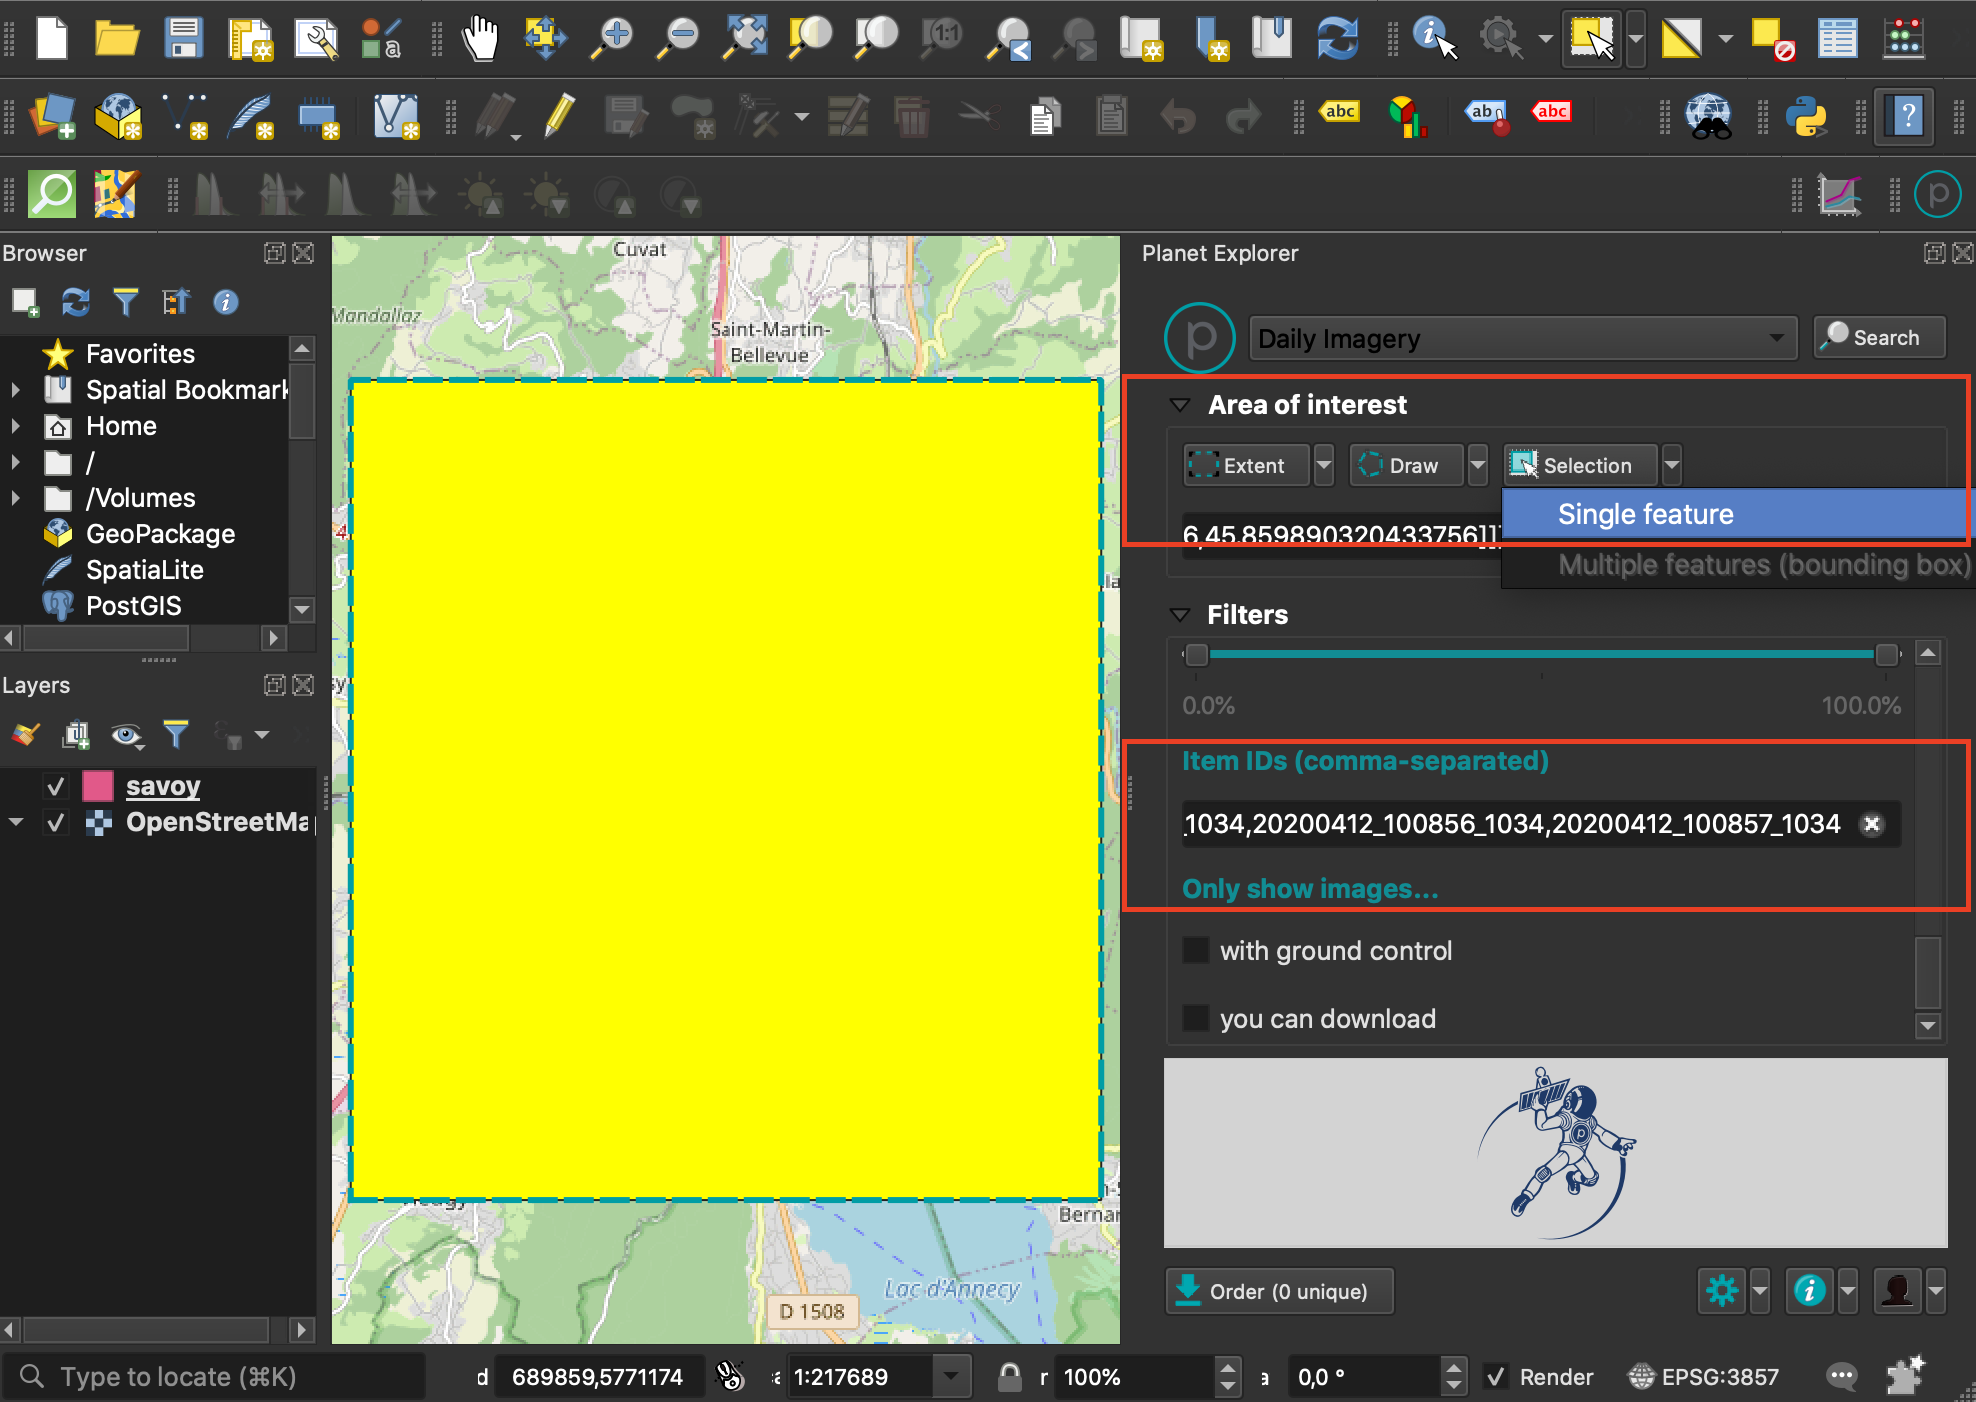
On the Planet Explorer tab, click on Selection on the Area of interest section and then on Single Feature to select your layer as AOI to search in. On the Filters section, tick the box for PlanetScope 3-band and define your Date Range by using the date picker tool. Hit Search.
If you already have a list, such as the one we got on step 2.a, you can skip the filter set up above and simply paste your list of the Item IDs (comma separated) input field.
Info
There are many more filters you can use to narrow your filter criteria. If you want to know more about using the QGIS integration, see this tutorial for a more complete overview.
c. Add images to workspace
A list of results will appear on the bottom part of the tab. If you hover on the results, you will get footprints displayed in your Map extent. You can also click on Settings for more options.
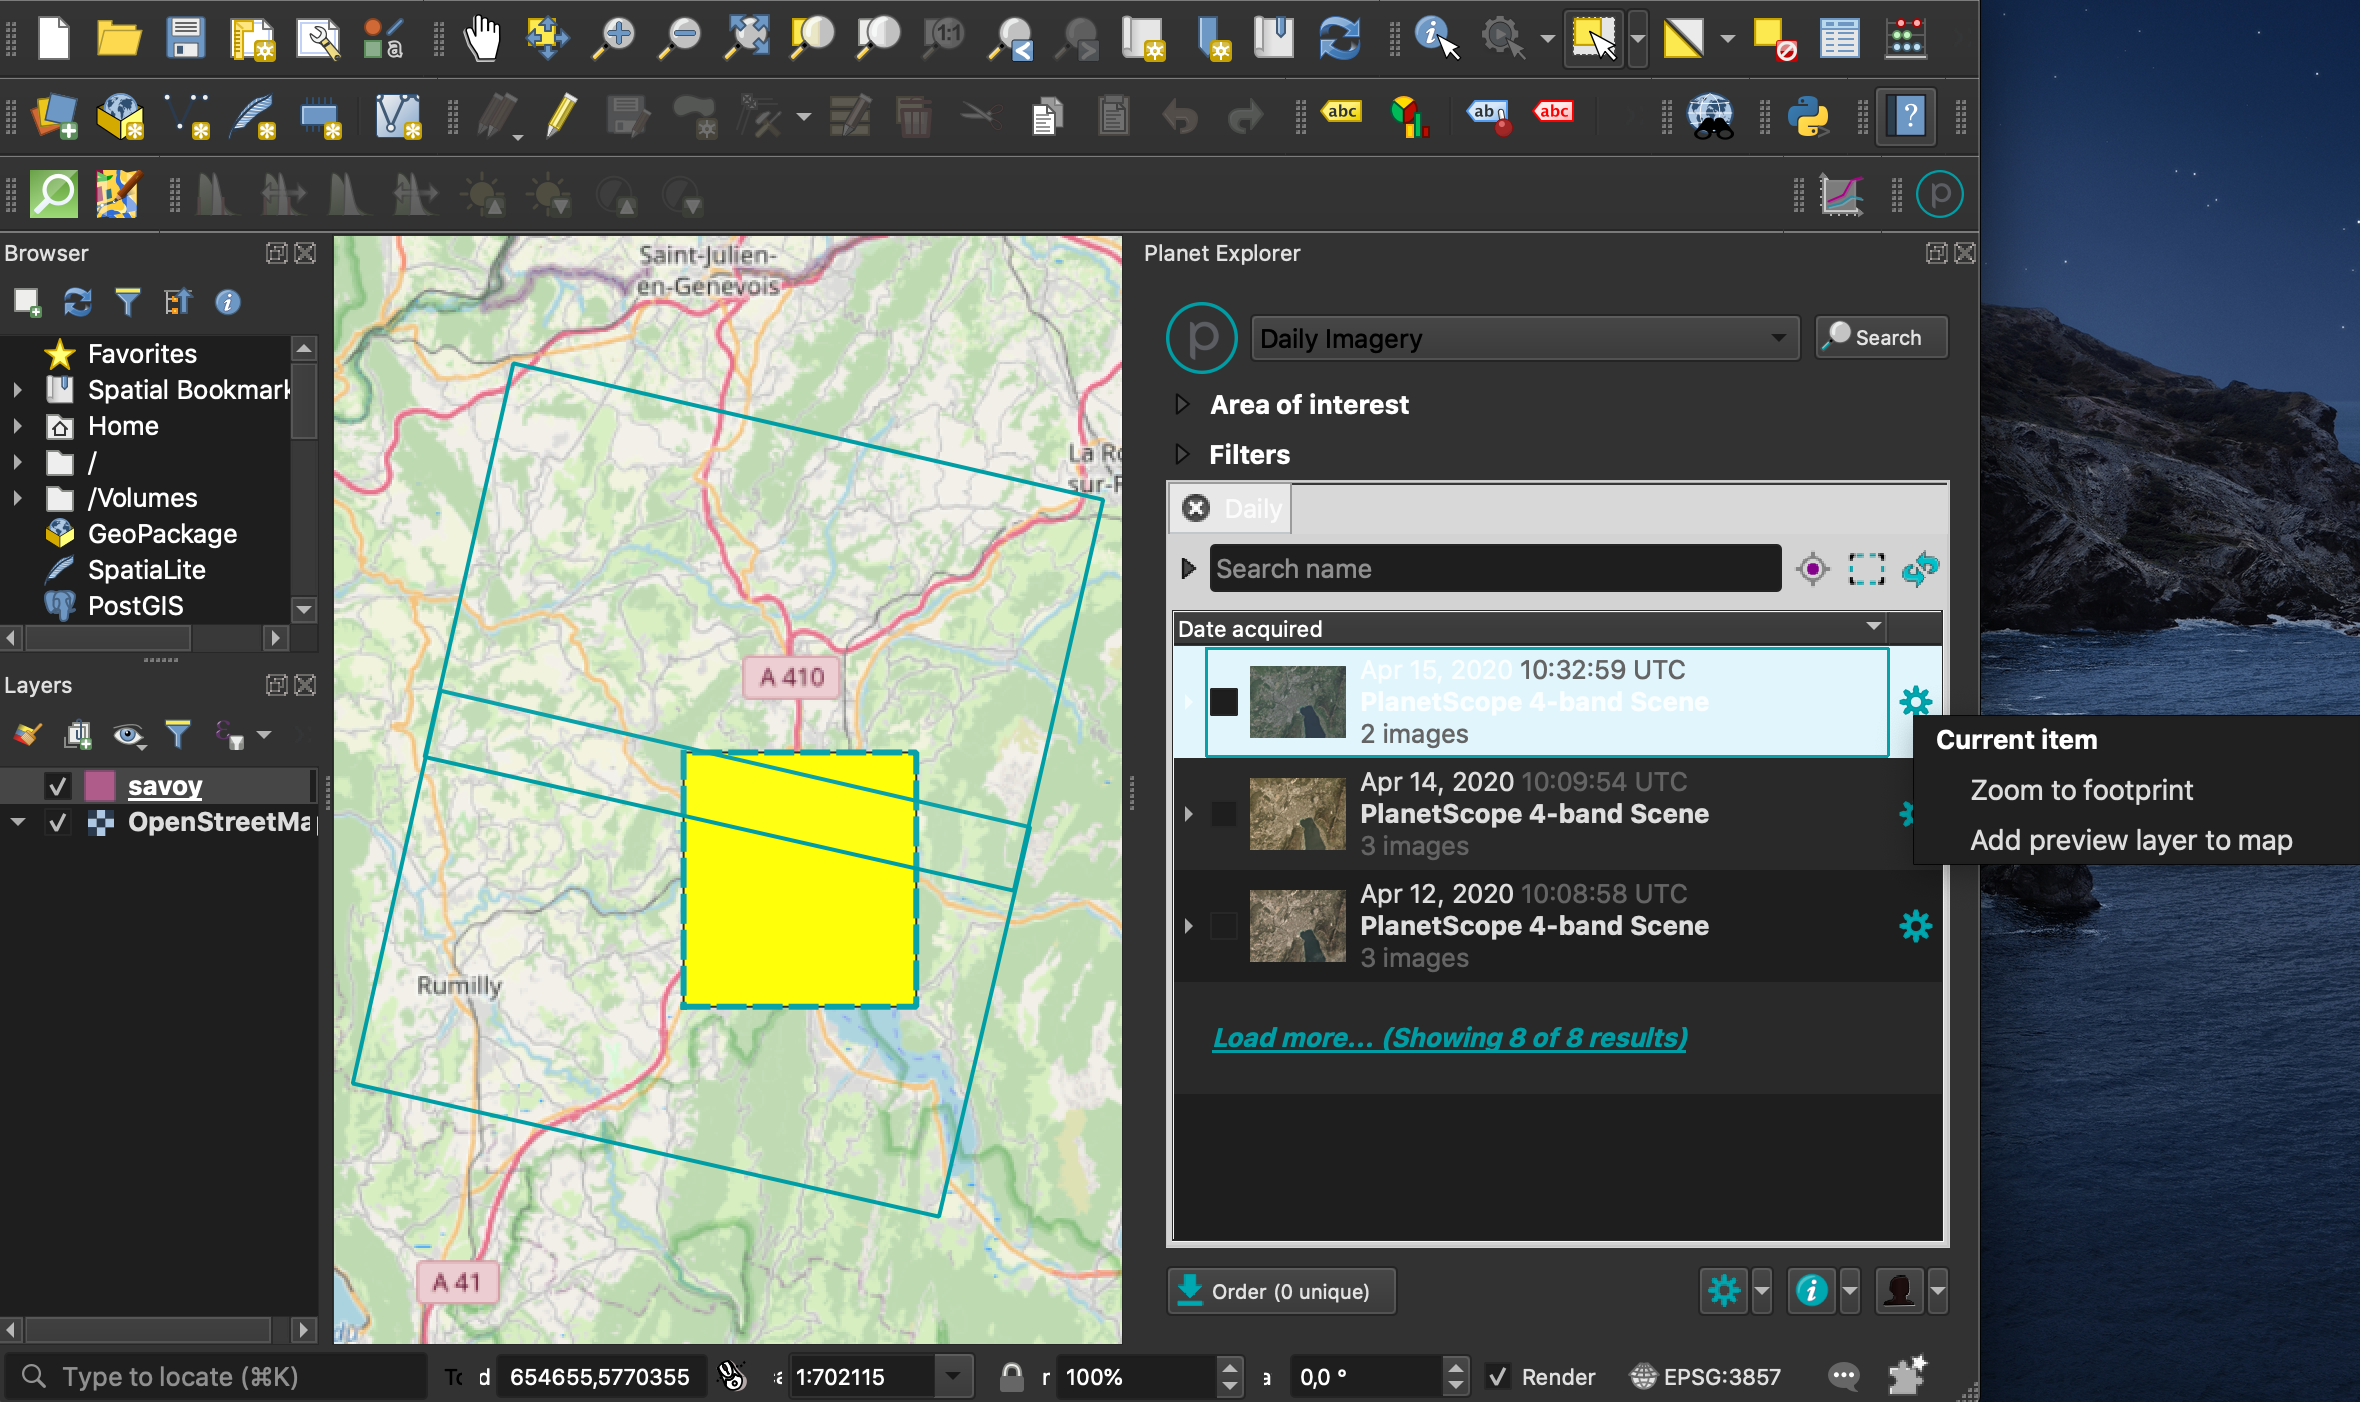
Clicking on Add preview layer to map will stream the full resolution images on your current Map.
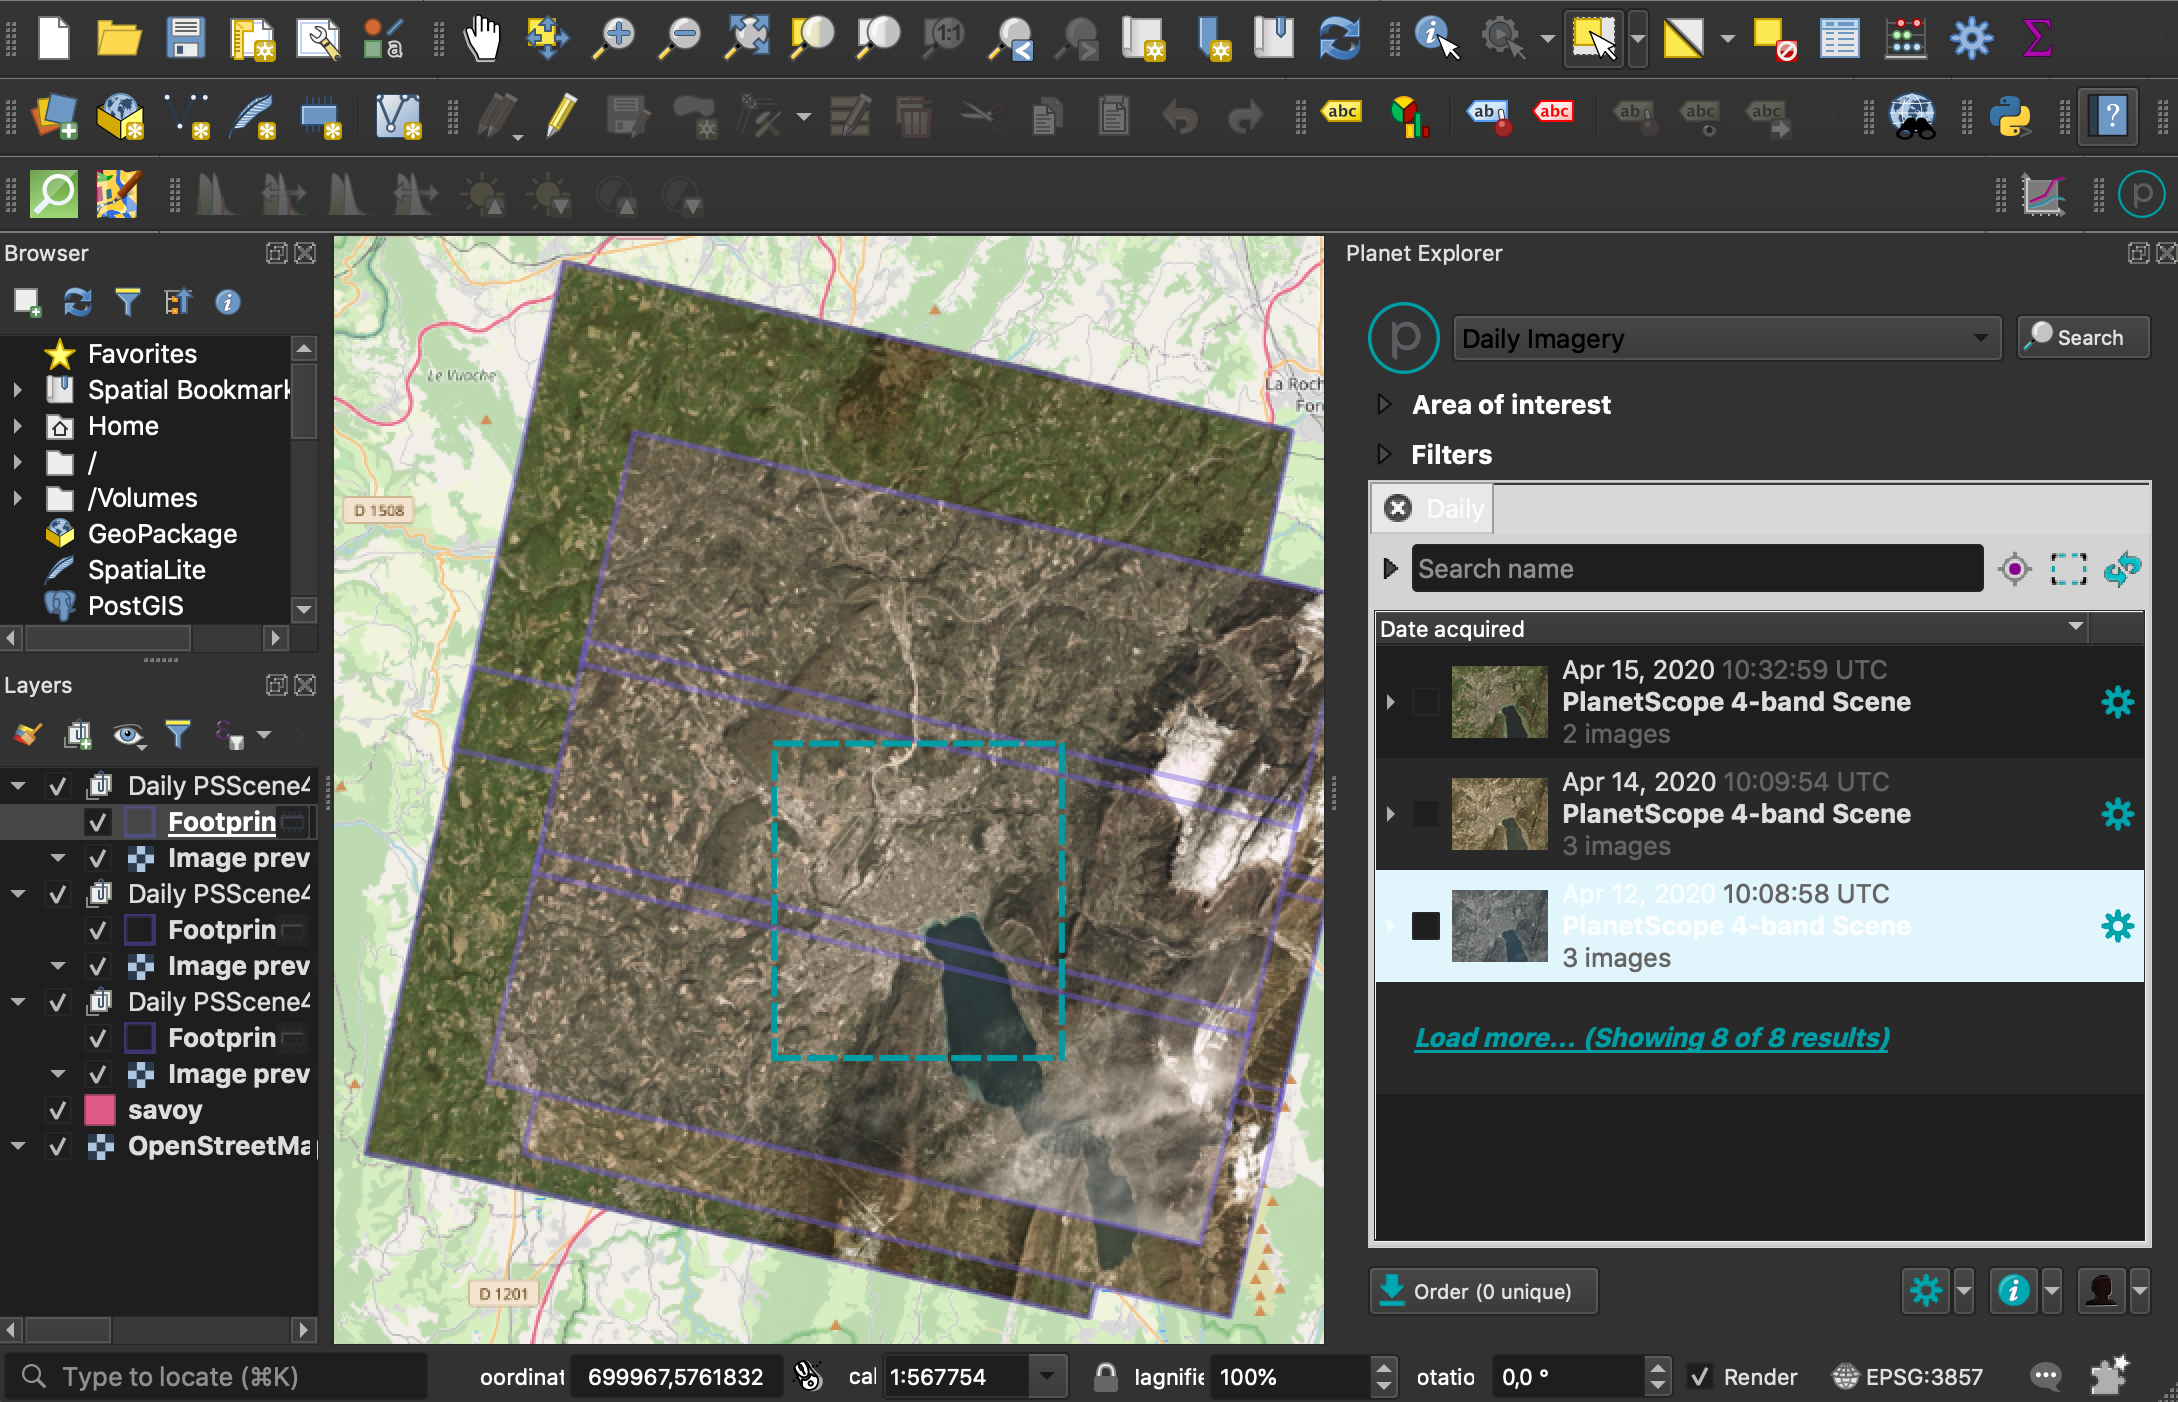
And that is it! In three simple steps you have added full resolution images to your GIS workspace which you can use in conjunction to other ancillary data to assess image usability and make decisions before ordering large image datasets.
Rate this guide: