Installation & Setup
Windows Users
If you're running Windows, use the OSGEO4W Installer to download & install a variety of free & open source geospatial tools, including GDAL & QGIS.
Visit http://trac.osgeo.org/osgeo4w, and follow the Quick Start for OSGeo4W Users steps:

During the setup process, make sure to select both the "GDAL" package and "QGIS" to be installed.
TIP: if you run into issues after the initial run of the installer, re-run the OSGEO4W installer & repeat steps 2-5 above. It's possible that some dependencies will not be installed on the first run.
Once installation is complete, you'll use the OSGeo4W Shell to access command line utilities like GDAL. This shell is automatically installed after completing the above.
Mac Users
If you're running Mac OS X, KyngChaos is a good way to get installable packages for both QGIS & GDAL.
To install QGIS, download the QGIS version listed under Current from http://www.kyngchaos.com/software/qgis:
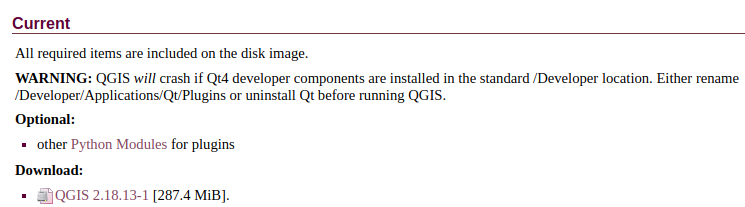 Here, the "Current" version available for download is QGIS 2.18.13-1
To install, right-click the installer file and select Open. A security warning will pop up, but you can continue the installation safely (for more information, see the 'Install Note' at the top of this page).
Follow a similar process to install GDAL from http://www.kyngchaos.com/software/frameworks. Under GDAL Complete, select the download for the GDAL version beginning with "2".
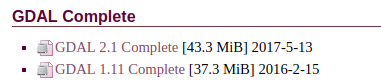 Here, the 2.x version available for download is GDAL 2.1
Right-click the downloaded file & select Open to begin the installation.
After the installation is complete, there's one more step required to enable GDAL's command line tools. To finish setup, open your terminal and type the following at the prompt:
echo 'export PATH=/Library/Frameworks/GDAL.framework/Programs:$PATH' >> ~/.bash_profile
Hit enter after that line, and type the following:
source ~/.bash_profile
After you hit enter again, setup is complete.
Linux Users
For most users, your Linux distribution's default repository is likely to have a relatively recent version of GDAL. Feel free to simple use that package, or read on for more specific information:
Ubuntu & Linux Mint Users
As of October 2017, Ubuntu's default (Universe) repositories have GDAL 1.11. To check what version of gdal is currently available to you, run the following command:
sudo apt-cache policy gdal-bin
To install that version, do:
sudo apt-get install gdal-bin
Alternatively, if you are running an LTS (12.04, 14.04, or 16.04) you
can use the ubuntugis-unstable PPA to install GDAL 2+. If you prefer this
option, run the following instead:
sudo add-apt-repository ppa:ubuntugis/ubuntugis-unstable
sudo apt-get update
sudo apt-get install gdal-bin
CentOS Users
In order to install GDAL, you'll need to use the EPEL repository. Follow the instructions for your CentOS version here to do that.
For example: for CentOS
7, assuming epel-release-7-10 is the relevant EPEL release, you would do:
su -c 'rpm -Uvh http://download.fedoraproject.org/pub/epel/7/x86_64/e/epel-release-7-10.noarch.rpm'
Once you've added the EPEL repository, run the following command:
sudo yum install gdal
Everyone Else
You can also build GDAL yourself, by compiling from source. Detailed instructions on this are available at http://trac.osgeo.org/gdal/wiki/BuildingOnUnix
All Users
Before going on, let's verify that the setup process completed successfully.
If QGIS has installed successfully, you should be able to find a newly-installed program, QGIS Desktop, on your system:
![]()
To confirm GDAL installation, open a terminal and type the following command:
ogrinfo
Windows users: remember, you'll use the OSGeo4W Shell here.
If all went well, you should get output similar to this:
Usage: ogrinfo [--help-general] [-ro] [-q] [-where restricted_where|@filename]
               [-spat xmin ymin xmax ymax] [-geomfield field] [-fid fid]
               [-sql statement|@filename] [-dialect sql_dialect] [-al] [-rl] [-so] [-fields={YES/NO}]
               [-geom={YES/NO/SUMMARY}] [-formats] [[-oo NAME=VALUE] ...]
               [-nomd] [-listmdd] [-mdd domain|`all`]*
               [-nocount] [-noextent]
               datasource_name [layer [layer ...]]

FAILURE: No datasource specified.
If, however, you get an error that says command not found, go back and review
the installation steps for your operating system.
Rate this guide: