Introduction
This tutorial will cover basic raster operations in ArcGIS Pro. In this workflow you will:
- Mosaic two basemap quads
- Clip the mosaic to a polygon feature class
- Create an NDVI raster
Before you start
You will need ESRI ArcGIS Pro or ArcMap to perform the raster operations demonstrated in this tutorial. Additionally, you'll need at least an ArcGIS Pro Basic lisence to use the necessary tools. More information on ESRI license requirements can be found here.
You will also need to have previously downloaded at least two basemap quads from Planet. Information on downloading basemap quads from Planet's Basemaps Viewer web application can be found here. Finally, you will also need a polygon feature class that will be used to clip the mosaic you create.
While this is a simple tutorial, it is recommended that you have basic familiarity with GIS concepts.
1. Mosaic Basemap Quads
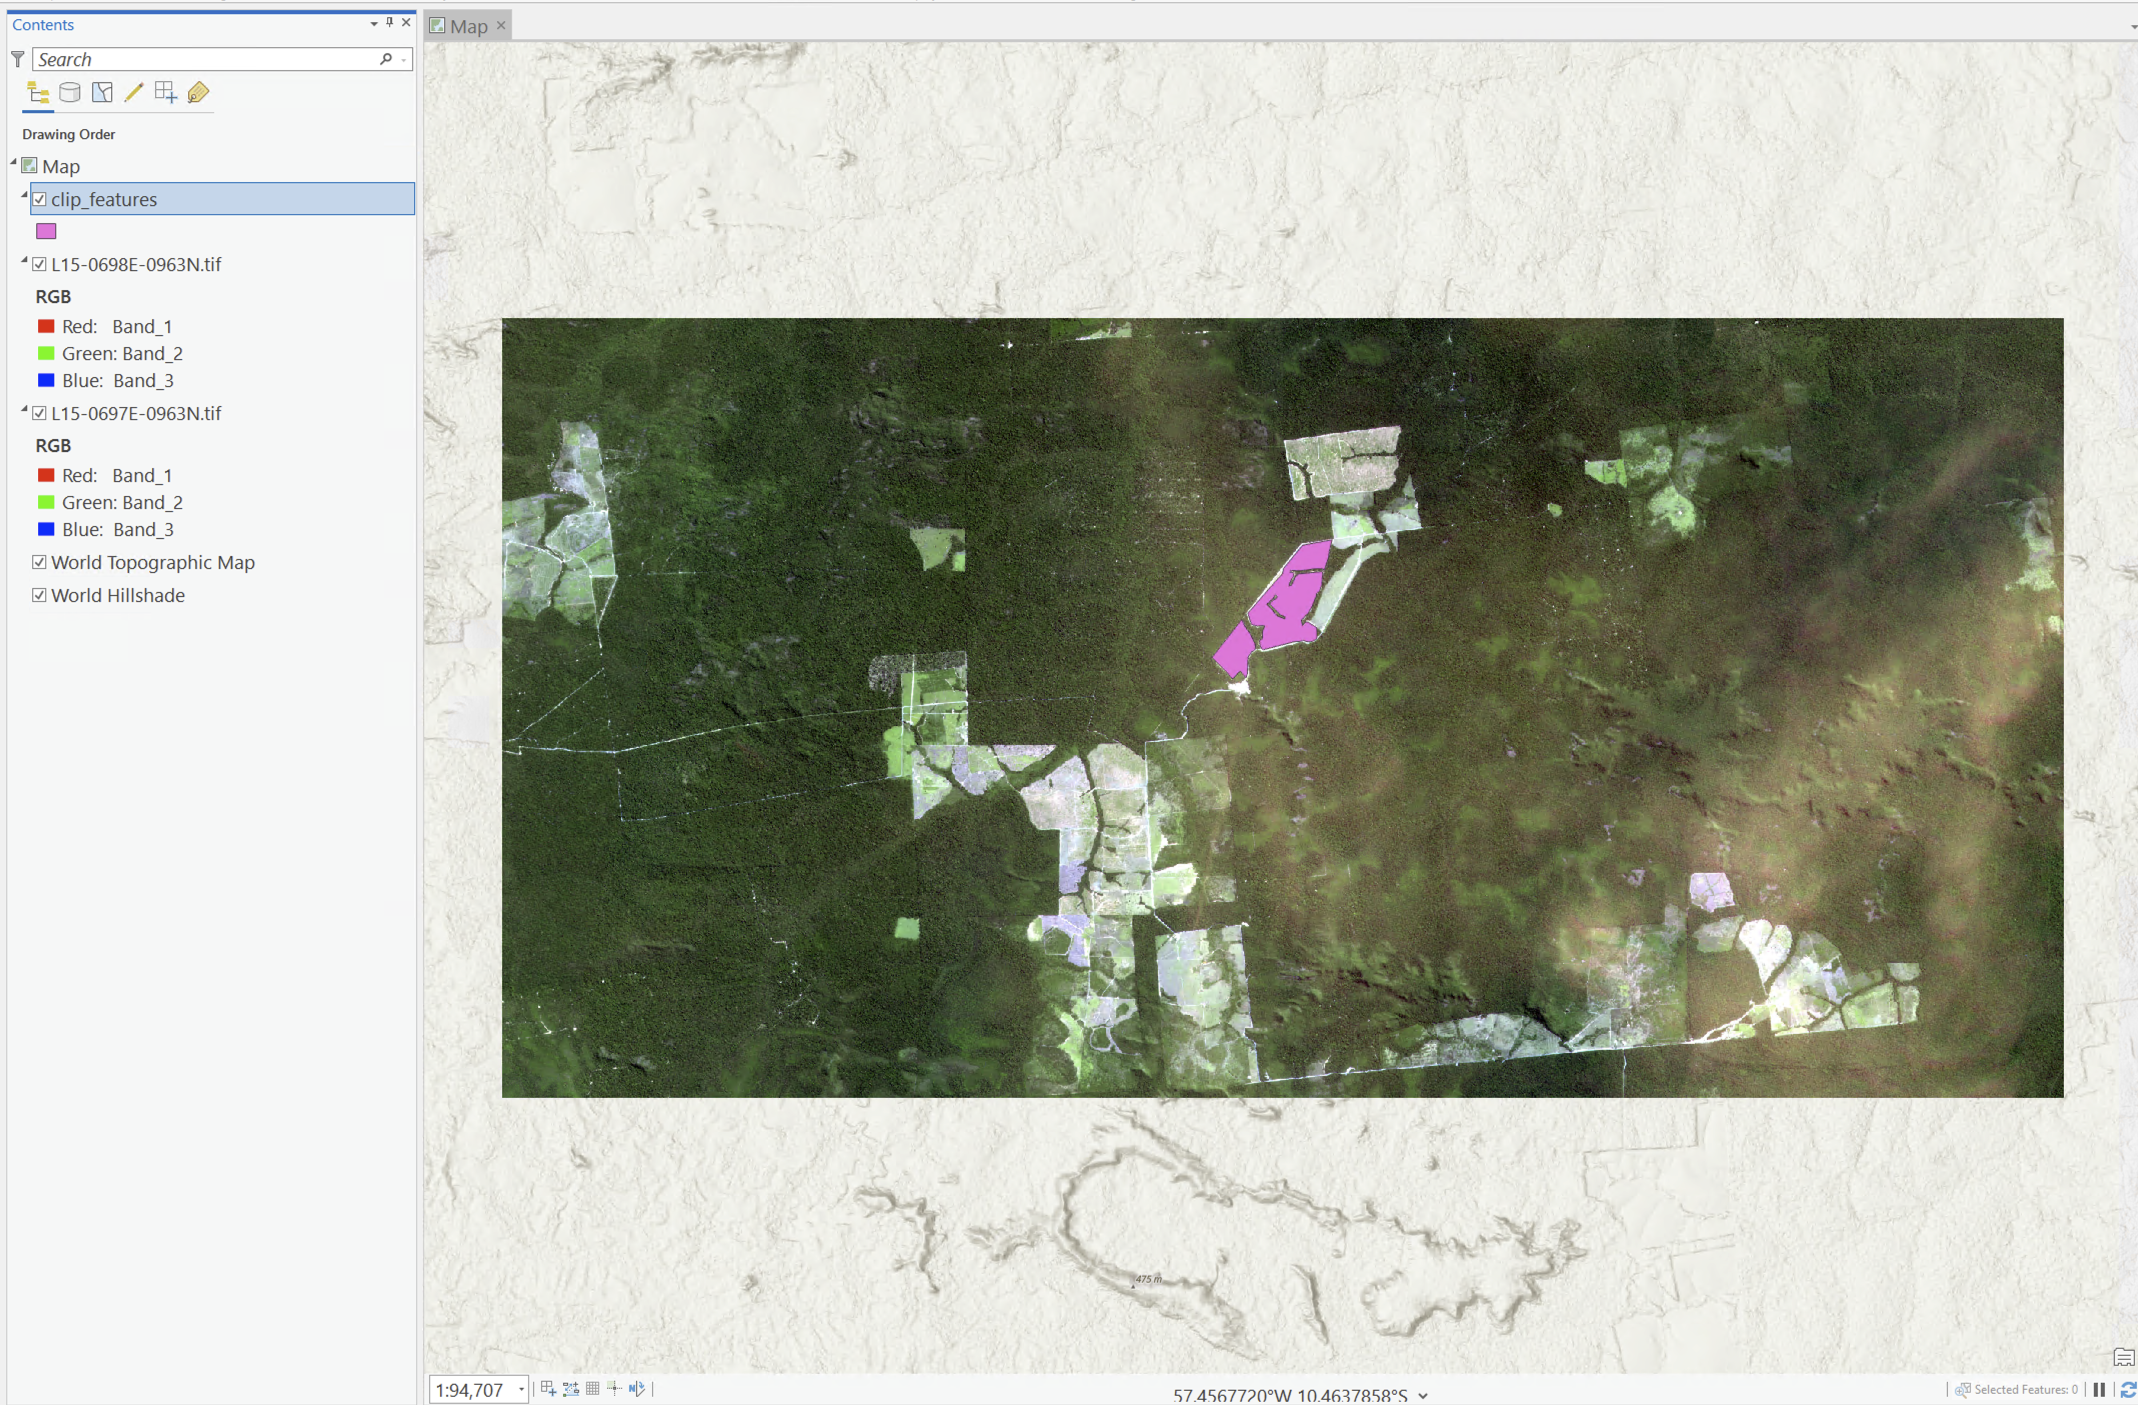
After downloading the two basemaps quads and creating a new project in ArcGIS Pro, click the Add Data button on the Map ribbon to add the basemap quads and clip feature class to your project.

Next, navigate to the Analysis ribbon and go to Raster Functions. ESRI has extensive documentation on the Raster Functions toolset if you are interested in learning more.

Under Data Management click Mosaic Rasters to open the tool dialog box. Alternatively, you can find the tool using the search bar atop the raster Raster Functions pane.

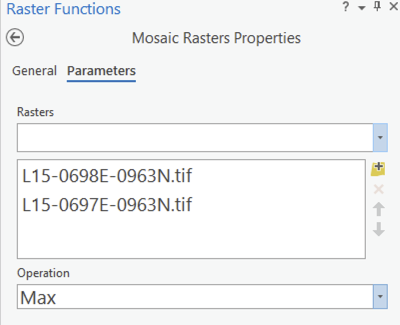
With the Mosaic Rasters tool dialog open, select your basemap quads for the Raster parameter. Under Operation, select Max. To learn more about any tool in ArcGIS Pro, click the question mark in the upper right-hand corner of the tool dialog.
After clicking Create new layer at the bottom of the tool dialog box, your new mosaic image will appear in the map view.
2. Clip Mosaic
Next, you will clip your newly created mosaic to the polygon feature class.
From the Raster Functions pane select the Clip tool that is also located under Data Management.
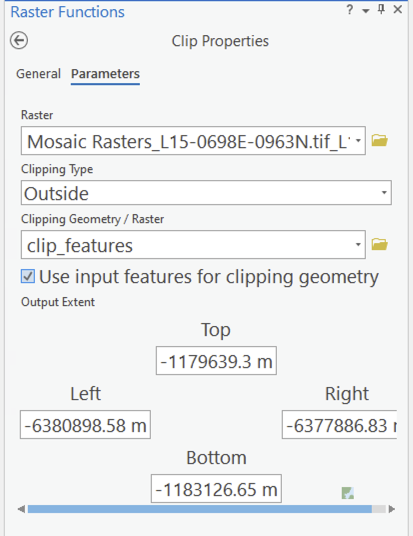
In the following tool dialog box, select the mosaic for the Raster parameter, a Clipping Type of "Outside" (this will remove pixels outside of the polygon clip feature class), and select the polygon feature class for the Clipping Geometry parameter.
Be sure to check the box next to Use input features for clipping geometry, which will insure that the mosaic is clipped to the input feature class.
After clicking Create new layer at the bottom of the tool dialog box, your newly clipped mosaic will appear in the Map view.
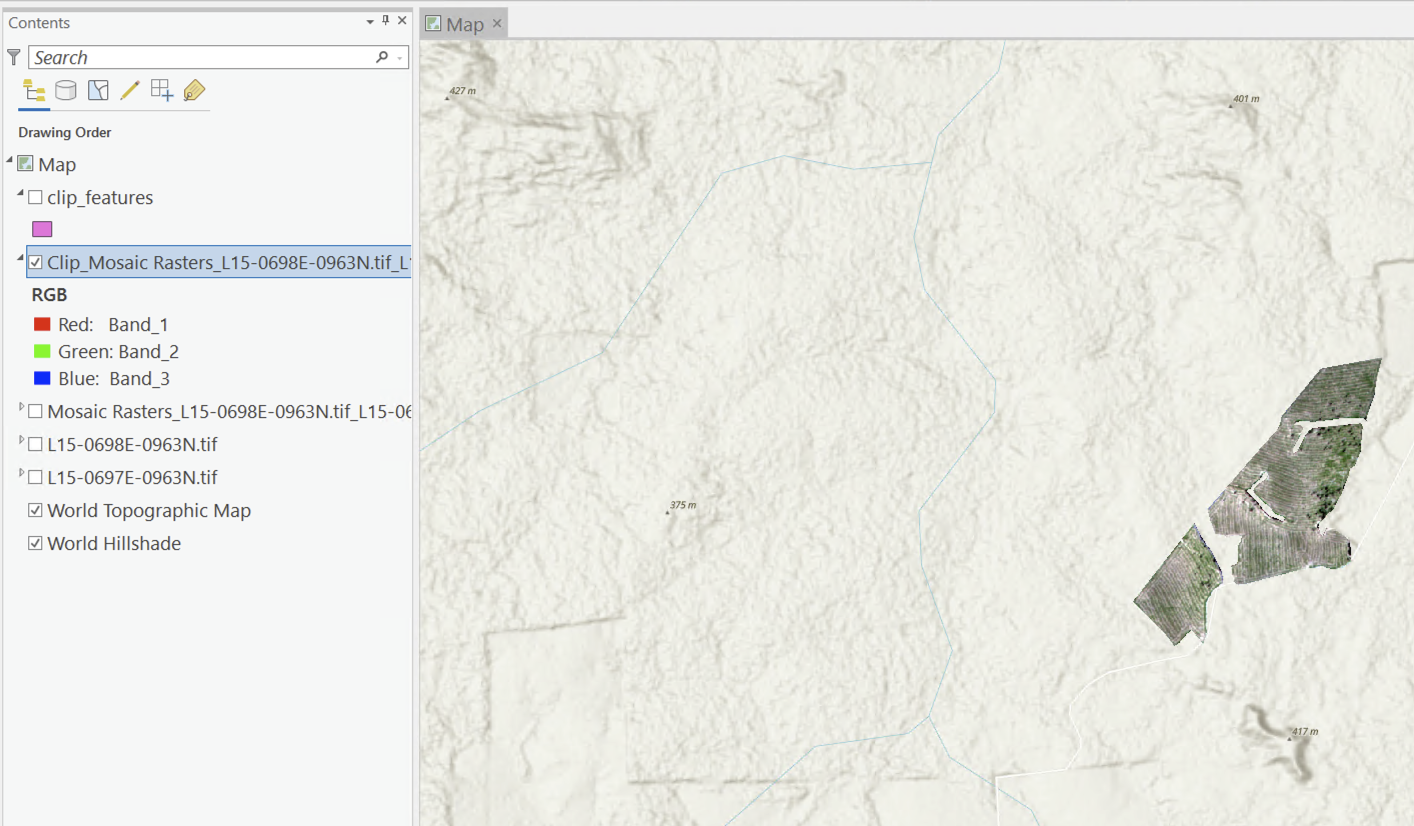
Nice work! You have successfully mosaiced two basemap quads and clipped the mosaic.
3. Create NDVI Raster
Finally, you will calculate NDVI (Normalized Difference Vegetation Index) and create a new raster with these values.
I. NDVI Overview
NDVI, developed by a NASA scientist named Compton Tucker in 1977, is commonly used to assess whether an area contains live green vegetation or not. It can show the difference between water and plants, bare soil and grass, whether plants are under stress, and what lifecycle stage a crop is in.
It compares how much more near-infrared light is reflected by chlorophyll vs visible red light and is given as the following equation:

II. Calculating NDVI in ArcGIS Pro
There are a number of ways to calculate NDVI in ArcGIS Pro. In this tutorial, you'll be utilizing the native NDVI tool which is located in the Raster Functions pane.
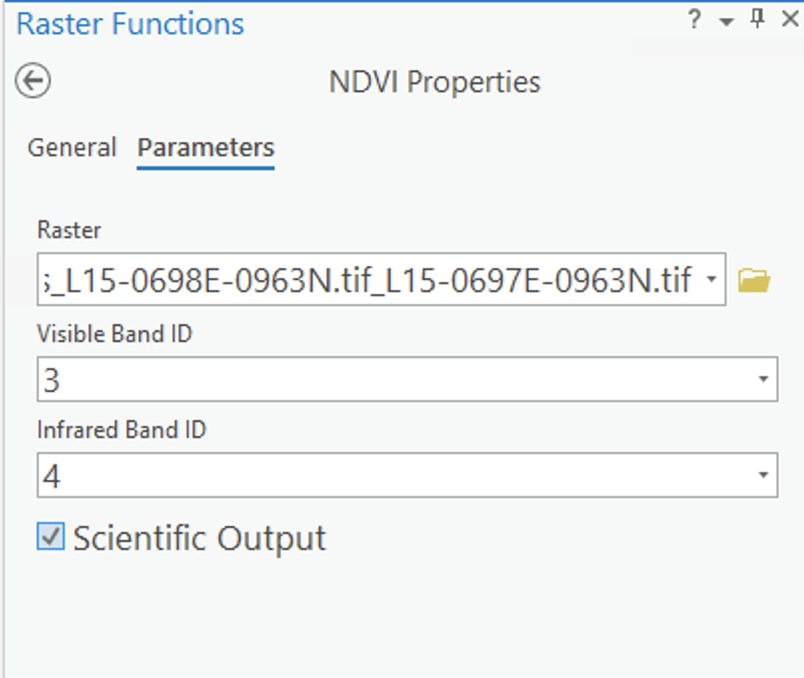
In the following tool dialog box, select the clipped image for the Raster parameter.
Under Visible Band ID, select 3. Under Infrared Band ID, select 4 For this basemap, band 3 is the red band, and band 4 is the near-infrared band.
Optionally, check the box next to Scientific Output, which will produce NDVI values between -1 and 1.
After clicking Create new layer at the bottom of the tool dialog box, your new NDVI raster will appear in the Map view. You may wish to adjust the symbology of the raster.
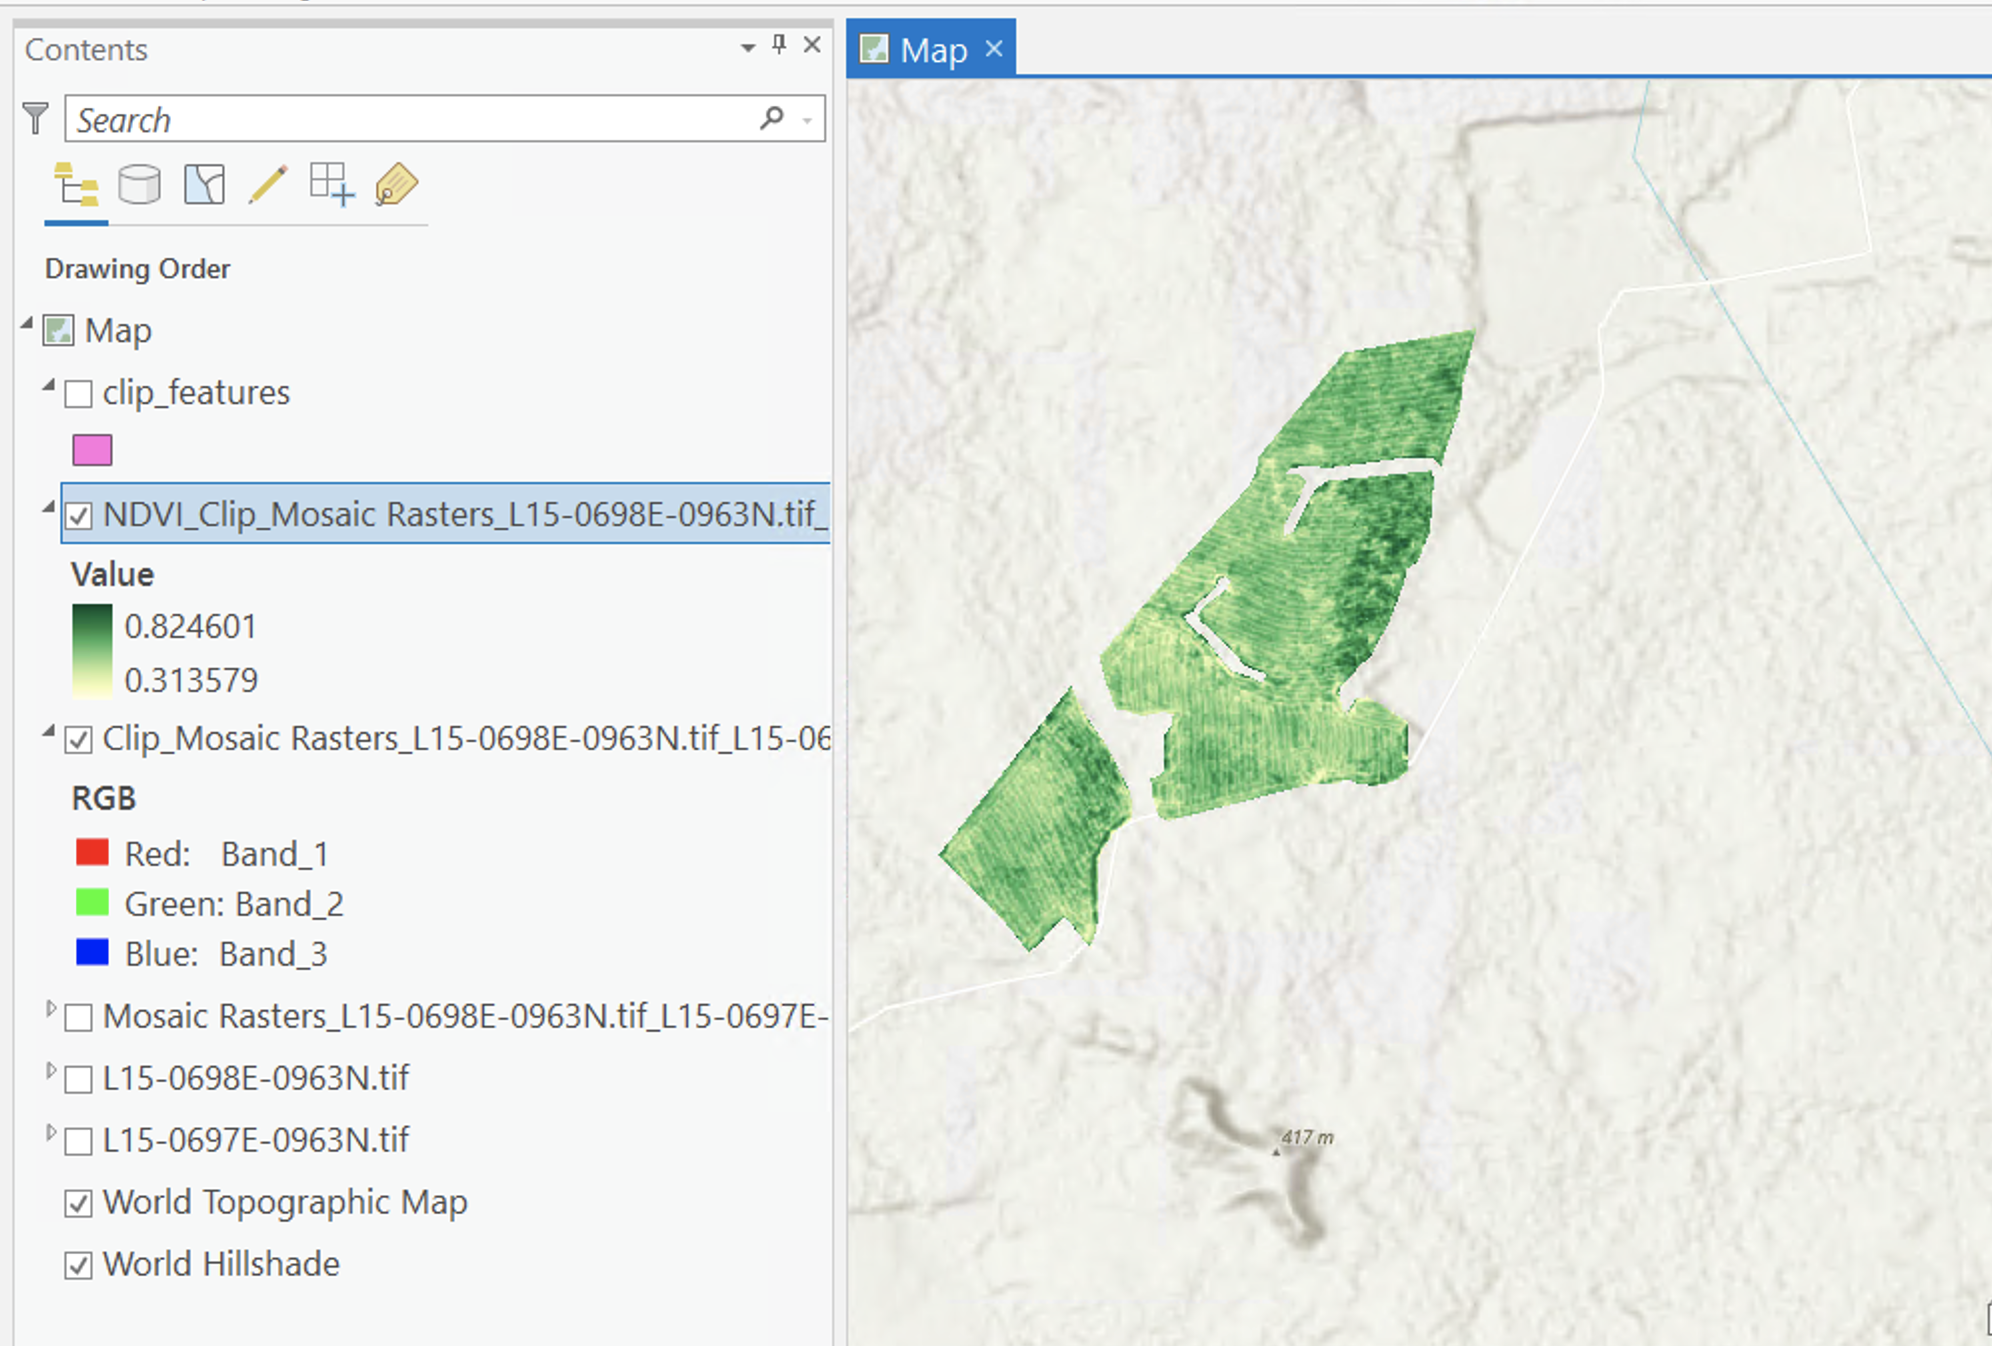
Nice work! You have successfully created an NDVI raster from the clipped mosaic!
Rate this guide: